PheMomenon has moved!

You should be automatically redirected in 5 seconds.

If not, please visit http://www.phemomenon.com and update your bookmarks and RSS feed.

Sunday, May 31, 2009

BBA #3: Bagels


Bagels, baby.  I so dearly love them.  This recipe is fantastic and I can't wait to try it again and make a sweet version.  The book gives directions for making a sweeter dough to make a cinnamon raisin bagel so I plan to work from that to make my favorite type of bagel - no shocker here - the chocolate chip bagel!


The dough was silky and beautiful to work with.  I am very grateful that I have a KA Pro stand mixer because it got a serious workout with this dough, but it did the job beautifully!  I know my smaller KA wouldn't have stood a chance.

I made 12 large bagels and topped some with poppy seeds, some with sesame seeds and some with a little sprinkle of kosher salt.  I also left a few plain.  We ate these plain and hubs even took some bagel sandwiches (ham and cheese) to work for his lunches and loved them.

Make sure to visit the Bread Baker's Apprentice Challenge page to visit the rest of the bakers and see how their bagels turned out!


To my Sweet Melissa Sunday's peeps - sorry I am missing the challenge today.  I tried to make the pastry cream, which failed miserably and had to be thrown out.  I didn't even get to make the dough yet, but I do hope to try making the Bee Stings in the future.  Jaime made it through the problems though so you should check out how she did!

Thursday, May 28, 2009

Perfect Buttermilk Biscuits


I have finally found and tweaked the perfect biscuit recipe!  This may not seem like much of an accomplishment, but I have been on a serious biscuit craving hunt for years!  

Wednesday, May 27, 2009

Daring Bakers: Strudel - Strawberry 'Toaster' Strudel


The May Daring Bakers' challenge was hosted by Linda of make life sweeter! and Courtney of Coco Cooks. They chose Apple Strudel from the recipe book Kaffeehaus: Exquisite Desserts from the Classic Cafes of Vienna, Budapest and Prague by Rick Rodgers.

Since I am not a big fan of baked apples I decided to stray from the filling and, as you can tell, from the rolled up shape. I made the strudel dough as directed, then, instead of filling and rolling, I folded the dough in half (longest edge to longest edge).

I then added about a tablespoon of homemade strawberry jam and spread it in a small rectangle along one half of the dough, leaving about a two inch space between the jam to make 10 spots. I folded the dough the long way again to fold over the jam and cut the pastries into rectangles as shown.

Before baking I pricked the dough a couple of times and baked the pastries for about 18 minutes. Once they had cooled a bit I drizzled them with a simple icing of a mixture of powdered sugar and heavy cream.

The strudel 'squares' were flaky, tender and a little crisp at the same time and we loved them. The dough itself was easy to make, and tough to roll to the right size. Mine was probably a few inches short in the size but it was still very, very thin.

See more strudel at The Daring Kitchen

Tuesday, May 26, 2009

TWD: Chipster-Topped Brownies


Beth of Supplicious chose this week's recipe from Baking From My Home To Yours, by Dorie Greenspan, for our Tuesdays with Dorie escapades.  

Beth, my sincerest thanks go out to you for the choice and especially to Dorie for creating and putting this recipe in the book in the first place.


To say that I loved this recipe is actually putting it mildly.  After all, this recipe basically combines my two most favorite comfort desserts into one insanely delicious and addictive pan -seriously, it is genius.  Chocolaty and delicious brownies topped by incredible chocolate chip cookie dough.  

'Nuff said - well, almost, I will say one more thing for you to wrap your mind around:  Cut a nice square while warm, top it off with some vanilla ice cream and chocolate sauce - yeah, I went there.


Don't forget to check out more chocolaty goodness at the Tuedays with Dorie blogroll!

Monday, May 25, 2009

BBA #2: Artos - Greek Celebration Bread


The second recipe in the Bread Baker's Apprentice challenge is a Greek Celebration bread call Artos, which can be used as a base to create some other bread's with the addition of some dried fruits and nuts, depending on the holiday, I believe.

For my first attempt, and since I'm not that big of a dried fruit fan, I decided to just make the Artos itself in the boule shape - which was basically a large round loaf... very large in this case.

The bread itself gets its warm color on the inside from the spices in the dough and its deep amber-gold color on the outside from being brushed with some warmed honey. The texture was velvet soft and tender and the taste was delicious.


The recipe for Artos and its variations can be found in Peter Reinhart's book, The Bread Baker's Apprentice.  Next week's challenge - Bagels!

Sunday, May 24, 2009

Gougeres - Gruyere Cheese Puffs


With all the times I have made choux pastry for cream puffs and the like in my life, I can't believe it took me so long to make these! I know it won't take me long to want to make them again. I think they would be perfect in a picnic basket... perhaps for Memorial Day? I hope you all have a beautiful day tomorrow and remember those who came before us and all they did for us.

For the recipe you can visit my page as the Salt Lake City Baking Examiner here.

Wednesday, May 20, 2009

Cake Slice Bakers: Mile-High Devil's Food with Brown Sugar Buttercream


I am back with The Cake Slice Bakers this month, after missing last month's challenge much to my dismay.  I wasn't missing this month since this recipe is one of the main reasons I bought Alisa Huntsman's (which, by the way, if you click on Alisa's name, you will go to her blog!) book, Sky High:  Irresistible Triple Layer Cakes.

Devil's Food cake may very well be my favorite - no surprise there since it is chocolate after all. What I truly love about this recipe though (and for that matter most of the recipes in the book) is that it is so unique to any other Devil's Food I've seen or made.

Most of the Devil's Food recipes I've seen use a combination of unsweetened cocoa and melted chocolate, which is truly rich and delicious, but always a bit overwhelming on my ingredients supplies and budgets.  It is awesome to have a beautiful cake, but when it wants to use my cocoa supply, and a good amount of my chocolate supply, it is a bit of a struggle to justify making it.


Happy Day After Devil's Food Cake Day!  Yes, it's true, May 19 was National Devil's Food Cake Day here in the U.S.!

So, in my opinion, the unique thing about this recipe is that it uses only unsweetened cocoa powder - a full cup of it.  Another thing that was different than a lot of recipes I've seen is that there was no buttermilk, or any milk for that matter.  Also, no granulated sugar.  The other really unique thing I found with this recipe is that it uses no white sugar, but it did put a large dent in my brown sugar supply!  In fact, the cake uses 3 cups of packed brown sugar!  Since I seriously loooooove brown sugar, this was fine by me!

The other portion of the dent in my brown sugar supply came from the buttercream, which got its slightly tawny, creamy white color from making a sugar syrup using 1 1/4 cups of light brown sugar and only a 1/4 cup of water.  It was a really lovely syrup too!  

To further gild the lily, I used some unsalted imported Irish butter in the buttercream that I had on hand for another project that I was planning (I can get more when I actually get around to it I guess) since all my other unsalted butter was still languishing in the freezer - poor planning on my part!

So, overall, the cake itself, funny enough, was rich, moist, chocolatey and absolutely delicious - when I ate a piece out the refrigerator it actually tasted just like a chocolate ice cream sandwich to me!  I know I will make this recipe many more times.

For my layer cake I used a 14-inch square pan and filled it with about just under 3/4 of the batter.  The remainder of the batter made 12 cupcakes for me, which are now in the freezer for some rainy day when I need a chocolate fix!  I cut the cooled large square into four smaller squares that I then stacked to make my layers.  It made one very tall and irresistible layer cake!

Make sure to check out all the other Devil's Food Cakes at The Cake Slice Bakers Blogroll!


Mile-High Devil’s Food Cake

From: Sky High: Irresistible Triple-Layer Cakes

By Alisa Huntsman and Peter Wynne


Makes an 8-inch triple layer cake:

  • 1 cup of unsweetened cocoa NOT DUTCHED PROCESSED

  • 1 and ¼ cups of hot water

  • 3 cups of light brown sugar; packed

  • 2 and 2/3 cups cake flour*

  • 1 and ½ teaspoons baking soda

  • ¾ teaspoon of salt

  • 9 ounces of unsalted butter at room temperature [2 sticks plus 2 tablespoons]

  • 3 large eggs

  • 1 and ½ teaspoons of vanilla extract

  • ¾ cup of cold water

{*1 cup of cake flour is equal to ¾ cup of flour plus 2 tablespoons of cornstarch}


Preheat the oven to 325 degrees F. Butter the bottoms and sides of three 8-inch round cake pans. Line the bottoms of the pans with parchment paper and grease the paper as well.


Place the cocoa in a medium bowl and add the hot water. Whisk until smooth and let it cool to room temperature.


In the bowl of an electric mixer, combine the sugar, flour, baking soda, and salt. With the mixer on low blend to combine. Add the butter and the dissolved cocoa. Then raise the mixer to medium speed and beat for 2 minutes until light and fluffy.


In a medium bowl whisk together the eggs, vanilla, and cold water until combined. Add this liquid to the batter in three additions scraping down the sides of the bowl between additions. Divide the batter among the three pans.


Bake for 35-45 minutes or until a cakes tester inserted into the almost comes out clean. There should be a few crumbs attached still. Cool the cakes in the pans for 15 minutes. Then invert and remove parchment paper and cool completely on a wire rack.


Bakers’ choice of: Brown Sugar 7-Minute Frosting or Brown Sugar Buttercream


Brown Sugar 7-Minute Frosting

  • 6 egg whites

  • 1 and ½ cups of brown sugar

  • ¼ cup light corn syrup*

  • 2 tablespoons of water

  • ½ teaspoon of cream of tartar

{*corn syrup can be substituted with equal parts of treacle OR liquid glucose OR light colored honey}


Do not try to make this frosting on a rainy day or if you live in an extremely humid area. The humidity will make it impossible to work with the egg whites.


Place all the egg whites in a bowl and set them aside while you make the syrup.


In a small heavy saucepan, combine the brown sugar, corn syrup, and water. Bring to a boil over medium-low heat, stirring to dissolve the sugar. Continue to boil washing down the sides of the pan with a wet pastry brush. Boil until the syrup reaches 238 degrees F (softball stage) on a candy thermometer. Immediately remove from heat.


Add the cream of tartar to the egg whites in the bowl and beat just to combine. With the mixer on medium speed gradually add the syrup in a thin stream taking care not to hit the beaters. Beat until fairly stiff peaks form but the frosting is still spreadable. If the frosting is too stiff it will be hard to work with. Use immediately.


Brown Sugar Buttercream

  • 5 egg whites

  • 1 and ¼ cups of packed brown sugar

  • ¼ cup of water

  • 1 pound of unsalted butter (16 ounces) at room temperature


Place all the egg whites in the bowl of an electric mixer; set aside.


In a heavy medium saucepan combine the sugar and water. Cook over medium heat stirring to dissolve the sugar. Then bring to a boil without stirring and cook until the syrup reaches 238 degrees F on a candy thermometer.


Begin beating the egg whites on medium low speed. Slowly pour in the syrup making sure not to hit the beater. Increase the mixer speed to medium high and beat until the meringue has cooled to body temperature.

With the mixer on med-low add 1-2 tablespoons of butter at a time. When all the butter has been added increase the mixer’s speed to medium and beat until the mixture looks curdled or separated. Continue to beat until the icing comes together again looking like soft smooth whipped butter.


Assembling the cake:

Place one layer flat side down and cover it with 2/3 cup of the frosting. Top with second layer and repeat process. Top with third layer and frost the sides of the cake.


Bakers Notes:

A cake topped with the meringue frosting is the best eaten the day it’s made. It does not do well in the fridge.


If you choose the buttercream frosting you can keep it in the fridge for 3 days. Make sure to allow the cake to come to room temperature for 1 to 1 ½ hours before slicing. Otherwise the frosting will be hard and heavy.

Tuesday, May 19, 2009

TWD: Fresh Mango Bread


Tuesdays with Dorie this week is all about Fresh Mango Bread, which was the selection of Kelly of Baking with the Boys. I'm not going to lie and say I was excited about this pick, because I wasn't. I will admit though that it was yet again another pleasant surprise. Will it replace my favorite banana bread? No, but it is definitely quite delicous and surprising to me how much I did like this, so thank you Kelly, for once again pushing me out of my comfort zone.

I actually made this bread twice, once with all bananas because I didn't have any mangoes, and once with half banana and half mango (shown here). I also added walnuts in place of raisins. Since Dorie mentions in the book that the bread can really benefit from being wrapped in plastic and eaten the next day that is what I chose to do. It really helped the bread to be moist and delicious.

Make sure to visit the Tuesdays with Dorie blogroll to see more delicious mango bread!

Sunday, May 17, 2009

BBA #1: Anadama Bread


It is true. I've joined yet another baking group. The thing of it is thought that it is all about breads this time. The book The Bread Baker's Apprentice by Peter Reinhart in fact.


When Nicole at Pinch My Salt announced on Twitter that she was going to bake her way through the entire book, in order, and asked if anyone wanted to join in the fun, it didn't take me too long to decide to go for it. So, over the next 40+ weeks, I, along with 199 others have committed to the Bread Baker's Apprentice Challenge - seriously, who couldn't go with some kind of homemade bread every week. Nicole has even created a map that shows where we are all scattered around the globe.


Nicole plans to post her breads on Mondays, and since that seems like a good day to me, I plan to try to just post them around the same time, or at least one each week. Since it is an amazing book with so much more information than just a recipe though, we won't be posting the recipes on our blogs - you should really get the book!

Thank you Nicole for such a great idea!!

I actually love making breads, probably just as much as I like making desserts, which for me is saying a lot. The book is the perfect choice for learning how to work with yeast and bread making since it is chock full of great information, while still being accessible to a beginner. I figure since I have been working with yeast and making bread for several years but don't know a whole lot about the mechanics or science of how it all works it puts me somewhere in between.

The first bread in the book was Anadama Bread. I've heard of this before, but never had or made it. It is a fairly soft loaf made with bread flour, coarse cornmeal or polenta and inclues molasses as well. They are all ingredients I like, so no problem there!

There are several explanations about the source for the bread's strange name, some of which are explained here.

I made a simple chicken salad for sandwiches with my bread - just some shredded roast chicken, mayo, a little Dijon mustard and some chopped walnuts. Very yummy!

Tuesday, May 12, 2009

TWD: Tartest Lemon Tart


So, I have to admit, I wasn't very excited about this week's recipe for Tuesdays with Dorie for the Tartest Lemon Tart. I have never made anything using the entire lemon and wasn't entirely sure I was interested. I love lemon, I love almonds, so really, what was my problem? I don't know why this weirded me out so much. I've used whole citrus before after all. It did though. I just couldn't envision this very well. I don't know why.


When I finally read through the entire recipe, I had to really laugh at myself, and once again realize that this baking group is so good for me. It gets me to try things I may have avoided otherwise.


I laughed because I realized that this recipe was an awful lot like the Toasted Almond Lemon Bars we made last month when I guest hosted the Cookie Carnival. Shortbread-like crust with ground almonds in it, lemon filling, powdered sugar on top. Why was I so afraid of this? I have to also admit now that I will make these again as they taste like delightful lemon bars and the filling was so easy to make and the texture wasn't anything like I expected since it was smooth and tart. I also loved the addition of doing a burnt sugar top as Dorie suggests.


So, thank you to this week's hostess, Babette of Babette Feasts!


BLOGGING FOR BABIES REMINDER!!


There are still a few more days to blog about and make something for the Blogging for Babies event. As I mentioned in the original post (all the details here if you want to enter) I was trying to put together a couple of prizes for a drawing from the entries. Thank you to those who have already sent me something to participate. I really appreciate it!


Here is Prize Package Number One:


The Art & Soul of Baking book, a pretty glass jar (we all need new blog props, right!) and a couple of darling little 'pretend' cherry muffins - they are fake so they can sit in your kitchen and look pretty all the time.


And Prize Package Number 2:


A copy of Hello Cupcake! and a ceramic cupcake bank - that's right, it is a 'piggy' bank in the shape of a cupcake!


THE END OF THE EVENT IS THIS COMING SATURDAY, MAY 16, 2009!

Sunday, May 10, 2009

SMS: Lemon Icebox Cake with Fresh Strawberry Sauce


To all the Mothers out there I hope that today is the best and most beautiful Mother's Day you have ever had!

Sweet Melissa Sundays this week is a Lemon Icebox Cake with Fresh Strawberry Sauce from The Sweet Melissa Baking Book was chosen by Jennifer of Keep Passing the Open Windows. Since around our house this weekend it is just me and the two little kiddos I went ahead and cut the recipe to make just 1/3 of it which was enough to make two very cute mini 5-inch springforms.

To say that I liked this recipe would be to milk. I absolutely adored this recipe. It is a good thing I cut the recipe because otherwise I think I would have still snarfed down the full size version all by myself.

It was a little difficult from the title of the recipe to entirely figure out what this recipe is like, so here is my attempt at an in-depth description:

First, the crust. The original recipe calls for the use of vanilla wafer cookies, which I am actually not a huge fan of, so I substituted my favorite cookie, the beloved Oreo. I knew, since I love the combination of the slightly tart lemon with the chocolate (like in the Black and White Cookies I make) that I would like the combination here.

Second, the filling. It is a light lemony, tart and tangy, custard that is further lightened by the addition of some of the meringue (remainder saved for the top). The filling is just sweet enough with not being too sweet and is like eating smooth, creamy lemon mousse - when frozen the texture of the cake is amazing - when thawed it really becomes soft and light - it is really best frozen, but I didn't mind the few bites that had thawed either.

Last, the toppings. This is probably the best meringue I've ever had. It was just the right amount on top for me, a nice compliment, but not too tall and perfectly sweet and beautifully toasted from putting the entire cake in the oven for a few minutes. The strawberry sauce was a lovely addition as well. It tastes exactly like what you would think, fresh, sweet strawberries.

This is one recipe I know I will be making again and again. Thank you Jennifer! Check out more icebox cakes at the Sweet Melissa Sundays blogroll.


Thursday, May 7, 2009

Chocolate Mousse

Shocking announcement here... ok, not really, but I looooove chocolate mousse. Coming from a chocolate loving fanatic that really can't qualify as shocking at all.

What does surprise me is the number of people who have never tried making this at home. It is one of the easiest and most satisfying desserts in my arsenal. You can use it as filling for cupcakes or cake, eat it alone or with whipped cream and when you serve it in pretty glasses it is probably one of the most elegant desserts out there.

Then there's me. Jam jars were my portioning vehicle of choice this time around - probably not the most elegant choice, but it got the job done and the half-pint jars were exactly the right size for four servings. This mousse is fairly rich though and next time I will probably go ahead and portion it out into six servings after all. As it was, I was the only one able to finish my jar - but then, there was no way I was letting any of it go to waste!

Chocolate Mousse
SOURCE: Mark Bittman in The New York Times

Yield 4 large servings or 6 smaller ones

Time 20 minutes, plus time to chill

2 tablespoons unsalted butter
4 ounces bittersweet or semisweet chocolate, chopped
3 eggs, separated
1/4 cup sugar
1/2 cup heavy cream
1/2 teaspoon vanilla extract

1. Place a double boiler or small saucepan over low heat, and melt butter and chocolate together. Just before chocolate finishes melting, remove pan from stove, and beat chocolate with a wooden spoon until smooth.

2. Transfer chocolate mixture to a bowl, and beat in egg yolks with a whisk. Place bowl in refrigerator.

3. Beat egg whites with half the sugar until they hold stiff peaks but are not dry. Set aside. Beat cream with the remaining sugar and vanilla until it holds soft peaks.

4. Stir a couple of spoonfuls of the whites into chocolate mixture to lighten it a bit, then fold in remaining whites thoroughly but gently. Fold in cream, and refrigerate until chilled. If you are in a hurry, divide mousse among six cups: it will chill much faster. Serve within a day or two of making it.

I topped the mousse with some lightly sweetened whipped cream with a little dash or vanilla and some chocolate shavings just before serving.

Tuesday, May 5, 2009

TWD: "Tiramisu" Cupcake Cones for Cinco de Mayo


You may very well be looking at these pictures and wondering what on Earth happened to this week's Tiramisu Cake for Tuesdays with Dorie chosen by Megan at My Baking Adventures.

Well, here is my story, and I'm sticking to it.  I have several 'good' reasons why I deviated so very, very far from the original recipe.  1) We don't do coffee at our house really of any kind, 2) May 5th is Cinco de Mayo, which though it is actually a Mexican holiday, is widely celebrated here in Utah due to our large Latino community and today my son's school is even doing a program - including singing and dancing, much to my macho five year old's chagrin.

I already did a cake where I substituted out the espresso syrup and made a hot cocoa version, I decided to make the cake for the Tiramisu, which Dorie mentions in the introduction is a basic yellow cake recipe.  I was excited to find this out because I have been looking for a good, from scratch, yellow cake for a while now.  I wasn't disappointed with this recipe - the cake was perfect.  I did however make just a half batch which gave me about a baker's dozen of cupcake cones.  I had to adjust some of the measurements for the recipe to cut it in half, but it worked like a charm.


For the frosting, and to reflect my Cinco de Mayo celebration, I made a light whipped chocolate ganache with some cinnamon and Ancho chili powder for just a tiny hint of spice in the chocolate.  You could also still make the creamy frosting for the Tiramisu recipe and use that to fill these cupcake cones or to frost them, then sprinkle with cocoa and make your own Tiramisu cupcake cones inspired by Italy instead of Mexico.

For my versions of the recipes for the cupcake cones and the frosting, you can visit my page on Examiner.com.

To see some actual Tiramisu Cakes, I suggest you visit the other Tuesdays with Dorie crew and find out what the recipe is really like.


Monday, May 4, 2009

Cookie Carnival: Toasted Almond Lemon Bars Recipe and Round-up


I am blown away by all the amazing bakers that joined in the fun with this month's Cookie Carnival! Lovely Kate at The Clean Plate Club invited me to be a guest host for this month and choose the recipe.

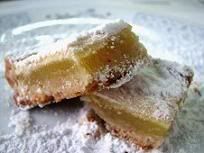
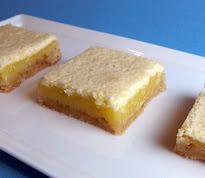
I chose the Toasted Almond Lemon Bars from The Sweet Melissa Baking Book. Kate and I agreed that something spring-like and lemony would be perfect this month. I thought that Melissa Murphy's take on a classic would be interesting for all of us to try.

These lemon bars have a buttery shortbread crust that is complimented by the addition of toasted almonds in the dough and then, just to add a bit more to the flavor there is the addition of some almond extract to the filling as well.

The recipe was a bit more labor intensive than some lemon bar recipes, but I for one thought it was worth it for such delicious results. I do know that some Carnivalers had a little bit of an issue with the filling getting a white layer on top. From what I can tell from the recipe I think that issue probably happens if you over whisk/mix the filling and get too many air bubbles in the curd. I barely mixed my filling together until it came together and didn't have any issues with the filling.


My thanks go out to Kate for letting me host this month's Carnival and especially to all of you amazing bakers who joined in the fun this month! I really, really appreciate all of you and hope that you enjoyed making this recipe!

We have a fantastic roundup, so here we go!!! The photo is above each Carnivaler's link and I thought it would be fun to give a little snippet of what each baker had to say about this recipe in keeping with the way Kate usually puts the roundup together. Without further ado...


First up was Jackie at Food Wanderlust who said, " I LOVED this recipe, so delicious.
So much so, that I actually never go to take pictures of my lemon bars."


Cristine at Cooking with Cristine said, "What makes these lemon bars stand out from others is the ground almonds in the crust."


Kate at The Clean Plate Club our fearless Carnival leader and creator said,
"DELICIOUS. super lemony. but sweet enough."


Natalie at Snooky Doodle Cakes & More said,
"I know I only made a small amount and perhaps that is why they came so thin."
Ah. Smart girl. Portion control.


Aisha at Sugar-n-Sweets said, "This one was a winner!" -
I am glad since I believe it was her first Carnival! Welcome Aisha!


'Cookie" at Workout then Cook! said, "these Lemon Bars were AMAZING!"
- she also changed things up so you'll have to go check it out!


Anissa of Anissa’s Kitchen said, "I was a little sceptical about adding almonds to a lemon bar recipe....I love lemon bars and these were Yummy!"


Linda at Baking Foodie said, "A friend of mine brought me some lemons from her tree about a week ago." How lucky is that!


Martha at Best Ever Cookie Collection changed things up due to some allergies, so check it out, and said, "The nuts in the crust added interest and they had the perfect sweet-tart contrast I love."


Whitney at Celestial Confections said,
"This will go into the favorite recipe file and will definitely be made again."


Lesley at The Cherub’s Food & Craft said, "These bars are delicious."


Tessa at The Cookin' Chemist said,
"Overall, it was a great first go at the Cookie Carnival."
Welcome to the Carnival Tessa!


Susan at She’s Becoming DoughMessTic joined in the Carnival fun this month
for the first time and said, "these are in a league all their own." Yay for Susan! Welcome!


Sallie at My Sisters Kitchen said
"The shortbread crust is probably the best of it's kind that I have tasted."


Carol at No Reason Needed said,
"I just couldn't get past the thought of C-R-U-N-C-H-Y lemon bars."


Sucrose Obsession said, "I have no idea who Melissa is but I'm not a fan of her lemon bars." Hope you like the next challenge better! Welcome to the Carnival anyway!


Christine at Whimsical Bakery said,
"What a nice treat the lemon is very tangy and the almond shortbread crust
a new FAVOURITE."


Lauren at Fried Pickles and Ice Cream said, "I'm not the biggest fan of lemon bars..." I'm glad her husband's co-workers enjoyed them then!


Sihan at Fundamentally Flawed said, "The shortcrust base though... was a God-sent with the added frangrance of almonds pushing the entire dessert just over the border of satisfactory."


Juliana at horneAndo Algo writes in Spanish, so in my pathetic attempt
(sorry Juliana - feel free to correct me) said, "really they are worth while"
(at least that is what the free translator said it meant!)


Nilam at Just Regular Every Day Life said,
"I've never made lemon bars before, so this was a new experience for me."


Mary Ann at Meet Me in the Kitchen said,
"Lemon Bars were something I remember having as a kid and nothing
is as good as a homemade lemon bar."


Tammy of Wee Treats by Tammy said,
"I am sure that there are lots of great recipes in the Sweet Melissa Baking book,
but for me, I wouldn’t make this one again."


Shelley at Playing with Tablespoons said "I LOVE almond flavoured things." Me too!!


Debbie at Let Them Eat Cake said, "I see more of these lemon bars in my baking future!"


Jacque at Daisy Lane Cakes said,
"I really enjoyed these lemon bars, they were tangy, lemony, and addictive."


Rachelle at Mommy I’m Hungry said,
"Yum! Perfect for the start of Spring."


Toasted Almond Lemon Bars
From The Sweet Melissa Baking Book by Melissa Murphy
Makes 1 dozen bars

"Everyone loves lemon bars. I make mine extra special by adding toasted almonds to the shortbread crust."

For the Crust:
2 cups all-purpose flour
3/4 cup confectioners' sugar
1/2 cup sliced blanched almonds, lightly toasted
1/2 teaspoon salt
20 Tablespoons (2 1/2 sticks) cold, unsalted butter, cut into 1/4-inch pieces

For the Lemon Filling:
4 large eggs
1 3/4 cups sugar
1/2 teaspoon almond extract
1/2 cup all-purpose flour
3/4 cup fresh lemon juice (about 7 lemons)
1/4 cup confectioners' sugar for sprinkling

To Toast the Almonds:
Preheat the oven to 350 degrees F. Spread the almonds in a single layer on a cookie sheet. Bake for 10 to 12 minutes, or until lightly golden and you can smell them. Remove to a wire rack to cool.

Before You Start:
Position a rack in the center of your oven. Preheat the oven to 350 degrees F. Spray a 9 x 13 - inch pan with nonstick vegetable cooking spray. Make a parchment "sling" by cutting two pieces of parchment paper, measuring 16 1/2 inches long by 12 inches wide (you can also use aluminum foil). Place one piece across the length, and the other across the width of the pan, with the excess hanging over the edges. You will use this sling later to lift the finished bar from the pan. Spray the sling with the cooking spray.

To Make the Crust:
1. In the bowl of a food processor fitted with the metal blade, pulse the flour, sugar, almonds, and salt to combine. Add the cold butter in pieces and pulse until the dough comes together in a ball.

2. Turn the dough out into the prepared pan and press evenly into the bottom and 1 1/4 inches up the sides. (This crust, once it is baked, needs to act as a liner in which to pour the liquidy lemon filling. So be sure to do a good job of pressing the dough up the sides - no cracks!). Cover the dough with a piece of parchment paper or aluminum foil, and fill with pie weights ( you can use dried beans or uncooked rice as pie weights as well). Bake for 25 to 30 minutes, or until lightly golden. Carefully remove the pie weights and the liner and bake for an additional 10 to 15 minutes, or until the whole crust is golden. Remove to a wire rack to cool.

To Make the Filling:
In a medium bowl, whisk together the eggs and sugar until smooth. Add the almond extract and flour, and whisk until smooth. Add the lemon juice, and whisk to combine.

To Complete the Bars:
1. Pour the lemon filling into the prepared crust. Reduce the oven temperature to 325 degrees F. Bake for 30 minutes, or until the filling is firm and lightly golden. Remove to a wire rack to cool.

2. When cool use the parchment sling to lift the entire bar from the pan and onto a cutting board. Slice into twelve 3 x 3 1/2 - inch bars. Remove from the pan and, using a small sifter, dust with the confectioners' sugar.

The bars keep in an airtight container at room temperature for up to 2 days. For longer storage, wrap in plastic wrap and refrigerate for up to 5 days, or freeze well wrapped in plastic wrap and then aluminum foil for up to 3 weeks. Do not unwrap before defrosting. Dust with confectioners' sugar before serving.

Blog Widget by LinkWithin