PheMomenon has moved!

You should be automatically redirected in 5 seconds.

If not, please visit http://www.phemomenon.com and update your bookmarks and RSS feed.

Thursday, May 20, 2010

Glazed Meyer Lemon Almond Poppy Seed Loaf Cake

Photobucket

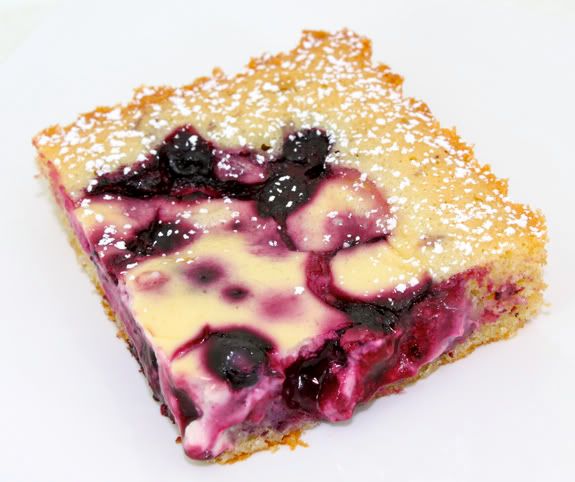
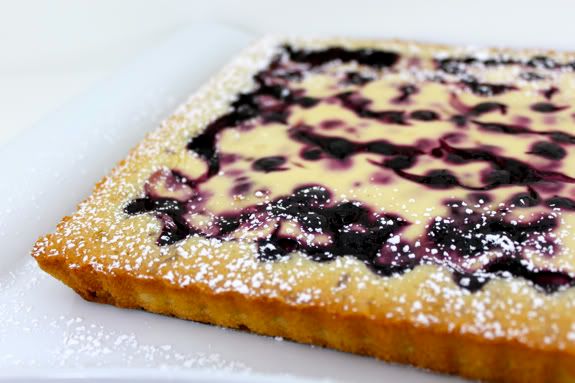
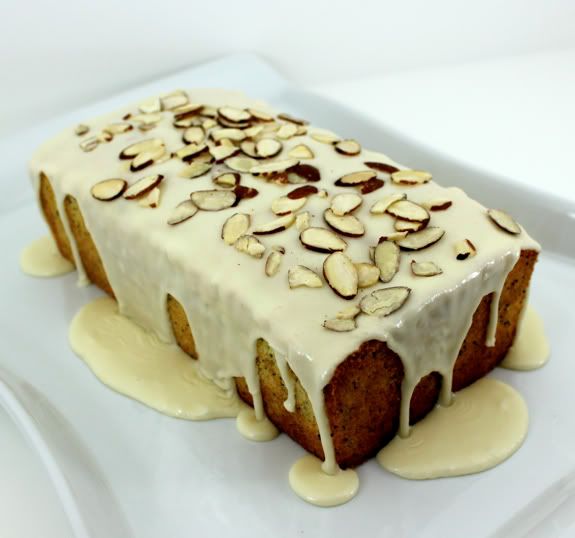
This month The Cake Slice Bakers voted and the winning recipe to try was once again from Sky High: Irresistible Triple Layer Cakes by Alisa Huntsman. The original recipe was for a Lemon Poppy Seed cake with Almond Cream Cheese Frosting. As you can tell from my photos, I deviated from there quite a bit, mainly just because I have absolutely no where to take a full size cake at the moment.
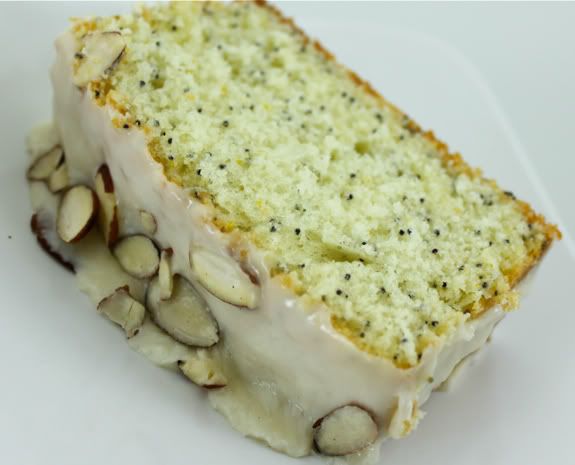
So, for my version of the cake I fiddled around and came up with a 1/3 recipe that I could bake in a loaf pan. I ended up making a few other changes as well and will share my very modified recipe soon - in the meantime, if you want it, just let me know in the comments.

Mainly, the changes consisted of using whole eggs instead of egg whites in the cake and adding almond extract as well as using a Meyer lemon for the zest. To top it off I made a simple glaze from powdered sugar, vanilla, Meyer lemon juice and a little heavy cream.

Photobucket

The cake was tender and had a nice lemon flavor to it along with a hint of almond. I also topped the cake with some sliced almonds for a little crunch, but I thought it was just as pretty without it.

To see the original cake and recipe you can visit the other Cake Slice Bakers!

Photobucket

Lemon Poppy Seed Loaf Cake
(Adapted liberally from original recipe found below)

1 cup cake flour
1/2 cup sugar
1 1/2 teaspoons baking powder
1/4 teaspoon salt
1 tablespoon poppy seeds 5 tablespoons unsalted butter, room temperature
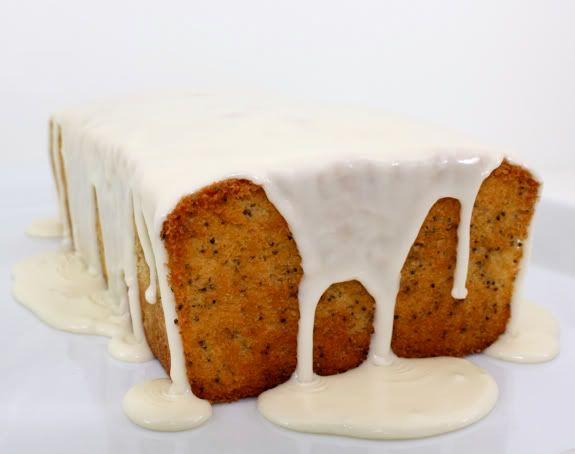
zest and juice of 1 small lemon (I used a Meyer lemon for the glaze and the cake, thus the richer yellow/orange color to the glaze)
1/3 cup buttermilk
2 large eggs
1 teaspoon almond extract

Butter an 8-1/2 x 4-1/2 inch loaf pan, line the pan with a piece of parchment like a sling up both long sides and the bottom of the pan, butter the parchment and dust the pan with flour, tap out the excess and set the pan aside.

Preheat over to 350° F.

In a medium sized bowl, whisk together the cake flour, baking powder, salt and poppy seeds. Rub the lemon zest together with the sugar in a small bowl, set aside. In a large mixing bowl beat the butter until light and fluffy, about 2 minutes. Add the lemon-sugar and beat another 2 minutes until very light and fluffy. Add the eggs and almond extract and beat 1-2 minutes more, scraping down the sides and bottom of the bowl as needed. Add the wet and dry ingredients, alternately, to the butter-sugar mixture, starting first with 1/2 of the dry ingredients, then the buttermilk, then the remaining dry ingredients and mix until just well combined with no dry spots. Pour and scrape the batter (will be very thick) into the prepared loaf pan and spread evenly with a spatula. Bake the cake in the preheated oven for 30-35 minutes until risen and lightly golden. Allow to cool in the pan 10 minutes, then use the parchment sling to remove the loaf from the pan and allow to cool to room temperature on a wire cooling rack. Prepare the glaze while the cake is cooling.

For the glaze:

2 1/2 cups confectioners' sugar, sifted
juice from 1 small lemon, reserved from making the cake
1/2 teaspoon vanilla, optional
milk or cream, as needed

Whisk all three ingredients together well to combine into a smooth, slightly pourable, thick glaze. Depending on the amount of lemon juice you get (I had about 1/4 cup) you may need to add more confectioners' sugar to get the thicker consistency, or a little milk or cream to thin the glaze down. The consistency is really just your preference and you could even just serve it like a sauce on the side in a small pitcher with individual slices.


Lemon Poppy Seed Cake with Almond Cream Cheese Frosting (original recipe for 3-layer 8-inch cake)

(Recipe from Sky High Irresistible Layer Cakes by Alisa Huntsman and Peter Wynne)

Lemon Poppy Seed Cake

3 cups cake flour

2 cups sugar

4½ tsp baking powder

½ tsp salt

3 tbsp poppy seeds

2 sticks (8 ounces) unsalted butter

1 large lemon, zest and juice

1¼ cups buttermilk*

5 egg whites

1/3 cup water

Poppy seeds or flaked almonds to decorate

Almond Frosting

8 ounces cream cheese

2 sticks (8 ounces) unsalted butter

5 cups confectioners sugar

1 tbsp almond extract

* If you don’t have buttermilk you can make your own by stirring 3 teaspoons of vinegar or lemon juice into each cup of milk and leaving for 10 minutes.

Method

To make the cake, heat the oven to 350F. Grease three 8 inch cake pans and line the bases with parchment paper. Combine the flour, 1¾ cups sugar, baking powder, poppy seeds and salt in a mixing bowl. Mix gently to combine.

Add the butter, lemon zest and 1 cup of buttermilk to the flour. Beat on low until completely mixed. Raise the speed to medium and beat for 1-2 minutes until lighter in colour.

In a medium bowl, combine the egg whites with the remaining ¼ cup buttermilk, whisk to blend thoroughly. Add the egg white mixture to the batter in 2-3 additions, scraping down the sides of the bowl and beating only enough to incorporate the mix. Divide the batter between the three pans.

Bake for 25 to 30 minutes until the cakes are golden brown, spring back when touched lightly in the centre, and a cake tester comes out clean. Leave to cool in the pans for 10 minutes before turning out.

While the cake layers are cooling, make a lemon syrup. In a small pan combine the remaining ¼ cup sugar, water and lemon juice. Bring to the boil, stirring to dissolve the sugar.

Generously brush the cakes with the lemon syrup while they are still warm. Then allow the cakes to cool completely.

To make the frosting, in a large mixing bowl beat the cream cheese and butter with an electric mixer until light and fluffy. Gradually add the confectioners sugar, 1 cup at a time, beating well between each addition. Add the almond extract and then continue to beat well for 3-4 minutes until light and fluffy.

To complete the cake, place one layer, top side down, on a cake plate and spread about a fifth of the frosting over the cake to cover evenly. Repeat with the second layer and place the third layer on top. Frost the top and sides of the cake with the remaining frosting. Garnish with your choice of flaked almonds or poppy seeds.

Makes 1 x 8inch triple layer cake. Serves 12-16

Saturday, May 15, 2010

Cookbook Spotlight: Huckleberry Cream Tart

Photobucket

If you want to see something that is just ridiculously pretty, you need look no further than through the pages of Deborah Madison's new book, Seasonal Fruit Desserts from Orchard, Farm and Market. If you don't quite believe me, just take a look at the book cover below.


Pretty compelling evidence all on its own, isn't it?

The Cookbook Spotlight - organized by Cath at A Blithe Palate (which is where you can find the roundup of posts soon - this time around was a real joy for me. This book is not only beautifully photographed, but it is also beautifully written and formatted with some really incredible and original ideas.

When I was going through the book, I kept coming back to this one recipe though for a Silky Tart Dough that was left unbaked, then filled with a healthy sprinkling of huckleberries, and then mixture of creme fraiche, eggs and a few other ingredients was poured in.

Honestly, the recipe struck my fancy most because I had never seen or read anything else quite like it. The tart dough is processed together into more of a very thick batter that spreads in the most unctuous and yes, silky, manner and then doesn't have to be baked before the filling is added and when baked is a bit of a cross between a tart dough and thick and sturdy delicious cake layer. The filling itself required very little effort on my part and really just a bowl and a whisk and you can see for yourself how gorgeous the results turned out once baked up.

Photobucket

The Huckleberry Cream Tart was amazing to make - really. I whipped it together in about 20 minutes one morning for breakfast (not including baking time of course - which wasn't too long anyway). Huckleberries are my husbands most favorite fruit on the planet, hands down, so he was pretty thrilled - serious good wifey points for me!

If I had any complaints about the book it would probably be simply that it is a bit devilish to have so many gorgeous ideas for how to use seasonal fruits paraded in front of you... then have to wait for them to come in to season! Of course, that is also part of the fun.

Probably my most favorite part of the book is the fact that Deborah shares so much great information about so many different types of fruit that I really didn't know. I finally feel like I have a good guide to these seasonal gems and many ideas and inspiration to work with to use them, and use them well.

Photobucket

Wednesday, May 12, 2010

Outrageous Chocolate Cookies

Photobucket

It has been quite a while since I joined in with the Cookie Carnival fun, but this month we had two choices - and as you can see here, one of those choices involved oodles of chocolate. I've actually had this recipe from Martha Stewart bookmarked for a while and had a wicked chocolate craving (as opposed to the rest of the time when I just want chocolate).

This recipe's time has finally come, and I must admit, since it was so quick and delicious that its time will come again (and again and again). I actually made only a half batch though because of the extreme amounts of ingredients required. It would be safe to say, with 20 ounces of chocolate (that is well over a pound of chocolate for only two dozen cookies people!) that this cookie has definitely earned its 'outrageous' moniker.

These cookies are literally just melted chocolate, sugar and a few other ingredients, plus a lot more chocolate chunks, cobbled together with a smidgen of flour. That being the case, it is a safe statement that the overall flavor you are going to end up with is the taste of the chocolate you use. Therefore, I would caution you to make sure to use a chocolate that you really like. I used a bittersweet chocolate that I like for baking, but not necessarily for just eating out of hand, and it made a difference in the end product.

Photobucket

That said, my most favorite thing about these cookies - and the reason I know I'll make them again - is that they were shockingly similar to a really good brownie - but just the melty chocolate, fudgey texture AND lots of chewy edges and shiny crisp outer shell. In other words, if you are like me and love pretty much all types of brownies and have ever wondered what it would be like to have one with all your favorite aspects rolled in to one - this is your cookie.

The best part about that is that they could be eaten almost immediately out of the oven - but were ah-ma-zing when just cooled to room temperature. A definite keeper.

Photobucket

Outrageous Chocolate Cookies

- HALF BATCH MEASUREMENTS - MAKES 1 DOZEN COOKIES

10 ounces semisweet chocolate, chopped into chunks - divided

2 tablespoons unsalted butter

1/3 cup all-purpose flour, spooned and leveled

1/4 teaspoon baking powder

1/4 teaspoon salt

1 large egg

1/3 cup + 1 tablespoon packed light-brown sugar

1/2 teaspoon pure vanilla extract

Preheat oven to 350 degrees. Heat 4 ounces of the chopped chocolate and butter in a microwave-safe bowl in 20-second increments, stirring in between, until almost melted; do not overheat.

In another bowl, whisk together flour, baking powder, and salt.

In a mixing bowl, beat egg, brown sugar, and vanilla on high speed until light and fluffy. Reduce speed to low; beat in melted chocolate. Mix in flour mixture until just combined. Stir in remaining chocolate chunks.

Drop heaping tablespoons of dough 2 to 3 inches apart onto parchment lined baking sheet. Bake until cookies are shiny and crackly yet soft in centers, 12 to 15 minutes. Cool on sheets 10 minutes; with a thin metal spatula, transfer to racks to cool completely.

Friday, May 7, 2010

Mother's Day Brunch Ideas

I thought with Mother's Day coming up on Sunday I would share three of my favorite brunch ideas for anyone out there who is having a get-together this weekend.

Photobucket

The first dish is this savory baked frittata I made recently for a teacher appreciation breakfast at Aidan's school. It is a mixture of so many good things all put together in one dish. While there is some prep work to put the dish together, you can pretty much make everything and bake it the night before and then just rewarm it the next morning, or bake it in the morning. It is best served just warm or at room temperature.

This version has caramelized onions, applewood smoked bacon, ricotta cheese, mozzarella cheese, and Parmesan. Then I added even more goodness with sauteed mushrooms, roasted red bell peppers and spinach.

Photobucket

Next up is a sweet option with this french toast casserole or strata that was embellished chopped white chocolate, sliced almonds and fresh raspberries. Then I topped it off with some buttermilk caramel syrup. I served this one to my in-laws a couple of weeks ago and it was an absolute hit!

Photobucket

This last one is a basic, delicious buttermilk waffle that gets a couple of little upgrades with a sprinkle of cinnamon and sugar on top of the batter before closing the waffle iron. Then I topped the waffle off with a thick honeyed whipped cream and some fresh blackberries for a special treat. Making the waffles this way was actually all Aidan's idea, so since a 6 year old came up with the idea, it must be (and was) something that the whole family will love.

Happy Mother's Day to all out there!

Tuesday, May 4, 2010

TWD: Burnt Sugar Fudge Ripple Ice Cream

Photobucket

Well, I'm late to the party, but I come bearing hand-made ice cream and even embellished it with a thick ripple of fudge. Did I mention I had to go the hand-made route? No, not just homemade HAND-made.

Yes, I'm proud of myself for following through on it, against all odds (odds being lack of groceries, 11 week old complicated baby, and the fact that I'm having surgery tomorrow - yeah, I'm feeling pretty crazy at the moment.... what better reason for ice cream then, right?! - more on all the above soon, I promise, I have details to share and just haven't gotten in gear to do it yet).

I obviously still haven't gotten around to replacing my ice cream maker that broke last year, but I didn't want to miss this week's Tuesdays with Dorie pick from my darling friend and fellow Utahn Becky over at Project Domestication. Becky is a complete doll and I didn't want to let her down this week. So, I hope you will all forgive my being late to the party.

Photobucket

So, Becky, this one is for you my dear.

I actually finally made it to the grocery store for milk and cream, which I was of course out of, late on Monday afternoon. I then went home and didn't get to start making the custard until around 8:30pm. I then just stuck the custard in the fridge to cool until this morning. I then put it in the freezer, whisked it about 45 minutes later, stuck it back in the freezer, then ignored it for another 45 minutes, whisked it again, repeated that process one more time.

Then it was thick enough for me to bust out my KA with beater blade. I froze my KA bowl, then dumped the thoroughly chilled and mostly frozen custard into the bowl with the blade to act as my churn. I then beat the custard on one of the highest settings for about 30 seconds to whip some air and texture into the mixture. Then I dumped the well churned stuff into a shallow baking dish and drizzled some slightly warmed chocolate ganache (which had a little corn syrup in it to keep it supple and more chewy than hard) so that when I scooped it out it would get that rippled effect. I didn't do as good of a job on that as I wanted, but that was mostly just my lack of technique. It came pretty darn close.

I covered the whole mixture with a piece of plastic wrap right on top of the ice cream and let it freeze and harden for a couple more hours before scooping, and voila, Burnt Sugar Fudge Ripple.

Photobucket

The flavor of the ice cream alone is complex and heavenly. As you can see I really let my sugar caramelize to a golden amber color which really enhanced that deep caramel flavor. The recipe is a keeper, even if it was a little more labor intensive here, I'm glad that I was able to get myself to do it, even without a specialty machine and more time.

Make sure to check out the LYL post for more ice creamy goodness from the TWD group.

Blog Widget by LinkWithin