PheMomenon has moved!

You should be automatically redirected in 5 seconds.

If not, please visit http://www.phemomenon.com and update your bookmarks and RSS feed.

Thursday, September 30, 2010

Giveaway Winners

The 'Life As We Know It' gift basket from Warner Bros. and Oh! Nuts goes out to Brooke (comment #1)
Apparently none of you were able to take advantage of the prescreening, so no winner for those.

Here's what Brooke had to say about parenting surprises - boy, can I relate!  Made me laugh out loud!

The most surprising thing for me about being a Mom was the feeling of doom that falls over you every time your child gets ill. Maybe it is just me, or because my baby was 2 1/2 months premature but I felt like there was nothing right in the world when she would get sick.
I was also very surprised at the distance milk can squirt and how much mess breast feeding can make when you are first starting out! YUCK! :D

Don't forget, you can still enter the movie sweepstakes here!

The Macy's $25 gift card's lucky winner is Natalie Jane (comment #7)

Here is what Natalie Jane had to say about Macy's new campaign commercial... I want to know how she knows this ;)
I like that it really does look like that in the Macy's employee section! Except for all the elves...

Ladies, please email me with your mailing address (phemomenon {at} gmail {dot} com) and I'll pass the info on to the appropriate parties to get your spoils sent on their way!

I'll draw the winner for the $25 CSN Stores gift code after the drawing ends tonight at midnight - head over there if you still want a chance to win.

Please note: I was offered these items from the providers (listed on the original giveaways) to share with my readers. I did not receive anything and I was not paid for my opinions. 

Tuesday, September 28, 2010

TWD: Tarte Fine + a Review & Giveaway

Photobucket


The Tarte Fine (aka apple pizza) was the recipe for this week's Tuesdays with Dorie, chosen by Leslie at Lethally Delicious.  I have to admit, I generally am really not a fan of baked fruit.  I do however, really love me some puff pastry. With how simple this recipe was, I knew it would be a simple one to pull off, even with a busy week. Of course, with me, that usually just means that I'm going to complicate things for myself somehow.

A quick note before I get much further though - do you know what this Friday is? Besides being October 1st it will be the very first post for the brand spankin' new French Fridays with Dorie celebrating and cooking our way through her new book - Around My French Table (which she is incidentally out on tour with right now).  This week's first recipe is a favorite of mine and if you don't have your book yet, you really ought to go ahead and order one. You won't regret it!  Also, if you didn't see the article, you can read a nice article that the Post-Gazette did about our own Laurie & Dorie :) This group is going to be awesome!

This week's complication turned out to be by making the recipe twice so that I could perform my own little puff pastry test.  Back when we made the little parisian apple tartlets for TWD I made the rough puff pastry recipe from Martha Stewart's site (you have to watch the video with Michel Roux - it is so great and the perfect simple tutorial).

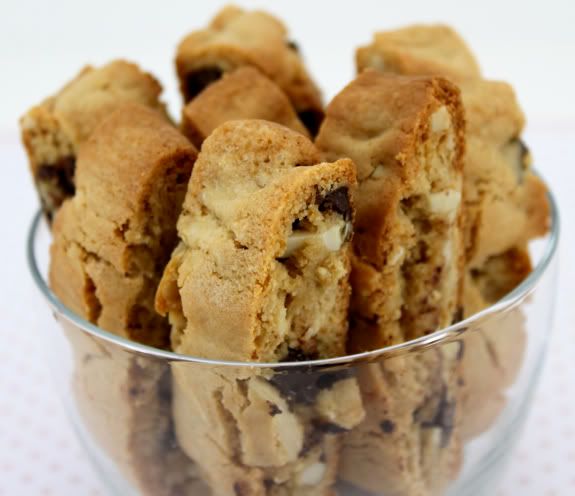
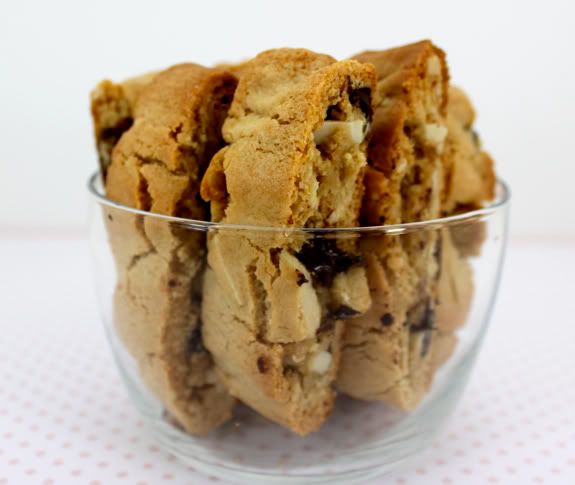
I made one version from the rough puff pastry and one from the Pepperidge Farms frozen puff pastry.  The rough puff once again beat out the frozen stuff hands down for flavor, flakiness, and texture.  The PF puff pastry was good, but the homemade puff pastry really made this dessert something special.

No surprise that I did the sweeter version over in the 'playing around' section of the book with the added butter and sugar under and over the apples.  I also added a little sprinkle of cinnamon since it is just always such a natural pairing in my book.  I was surprised how much I really enjoyed this dessert, but only the homemade pastry version (the other I ate a couple bites and was done).  As I mentioned, I don't like baked fruit all that much, especially apples, so I think that the fact that they were sliced so thin really made a difference for me.  I would definitely make this again... but probably only when I have some more homemade pastry on hand.

As much as I loved making my own puff pastry, and how delicious it turned out, I haven't done it more than a couple of times.  Not so much because of the effort or even the time and performing the different 'turns'.  It was actually the mess.  As you can see in the video you dump a huge pile of flour and an equally huge pile of little cubes of butter onto your countertop and go to work.

Photobucket
homemade rough puff pastry version

In a house with three small children running around, as you can imagine, counter space is a precious commodity and it will come as no surprise to anyone out there that any time I want to make something that has any time on the counter I have to perform a deep cleaning to feel like I can use the space.  With little kids, believe me, a simple nice thorough wipe-down is never enough!

You may remember not too long ago I mentioned that I would be doing an upcoming review for CSN Stores.  They were kind enough to let me choose what I would like to review and after drooling over any number of things from their selection of Le Crueset and other dutch ovens to dining chairs (I particularly love the breakfast nooks - so cute!), baking rings, and lots of fun, harder to find restaurant and bakery style equipment. CSN Stores is actually comprised of 200+ stores though with just about anything you can think of, not just for the kitchen.

I spent quite a while going through their site browsing and when I found this huge, silicone pastry mat I knew I had to try it out.  The thought of having a sturdy, non-stick, easily cleanable surface to use for breads, cookies, pastries, etc - I had to try it.  Thanks to CSN Stores sending me one I was able to have one and try it out.
 
Photobucket
pastry mat with flour and butter ready to make rough puff


The main thing I can say about this pastry mat is that I can't believe I've gone so long without one! Oh, how much I love this mat.  It is huge for one thing - that is no small mound of flour and butter you see there either.  The work space was clean, plentiful and perfect.  Cleaning up couldn't have been easier since I just removed any left over mess to the sink and washed up, leaving my countertops clean as well.

The ordering process with CSN was simple and easy, and best of all, my pastry mat arrived promptly within a couple of days.  I really enjoyed going through their site and being able to read reviews of products from others as well as having all the product specifications right there.

If you have a baker in your life, or want to get started a little early on your holiday wish list, I definitely recommend that you put this pastry mat at the top of your list.  In fact, forget getting it for the holidays - you need this BEFORE then so that you can really pull out all the stops for your holiday baking! Just think of all the things you could do! I know I am.

THE GIVEAWAY!
To help you along the way, CSN Stores is offering a $25 gift code to one lucky reader to use off of anything in any of their stores.  All you need to do to enter the giveaway go check out CSN Stores and leave a comment on this post before Thursday, September 30 at midnight MST telling me what you would get.  That way, by the time all the comments are in, we'll have one heck of a wish list going right here I'll bet!  The winner will be drawn using Random.org.

For second entry in the drawing tweet about this giveaway and include @PheMom in the tweet so I know about it and in case I don't already follow you on Twitter.  Then LEAVE ANOTHER COMMENT telling me you tweeted so that it's in the drawing.

Good luck!


Photobucket
store-bought puff pastry version


Photobucket
homemade rough puff pastry version

Saturday, September 25, 2010

Hodge Podge: Baked Oatmeal with Burnt Sugar Bananas + Week in Review Favorite Links & Giveaways!

Photobucket

This week has been a bit crazy, so a fast-to-make, walk-away-from-while-it-cooks, simple but hearty and comforting breakfast was definitely called for.

Enter Baked Oatmeal.

I hadn't really ever heard of it until Melanie posted a recipe a while ago, which I've made several times.  I decided to try another recipe this time though because it was heavy on brown sugar and used butter and more vanilla for an extra punch of flavor.  It was delicious.  Topped off with some sliced bananas and brown sugar melted and caramelized with a kitchen torch (or under the broiler) and it really hits the spot.  Oh! And the kids go crazy for it too since it's like eating a big, soft oatmeal cookie in a bowl. Yum! (Recipe waaaaaay down at the bottom.)

HODGE PODGE TIME!

I realized late last night when I was trying to fall asleep that part of the reason I was still so awake was the fact that I have so many ideas, bookmarks, and things running around in my brain that I wanted to share with you. Who knows when I'll get to these ideas, but that doesn't mean you shouldn't in the mean time.  I'm hoping to be able to share something like this with you every week - that way it will serve as a running journal for me as well instead of just being lost in all my bookmarks. Maybe if I get the information out of my brain and onto the page, I'll sleep (probably not, but it's worth a try!).  I have so many things like this that I want to tell you about and don't seem to get around too because of time, so we'll see how this goes!

Also this week I've had several giveaways come together and I have created a separate post where you can enter to win. I've listed the giveaways at the bottom.

Here's what caught my eye this week:

First off, Katie of Good Life Eats shared a recipe for Oatmeal Almond Chocolate Chunk Cookies that have so many good things in them, you can feel pretty good about making them and eating them.  Of course, knowing me, I'll eat them for breakfast, but that's just me.  Incidentally, Katie's blog is where I got the idea that it would be a good idea to post all these links and ideas in one place that we could all enjoy together - you should see her Bookmarks from This Week posts for more great ideas.  Thanks for the inspiration Katie - my over active brain thanks you too!

Earlier this week I was lucky enough to get to go to the aquarium and lunch with Rachael (La Fuji Mama) and her wonderfully sweet girls.  It was so much fun and we had the most wonderful and relaxing time, even while chasing Cole around with his usual craziness.  We also visited a local cider mill and picked up some raw apple cider which I will be using to make Rachael's Spiced Apple Cider tomorrow - can't wait!

I also picked up some peaches while I was at the mill which will be turned in to a peach jam with vanilla made with some vanilla beans I received from Megan's giveaway - that was by far the BEST smelling mail I've ever received!  Thanks Megan!

On the way home from our outing with Rachael I headed over to Danny and Shawnee McDowell's urban home farm to pick up a gorgeous pasture raised, fresh chicken they just processed this week - if you want to go get your own and you are here in the Salt Lake City area, I think they still have some chickens (now frozen - but when it is a locally raised, who is going to quibble about a couple of days in a freezer?). I have such plans for this chicken!

We spent most of the rest of the week just staying home, so there was time to browse some of the lovely photos over on foodgawker - my favorites from this week were some unique ideas I hadn't thought of or seen before.  Like this Balsamic Jelly - oh the possibilities - and kiwi slices dipped in chocolate like lollipops - it just never occurred to me to try putting them on a stick like this - so cute!

There was also Joy's fantastic post about 5 Ways to Bake Like a Grown Up which made me really laugh and drool with great ideas when I needed it and Aimee's Ultimate Holiday Baking Pantry Checklist - such a fantastic tool and with a printable list option as well. The holidays will be here before we know it, so you should get your copy ready to go and start organizing - I know I will be using the list this year.

Aside from that Spiced Apple Cider from Rachael that I can't wait to make, she also posted a recipe for making Chai with a Japanese twist called Mugi-Chai (which is just so fun to say!) that I can't wait to make.  The photos are lovely and just make you want to curl up with a warm cup of tea on a crisp Fall day.  While you are checking out that recipe, you really should head over to Pillsbury's site and vote for Rachael as your favorite Crescent Cook with her Greek Salad Pizza - you can register and vote every day too, so make sure to check it out.

Brooke over at Cheeky Kitchen posted a recipe on The Family Kitchen for Babble for Jacket Potatoes that looks good enough to eat, which is just the way it should be! I can't wait to try this version and eat them all winter long.  Incidentally, if you are looking for SUPER cute ideas for Fall-ish treats - Brooke is your girl - just look at these ridiculously cute Owl Sugar Cookies and try to tell me I'm wrong!  Seriously people, I'm just not that creative - that's why I love you guys and Brooke is just rockin' it!

Maria of Two Peas and Their Pod has been making some fantastic pumpkin recipes that are perfect for Fall so you've got your choice - you can go for the Pumpkin Nutella Bread or the Pumpkin Chocolate Chip Bread - either way, I think you are going to be in heaven!

Last, but certainly not least (and this isn't a new post so, yes, I'm behind the times!) I found a recipe from Jamie over at Sophistimom for Conference Cinnamon Rolls - and since general conference is next weekend here in Utah (and all over the world), there you go! I know I'll be making these - can't wait!

Here are the giveaways I mentioned:
All winners will be chosen by Random.org


Photobucket

Baked Oatmeal with Burnt Sugar Bananas
Adapted from All Recipes

3 cups quick oats*
1 cup packed light brown sugar
2 teaspoons ground cinnamon
2 teaspoons baking powder
1 teaspoon salt
1 cup milk
2 eggs
1/2 cup (1 stick) unsalted butter, melted
1 tablespoon pure vanilla extract

*You can use old fashioned rolled oats if you want.  The texture will be a little less soft and fluffy and you'll need to bake the mixture 10 minutes extra.

Makes 8 servings oatmeal - you need about 1/2 banana + 1 teaspoon brown sugar, mixed with 1/4 teaspoon water, per serving bowl

Preheat the oven to 350 degrees F.  In a large bowl, whisk together all the ingredients.  Pour the oatmeal mixture into a lightly greased 9x13 pan.  Bake for 30 minutes.  Scoop into heat proof bowls.  Top with thinly sliced bananas.

If you are using bananas on all the servings, then just mix the brown sugar and water all together at once, then spread a little on top of each bowl before broiling to melt and caramelize the sugar or use a small kitchen torch.  You'll use about an 1/8 cup of sugar and about 1 tablespoon or a little less of water. 

Serve the oatmeal with a little milk, or if you really want to be decadent, pour a little cream on top and enjoy!

More baked oatmeal versions:
Melanie at My Kitchen Cafe
Joy the Baker

GIVEAWAY: TCBY Preview Event - Murray, Utah


THIS GIVEAWAY WILL END WEDNESDAY, SEPTEMBER 29 AT NOON MST AND IS OPEN TO LOCALS ONLY
Winners will be chosen Random.org


TCBY is opening another new store here in Salt Lake, at Fashion Place actually, and they are holding a sneak peek media event next Friday, October 1st at 10am.  They invited me to the event and have told me that I can bring two of my lovely readers to the event as well.  

So, if you are able, willing and close-by next Friday, and want to check this out with me, please leave a comment.  I'll draw for two winners next Wednesday.  Please make sure you are available to go and that I can reach you (no anonymous comments please).

Here is the information about the preview event:
This first-of-its-kind store will not only serve TCBY’s healthy frozen yogurt in the new self-serve design, but it will also feature Yovana, TCBY’s fresh yogurt concept, with extended hours to include the breakfast day part.  Yovana, a fresh yogurt that is prepared daily, is the perfect meal replacement or snack for breakfast and beyond.  The product is healthier than even your highest quality pre-packaged grocery store yogurt.  At the Fashion Place TCBY, customers will have the ability to order Yovana, with a variety of freshly cut fruits, granolas, and mixed nuts, prepared in yogurt bowls, parfaits or blended for either a drinkable yogurt or smoothie.
We would like to invite you to join us for a special media VIP event at the new Fashion Place location on Friday, October 1 at 10:00 am where we will kick off the new breakfast offering with samples of Yovana yogurt.  Tim Casey, CEO of TCBY, will be on hand as well.

The Media VIP event will take place at this location:
TCBY - Fashion Place Mall
6191 S. State Street, #023
Murray, UT 84107

GIVEAWAY: Macy's Fall Campaign - $25 gift card

THIS GIVEAWAY WILL END WEDNESDAY, SEPTEMBER 29 AT NOON MST.
Winners will be chosen Random.org

I received an email about Macy's Fall advertising campaign and wanted to share it with you.

This fall, Macy’s invites you to “Find Your Magic” with their latest campaign.

Harnessing the power of the magical Macy’s brand, the campaign aims to dazzle and delight customers. With a new iconic television spot, magic in-store elements, and an engaging online destination at www.macys.com/findyourmagic, Macy’s has created a sense of fantasy with fresh and fun experiences for customers every day. More details below:
“Find Your Magic” TV Commercial – On September 12th, Macy’s revealed their most ambitious commercial yet showing the inner workings of the magic of Macy’s. The spot features celebrity designers including Sean “Diddy” Combs, Tommy Hilfiger, Jennifer Lopez, Rachel Roy, Jessica Simpson, Martha Stewart and Donald Trump. 
“Fashion Director Daily Fashion Challenges” – Coming back again, Macy’s is inviting users to take part in the Fashion Director Daily Fashion Challenges for a daily chance to win $100 Macy’s gift cards online and at participating locations.
Macys.com/findyourmagic – The enchantment of the campaign also extends online at www.macys.com/findyourmagic. Featuring fall fashion previews, Macy’s Fashion Director hosted by Clinton Kelly, magic videos with style tips and great finds, as well as other fun behind the scenes content - the site is the home base for virtual acts of magic.
Macy’s Shopping Bag Dress Displays - To drive the magic bag message in-store, Macy’s is displaying over the top dresses made entirely from the shopping bag that measure approximately 10 feet high at 100 Macy’s locations nationwide!
Growing up in Wyoming, there really isn't any such thing as any kind of department store, let alone a major one like Macy's.  Every Thanksgiving, I would get up (usually just me, before everyone else) and watch the parade on TV.  It all seemed so far away - so exotic - so magical!

Since I moved to Utah years ago I've gotten more used to having access to stores and resources, but interestingly enough, when Macy's opened here a few years ago - that magic wasn't diminished and I found that, even though I had lost some of the excitement and taken things for granted a bit with their availability.  This was Macy's! The place childhood dreams were made of.

That is what their new campaign made me think of instantly, and all the times I've seen the new commercial it just reminds me of that feeling of wonder.  If you haven't seen the commercial, you should watch it - it's pretty fun!


To win, please tell me your favorite part of the new commercial. 
Leave a comment (no anonymous comments please - U.S. winners only - sorry!).

GIVEAWAY: Movie Pre-Screening Tickets & Gift Basket

THIS GIVEAWAY ENDS MONDAY, SEPT. 27 AT NOON MST.
Winners will be chosen Random.org

Earlier this week I got a nice email from the folks over at Oh! Nuts about their partnership with Warner Bros. for the new movie that is coming out called "Life As We Know It" which looks absolutely hilarious!


They are holding a sweepstakes that anyone can enter and to try to help promote the sweepstakes and movie they offered me a movie gift basket and tickets to go to a pre-screening of the movie.  Cool, right?

Well, the thing is, I don't live in one of the major cities where the pre-screening will be held.  BUT... perhaps YOU do?!  So, I can give away those two tickets to one of you so that you and a guest can check out the pre-screening.  Please be sure to mention your city in the comments - no anonymous comments please.  If I can't reach you, I'll have to pick someone else.  Time is of the essence because they need the ticket info by Monday!


Here is a portion of the email I received:
“Oh! Nuts is partnering with Warner Bros. Entertainment to promote their upcoming movie “Life As We Know It.” We will be hosting an online sweepstakes offering a chance to win a family trip for 4 to Hollywood, CA.
For more information about the sweepstakes, check out the website at: www.ohnuts.com/life/
As an added incentive… to enter the sweepstakes…, we can offer you two tickets to a prescreening of the movie for you to use anyway you like. You can enjoy them yourself, or you can give them away to readers of your blog.          
 Available cities for the movie pre-screening:
New York City
Los Angeles
Chicago
Dallas
San Diego
San Francisco
Houston
Miami/Ft. Lauderdale
San Jose
Seattle                                           
Now, since someone in or near those cities needs to win the movie tickets it seems only fair someone else that can't go to the movie should get the fun swag basket.  

SO.  How do you enter to win? I think we can all use a good laugh, so please share one thing about parenting you weren't expecting or that surprised you - the good, the bad, the ugly, whatever! Whether you're a parent or not, I'll bet you still have an opinion - after all, we've all been kids so have some perspective one way or another.

Please make sure to mention in your comment if you are entering for the tickets
(including the City you would go to the pre-screening in) or the movie gift basket!
Be sure to enter the sweepstakes at www.ohnuts.com/life

Tuesday, September 21, 2010

TWD: Hot Cocoa Muffins

Photobucket


OK, so really this week's Tuesdays with Dorie recipe, chosen by Rhiani of Chocoholic Anonymous, is supposed to be for a coffee flavored muffin - which I'm sure you can see plenty of if you visit the TWD blog and follow the links of my fellow bakers.  I didn't really see sharing coffee muffins with my kids and definitely not all those muffins just for me so I decided to tweak the recipe and turn them into hot cocoa muffins.

Where the recipe calls for 1 cup of hot coffee, I subbed 1/2 cup of milk and 1/2 cup of water, heated till just boiling then added 3 tablespoons hot cocoa mix (from my homemade recipe) plus whisked in a 1/4 cup of chocolate chips till they melted. I could have just drank that and been happy!

The resulting muffins were a light milk chocolate flavor and were moist and delicious. While I am definitely a super chocolate lovin' gal, I really liked the light chocolate flavor too.
Photobucket

Wednesday, September 15, 2010

Almond Chocolate Chunk Biscotti

Photobucket


As Autumn is starting to roll around and the weather is starting to change my mind turns to baking.

What? That made no sense. My mind is always on baking, right?

Here's the thing. I don't know what it is, but there is something about Fall that makes me want to bake obsessively.

Oh, I already bake obsessively.... hmmm.

Exactly. That is the problem.

In the past couple of weeks, I've gone from being relaxed about all the things I want to make to obsessively making lists and priorities and bookmarking and making copies of recipes and basically thinking about baking all the time!

Even more than usual.  Which is tough to do.

Photobucket

I thought though, since the cooler weather also makes me obsessively start thinking about and drinking more hot chocolate, that I would share my most favorite biscotti recipe with you so that you can make something to dunk in your hot chocolate.

Remember a while back, when we made the Lenox Almond Biscotti recipe for Tuesdays with Dorie?  Hands down, this is the recipe I have riffed on and made out of Baking From My Home To Yours the very most. I've only ever actually made the recipe as written once though.  I've tweaked it so many times I'm not sure I've even written them all down.

In fact, if I had had to buy the book and only ever got that recipe from it, I would have been perfectly happy.  My favorite change that I always make probably makes my version less authentic though because I like my biscotti a little more on the chewy, slightly soft side, than really crunchy.

I have to admit, before I ever made biscotti at home I figured they would be difficult to make. I was so pleasantly surprised to find that they aren't difficult at all and are amazing.

Need a quick gift to give to a friend or someone you want to impress? Wrap a few of these up in a cellophane baggie with a pretty ribbon and they will love you forever.  Of course, they may also ask you to make them for them again and again too.  Since then you would have to eat a few - you know, quality control and all that - that isn't a necessarily bad thing.

So, my suggestion to you, especially these days, if you are like me and love having a cookie to dip in your hot chocolate or coffee, then do yourself a favor and make your own biscotti to go with the steamy beverage of your choice.  They are far better than anything I've ever had from the store or even most bakeries.

Photobucket


Almond Chocolate Chunk Biscotti

2 cups all-purpose flour
1 1/2 teaspoons baking powder
1/2 teaspoon salt
1 stick unsalted butter, soft
1/2 cup packed dark brown sugar
1/2 cup sugar
2 large eggs
1 1/2 teaspoons pure almond extract
1/2 teaspoon pure vanilla extract
1/2 cup sliced almonds
1/2 cup semisweet chocolate chunks (or chips)

Preheat your oven to 350 degrees F with the rack in the center position.  Line a baking sheet with a silicone mat or parchment.

In a medium sized bowl, whisk together the flour, baking powder, and salt.  Set aside.

In a large mixing bowl (preferably a stand mixer with paddle attachment) beat the softened butter, brown sugar and sugar together at medium speed for about 3 to 4 minutes until very light and fluffy.  Add the eggs and beat for 2 minutes more, stopping and scraping down the sides of the bowl a couple of times to make sure everything is well beaten.  Add the almond extract and vanilla and beat till combined. 

Turn the speed to low and add the dry ingredients, mixing until just incorporated. Add the sliced almonds and chocolate chunks and mix till just combined.

Scrape half the dough out onto one side of the lined baking sheet.  Using your hands and a rubber spatula, shape the dough into a log about 12-inches long and about 1 ½ inches wide.  The dough will be very sticky and should be more of a bumpy rectangle.  Repeat the process with the second half of the dough down the other side of the baking sheet.

Bake the logs for 15 minutes, or until light golden but still soft to the touch.  Remove the baking sheet from the oven and allow to cool on a rack 30 minutes before cutting and baking the cookies the second time.

Use a wide metal spatula to move the logs to a cutting board.  Cut the logs into 1-inch thick slices and place the slices back on the lined baking sheet.  Bake the cookies another 15 minutes, until golden and firm.  Transfer them to a rack to cool completely.  Store the cookies in an airtight container to keep them more chewy.


Friday, September 10, 2010

CSN Stores: Shop Easy

If you haven't already heard the buzz around the blogosphere about CSN Stores, then I'm glad you are reading this. Their website makes it easy to find and buy literally just about anything you may need, easily and in one place.  They have a vast selection of everything including a beautiful selection of dining chairs on down to baby needs and speciality kitchen equipment, bedding, and other furniture - you name it, odds are good they have it!

CSN Stores is a site that brings together 200+ stores under one shopping cart or 'roof,' so to speak. I have had a lot of fun perusing their stores and creating quite the wish list of must haves and products that I would love to get my hands on - especially some of them that have been difficult to find (like that specialty kitchen equipment I mentioned!).

I am also very excited that I'll be doing some reviews of some of my favorite products that I have found so far on their site, as well as doing a giveaway.  More on all of that soon, so stay tuned!

In the meantime, you should head on over to CSN Stores and enjoy how easy their website is to navigate and find what you are looking for.  There are great features, like the ability to sort by manufacturer down the side of the screen, and how there is always all the detailed product information, as well as ratings, along with each product.

Tuesday, September 7, 2010

TWD: Peanut Butter Crisscrosses with Chocolate Chips

Photobucket


For some really random reasons, this week's Tuesdays with Dorie recipe for the Peanut Butter Criss-Cross Cookies (here with chocolate chips) took me on a surreal trek down memory lane.  It was kind of fun though, and the cookies were great, so, while I don't often get really random on here, please allow me in this case to indulge in some true ridiculousness.  Thank you to Jasmine at Jasmine Cuisine for choosing this recipe and sending me to visit the past.  It was fun!

I have always LOVED peanut butter cookies.  My favorites growing up were always the ones that added in some chocolate.  No shock there.  These cookies were everything I want in a good peanut butter cookie.  I only made changes (leaving out the extra peanuts and adding the chocolate chips without the cocoa variation) because I just wanted to use what I had on hand.  I'm sure the other variations are just as wonderful.

For whatever reason - and I blame the nostalgia of these cookies themselves for sending me off on this tangent - when I was typing 'Criss-Cross' in the title it took me all the way back to 1992 and another Kris Kross - two kids who were only 13 and hit big on the rap scene.  The first song I remember was one called "Jump" - not a particular favorite of mine, but it did get me thinking...

I would have been a freshman in high school (you all know I'm not shy about dating myself here now).  I grew up in Wyoming and the extent of our access to the outside 'trendy' world was getting our tv stations from Denver.  If I wanted any concept of what was going on in the world (let's face it - the internet was just getting going where I lived - I have no idea when it started booming in places that weren't as rural as Wyoming) was to watch MTV.  This all got me thinking about what music I listened to back them (pretty much everything - which is the same now) and what other music was popular during my high school years.

This is one random tangent I know, but it made me realize a couple of things about music that was popular in the early nineties - there was an awful lot of jumping going on - especially at our high school dances.  So, to share in the random tangent I went on and take any of you other nineties lovers there with me, I found a list of some of the songs that were popular in the 90's.  Prepare yourself.

Photobucket

So, grab a cookie and have your own little nostalgic moment.  Enjoy! I'm not going to lie - I enjoyed this mix - some were favorites, some were ones that we got really, really, really sick of - but over all it was a nice little trip with some good laughs too.

The 90's were a pretty big decade for me I must say as I look back.  I started high school, dated for the first time, went to my first school dances, had my first real crushes, graduated high school, moved away from home for the first time, moved to a different city/state from my parents, went skydiving, met my husband and got married.  It was a whirlwind.

What song/memory do you associate most with the 90's?


I have to send you to this separate clip too though because for some reason the first one pretty much had no grunge on it and frankly, that was a huge part of the 90's for me too.  Along with my flannel shirts and Docs (which, incidentally, I still find very cute - they were pretty practical in Wyo too - these are the closest style to ones I used to wear I think).  That was a very acceptable fashion in the wilds of Wyoming.  :)

Photobucket

Sunday, September 5, 2010

Peach Cinnamon Vanilla Crumb Bars

Photobucket

Before I tell you more about these lovely crumb bars I wanted to let you know about a local Utah gal, Melissa Chappell who has made a real name for herself by teaching people how to eat fresh foods and understand the benefits.  Something I personally am trying to start learning more about.  This book is a great, useful resource for anyone out there who wants to know more about eating fresh.

The great thing is that she even has a book coming out really soon and trust me, you are going to want this book.  I went to a conference last summer and got to try some of her food and it was as fresh and delicious as you could ever hope for.

To help everyone out there to have a chance to get the book Melissa is having a pre-sale until this coming Friday, September 10th.

You can get the book through for only $12.95 (after pre-sale it is still only $15.95 so it is still totally affordable).

You can find out more about the book and Melissa on her blog.  Here is what Melissa had to say about the book:


This is a beautiful little cookbook full of fresh recipes that will please you and your family. It's got a beautiful glossy cover filled with photos and beautiful illustrations as well as several pages of facts about the nourishing foods included in the recipes. The paper is thick with a "raw" texture and the layout is extraordinary. You'll find six sections: light meals, desserts, salads, salsas, sauces and dips and smoothies, all fresh and delicious. My favorites are the famous Thai Nut Sauce, Lime Mousse, Winter Tomato Sauce, Raspberry Basil Smoothie, and the No Bake No Bake Chocolate Cookies and, well, I like all the recipes and I think you will, too.
I'll be at the American Fork Good Earth on September 18th from 11am-4pm to sign copies and give out free vanilla and chocolate covered macaroons! If you purchase a cookbook here (at the discounted presale price), you can pick it up that day or you may pay for shipping and we'll ship it to you. Just be sure to include your name and address.

Here is the link to Melissa's blog where you can buy the book!

Now, on to the Peach Cinnamon Vanilla Crumb Bars.

Peaches were plentiful at the Farmer's Market here this past week and for me that usually means making jam.  I bought enough peaches to make a small batch of jam, but then two out of three kiddos got sick and all my good intentions fell apart.  Jam isn't difficult or hard to make, but it does take some watching. By the time I had a chance to use these peaches I decided to take them in a different direction this time around.  I guess that means I'll just have to try to get some more peaches this week.

I was reminded when my feed email from Smitten Kitchen showed up in my inbox this week with Peach Shortbread that I had recently seen a version of the Blueberry Crumb Bars Deb posted a while back turned into a peach version over at Annie Eats.  I love me some peach cobbler and I really love crumb bars so I really wanted to try them out.  I think all these versions are quite probably completely fabulous, but since I can never leave well enough alone I knew I wanted to fiddle around with these recipes and came up with my own version.

So, to save time, I've added links to all the similar bars down below the recipe.  That way, you can decide what direction you want to go.  I would say that my version is closest to a cross between a couple of the recipes, but you'll just have take a look and decide what appeals to you.

I knew that I really wanted to incorporate two of my favorite flavors to pair with peaches - cinnamon and vanilla.  I also can't resist the warm sweetness of brown sugar.  The other change I wanted to make was to increase the amount of crust to filling ratio.  Now, it may be just me and my actual lack of love for too much baked fruits, but you could easily just increase your peaches a little bit and have a thicker fruit flavor.  The bars themselves ended up being just what I hoped for and all the flavors came through nicely.  It was like having a wonderful slice of peach cobbler or crumb topped peach pie that I could eat on the go - or even for breakfast.

Photobucket


Peach Vanilla Cinnamon Crumb Bars

For the peach vanilla cinnamon filling:
6 cups peeled, chopped fresh peaches (about 7 peaches)
1/2 cup sugar
1 vanilla bean, split lengthwise and seeds scraped out
1 teaspoon ground cinnamon
3 tablespoons cornstarch (optional)

For the crust and crumbs:
4 cups all purpose flour
1 cup sugar
1/3 cup packed dark brown sugar
1 1/2 teaspoons baking powder
1/2 teaspoon salt
2 1/2 sticks (20 tablespoons or 1 1/4 cups) cold, unsalted butter cut into chunks
1 large egg

Make the peach filling first:  In a large pan, stir together the chopped peaches, sugar, the vanilla bean seeds and the split bean pod, and the cinnamon.  Stir well to combine and bring to a boil over medium heat.  Turn the heat down and allow to simmer about 30 minutes until the juices have mostly thickened.  You can stop at this point with a little juice, or if you like a thicker filling, stir in the cornstarch and simmer for 2 minutes more until the peach filling is thick.  Remove the filling from the heat and allow to cool to about room temperature.

(Note: This peach filling is also wonderful in crepes or on pancakes or waffles.)

Preheat the oven to 375 degrees F.  Lightly spray a 9x13-inch baking pan and line it with a piece of parchment so that the parchment makes a sling in the pan with the edges hanging up and out the long sides of the pan.  Crease the parchment into the bottom corner of the pan to help keep it in place.  Spray the parchment lightly to make sure everything is well greased.  Set the pan aside.

In the bowl of a stand mixer with a paddle attachment stir together the flour, sugar, brown sugar, baking powder, and salt.  On low speed, add the butter chunks and beat until the mixture is very crumbly and the butter is cut in.  You can do all this by hand if you prefer using your fingertips or a pastry blender to run the butter into the flour until the mixture is crumbly with the largest chunks about pea-sized.  Add the egg on low speed (or use a fork) until the mixture is crumbly and combined and when squeezed just holds together.

Press about half of the dough mixture into the bottom of the greased pan evenly and pressing into the corners and edges (do not go up the sides of the pan).

Spread the mostly cooled peach filling evenly over the crust in the pan.  Squeeze the remaining crumbs in the bowl lightly to just make bigger crumbs and chunks and scatter that crust over the peach filling.

Bake the bars for 40 to 45 minutes or until the top is light golden brown.  Remove the pan from the oven and allow to cool completely in the pan.  Use the parchment sling to remove the entire bar from the pan and onto a cutting board.  Use a sharp knife to cut into squares or rectangles (makes about 24 to 30 bars depending on how big or small you cut them).

Serve slightly warm or at room temperature.  Great as a breakfast treat or after school snack or make it a real dessert with a little vanilla ice cream and some caramel topping.

Similar Recipes:
Brown Butter Peach Bars - Big Sur Cookbook (originally linked via Smitten Kitchen as well)

Photobucket

Edible Imagination: Alice in Wonderland - Wacky Cupcakes + September's Book!

Photobucket


Sorry for the delay in when I thought I would get this posted! Cole and Kayla have been sick this week as well as about a million and one other things that all seemed to converge on us at once.  We finished the Alice in Wonderland book several days ago for our first round of the Edible Imagination, but Aidan couldn't decide what he wanted to make inspired by the story.  By the time he did, the kids were sick and thus the delay.

Before I get to much more into our review though, if you joined in the fun with Alice in Wonderland, please be sure to leave a comment with a link to your review post in the comments of this post - I can't wait to see what you came up with!

Also, if you would like to join in with us for September, this month we have decided to read The Little Prince - I really hope you'll join in the fun! We will make something and post it toward the end of September/beginning of October so there is still plenty of time to read along.


Back to Alice...

Our discussions about what to make that the book inspired us with went from the simple to the complicated and creative, but with how the rest of this week shook out we decided to keep it simple.

There were plenty of ideas to choose from though that we had a lot of fun thinking of ways to go.  Tea cakes, tarts, and of course we could have gone the tea party route, but for some reason my totally boyish boy wasn't so in to that idea.  :)

We did consider tarts for the Queen of Hearts, but the boys wanted to make cake.  Cupcakes to be exact.
We decided, that since there was so much nonsense and wackiness in Alice in Wonderland that we would try making Wacky Cake (see an explanation of Wacky Cake below, by the recipe).  Originally we wanted to make a small rectangle cake with poured fondant and put a little note on it that said, "Eat Me" in honor of the book.  To be honest, I just couldn't get my act together enough to ever get the cake made and deal with trying to make the poured fondant.

Rather than keep waiting, we decided to just make the Wacky Cake into Wacky Cupcakes that could be served at a tea party and that are about the simplest, easiest and most fun cake that a kid could make almost entirely by themselves.

We frosted the cupcakes with a simple Caramel Cream Cheese Buttercream which ended up being insanely delicious, due in no small part I'm sure to the use of my Caramel Topping from Le Caramel.  I've never been enough of a fan of frosting to say I could just eat a frosting shot, but let me tell you, this frosting could change my mind!

As for our thoughts on the book, here is the run down from the boys and myself.

THE REVIEW

What Aidan (7YO) had to say:
Favorite Part: I liked that fake turtle and the dance. That was funny. (Referring to the Mock Turtle and the Griffin and the Lobster Quadrille toward the end).
Favorite Character: The Mad Hatter (said with an maniacal laugh - I really ought to video these reviews, it is quite funny)
Overall Opinion: It was weird. Good weird. I liked it. 

What Cole (almost 3YO) had to say - sort of:
Favorite Part:  All he focused on the entire book was when I made piggy snorting and squealing noises when Alice had the pig baby she took from the Duchess's house.  As soon as we would start reading every night Cole would just climb all over me and say, "Piggy says SNORT SNORT"  - I really should record this because it wasn't actually him saying 'snort' so much as him trying to snort over and over.  It is ridiculously cute and funny.

What Holly (aka Mommy) had to say:
Favorite Part:  I think I actually liked the trial at the end the best.  It kind of tied together the entire bits of nonsense through the book for me.
Favorite Character: Alice herself. She was actually an interesting and clever girl in a crazy situation with a lot of imagination.
Overall Opinion:  Overall, I liked the whole book.  I was pleasantly surprised that I liked it at all.  I never liked the Disney movie - I always thought it was weird and creepy, and not in a good way.  I never enjoyed it for the nonsense it was because I could never get past all the craziness.  I don't know if I'm just able to enjoy the nonsense more for what it is now or if I'm just old enough to see the nonsense in the Queen of Heart's constant threats. I always felt like the story was too crazy for me.  

Photobucket


The boys mixed the cupcake batter almost entirely by themselves.  I collected the ingredients and helped with some of the measuring while we talked about it.  They used a scoop to measure and scoop the batter in the cupcake liners.  They were also able to put all the ingredients for the frosting into the mixing bowl with very little help.  We just scooped the frosting into a big ziptop plastic bag with a plain round tip and squeezed it straight onto the cupcakes.  The boys helped with the scooping and I helped guide with the squeezing.  We didn't really feel like getting crazy with the decorating, but you could add more to gussy these cupcakes up pretty easily.

Here is what the Food Timeline has to say about the origins of Wacky Cake.


Wacky cake is an interesting study in culinary chemistry. What sets modern Wacky Cake apart from other chocolate cakes? Vinegar and method. WWI-era Dump Cakes likely provided inspiration. They do not, however, include vinegar. Depression-era Crazy cakes feature cocoa, baking soda & baking powder. No vinegar. In sum, recipes with these names vary greatly according to place and period. The connecting culinary threads are innovation, efficiency, and deliciousness.
It is interesting to note that two popular 20th century American food history books (Jean Anderson's American Century Cookbook and Sylvia Lovegren's Fashionable Food) place this recipe in the 1970s. Culinary evidence confirms this recipe existed in the 1940s. Wacky cake is but one example of the tradition of "make do" cakes that were popular during times of short supply. Contrary to popular opinion, eggless, butterless cakes were not invented at that time, they were revived from WWI days (which were revived from pioneer days). Dump Cake is another descendant of Wacky Cake in method.


Wacky Cupcakes

Adapted from recipe by Nancy Shay and Cook’s Country

1 1/2  cups all-purpose flour
3/4     cup sugar
1/4     cup natural cocoa powder
3/4     teaspoon baking soda
1/2     teaspoon table salt
5     tablespoons vegetable oil
1     tablespoon distilled white vinegar
1     teaspoon vanilla extract
1     cup water

Center the rack in your oven and preheat to 350 degrees F. Line one muffin tin with cupcake liners or grease the pan or use paper souffle cups, also lightly sprayed.

In a medium bowl, whisk together the flour, sugar, cocoa, baking soda, and salt.  

Push 1 large crater and 2 smaller craters into the dry ingredients to make holes to pour in the wet ingredients - the kids loved this part.  

Add the oil to the largest crater, then the vinegar and vanilla separately to the smaller craters. Pour the water into the bowl, and using a spoon or spatula (or whisk gently) mix the ingredients until just a few streaks of flour remain and it is mostly smooth. 

Fill the cupcakes just 2/3 full. Bake the cupcakes 16 to 18 minutes until they are set and a toothpick comes out mostly clean.  The recipe makes about 12 cupcakes.

Caramel Cream Cheese Frosting
Recipe from PheMOMenon

8 oz cream cheese, softened slightly
1 stick (1/2 cup or 8 tablespoons) unsalted butter, softened to room temperature
2 cups confectioners' sugar
1/2 cup good caramel topping (I used Le Caramel)
1 teaspoon pure vanilla extract

Place all ingredients in a mixing bowl or stand mixer and beat, start on low so that you don't have sugar flying everywhere then turn up the speed and beat well until light and fluffy.  Pipe or scoop a large dollop of frosting on each cupcake.  Keep cupcakes refrigerated in an airtight container.  They are great cold as well as at room temperature.


Photobucket

Blog Widget by LinkWithin