PheMomenon has moved!

You should be automatically redirected in 5 seconds.

If not, please visit http://www.phemomenon.com and update your bookmarks and RSS feed.

Showing posts with label Caramel. Show all posts

Sunday, September 5, 2010

Edible Imagination: Alice in Wonderland - Wacky Cupcakes + September's Book!

Photobucket


Sorry for the delay in when I thought I would get this posted! Cole and Kayla have been sick this week as well as about a million and one other things that all seemed to converge on us at once.  We finished the Alice in Wonderland book several days ago for our first round of the Edible Imagination, but Aidan couldn't decide what he wanted to make inspired by the story.  By the time he did, the kids were sick and thus the delay.

Before I get to much more into our review though, if you joined in the fun with Alice in Wonderland, please be sure to leave a comment with a link to your review post in the comments of this post - I can't wait to see what you came up with!

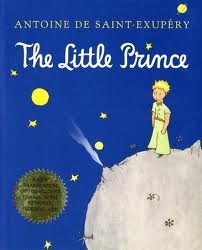
Also, if you would like to join in with us for September, this month we have decided to read The Little Prince - I really hope you'll join in the fun! We will make something and post it toward the end of September/beginning of October so there is still plenty of time to read along.


Back to Alice...

Our discussions about what to make that the book inspired us with went from the simple to the complicated and creative, but with how the rest of this week shook out we decided to keep it simple.

There were plenty of ideas to choose from though that we had a lot of fun thinking of ways to go.  Tea cakes, tarts, and of course we could have gone the tea party route, but for some reason my totally boyish boy wasn't so in to that idea.  :)

We did consider tarts for the Queen of Hearts, but the boys wanted to make cake.  Cupcakes to be exact.
We decided, that since there was so much nonsense and wackiness in Alice in Wonderland that we would try making Wacky Cake (see an explanation of Wacky Cake below, by the recipe).  Originally we wanted to make a small rectangle cake with poured fondant and put a little note on it that said, "Eat Me" in honor of the book.  To be honest, I just couldn't get my act together enough to ever get the cake made and deal with trying to make the poured fondant.

Rather than keep waiting, we decided to just make the Wacky Cake into Wacky Cupcakes that could be served at a tea party and that are about the simplest, easiest and most fun cake that a kid could make almost entirely by themselves.

We frosted the cupcakes with a simple Caramel Cream Cheese Buttercream which ended up being insanely delicious, due in no small part I'm sure to the use of my Caramel Topping from Le Caramel.  I've never been enough of a fan of frosting to say I could just eat a frosting shot, but let me tell you, this frosting could change my mind!

As for our thoughts on the book, here is the run down from the boys and myself.

THE REVIEW

What Aidan (7YO) had to say:
Favorite Part: I liked that fake turtle and the dance. That was funny. (Referring to the Mock Turtle and the Griffin and the Lobster Quadrille toward the end).
Favorite Character: The Mad Hatter (said with an maniacal laugh - I really ought to video these reviews, it is quite funny)
Overall Opinion: It was weird. Good weird. I liked it. 

What Cole (almost 3YO) had to say - sort of:
Favorite Part:  All he focused on the entire book was when I made piggy snorting and squealing noises when Alice had the pig baby she took from the Duchess's house.  As soon as we would start reading every night Cole would just climb all over me and say, "Piggy says SNORT SNORT"  - I really should record this because it wasn't actually him saying 'snort' so much as him trying to snort over and over.  It is ridiculously cute and funny.

What Holly (aka Mommy) had to say:
Favorite Part:  I think I actually liked the trial at the end the best.  It kind of tied together the entire bits of nonsense through the book for me.
Favorite Character: Alice herself. She was actually an interesting and clever girl in a crazy situation with a lot of imagination.
Overall Opinion:  Overall, I liked the whole book.  I was pleasantly surprised that I liked it at all.  I never liked the Disney movie - I always thought it was weird and creepy, and not in a good way.  I never enjoyed it for the nonsense it was because I could never get past all the craziness.  I don't know if I'm just able to enjoy the nonsense more for what it is now or if I'm just old enough to see the nonsense in the Queen of Heart's constant threats. I always felt like the story was too crazy for me.  

Photobucket


The boys mixed the cupcake batter almost entirely by themselves.  I collected the ingredients and helped with some of the measuring while we talked about it.  They used a scoop to measure and scoop the batter in the cupcake liners.  They were also able to put all the ingredients for the frosting into the mixing bowl with very little help.  We just scooped the frosting into a big ziptop plastic bag with a plain round tip and squeezed it straight onto the cupcakes.  The boys helped with the scooping and I helped guide with the squeezing.  We didn't really feel like getting crazy with the decorating, but you could add more to gussy these cupcakes up pretty easily.

Here is what the Food Timeline has to say about the origins of Wacky Cake.


Wacky cake is an interesting study in culinary chemistry. What sets modern Wacky Cake apart from other chocolate cakes? Vinegar and method. WWI-era Dump Cakes likely provided inspiration. They do not, however, include vinegar. Depression-era Crazy cakes feature cocoa, baking soda & baking powder. No vinegar. In sum, recipes with these names vary greatly according to place and period. The connecting culinary threads are innovation, efficiency, and deliciousness.
It is interesting to note that two popular 20th century American food history books (Jean Anderson's American Century Cookbook and Sylvia Lovegren's Fashionable Food) place this recipe in the 1970s. Culinary evidence confirms this recipe existed in the 1940s. Wacky cake is but one example of the tradition of "make do" cakes that were popular during times of short supply. Contrary to popular opinion, eggless, butterless cakes were not invented at that time, they were revived from WWI days (which were revived from pioneer days). Dump Cake is another descendant of Wacky Cake in method.


Wacky Cupcakes

Adapted from recipe by Nancy Shay and Cook’s Country

1 1/2  cups all-purpose flour
3/4     cup sugar
1/4     cup natural cocoa powder
3/4     teaspoon baking soda
1/2     teaspoon table salt
5     tablespoons vegetable oil
1     tablespoon distilled white vinegar
1     teaspoon vanilla extract
1     cup water

Center the rack in your oven and preheat to 350 degrees F. Line one muffin tin with cupcake liners or grease the pan or use paper souffle cups, also lightly sprayed.

In a medium bowl, whisk together the flour, sugar, cocoa, baking soda, and salt.  

Push 1 large crater and 2 smaller craters into the dry ingredients to make holes to pour in the wet ingredients - the kids loved this part.  

Add the oil to the largest crater, then the vinegar and vanilla separately to the smaller craters. Pour the water into the bowl, and using a spoon or spatula (or whisk gently) mix the ingredients until just a few streaks of flour remain and it is mostly smooth. 

Fill the cupcakes just 2/3 full. Bake the cupcakes 16 to 18 minutes until they are set and a toothpick comes out mostly clean.  The recipe makes about 12 cupcakes.

Caramel Cream Cheese Frosting
Recipe from PheMOMenon

8 oz cream cheese, softened slightly
1 stick (1/2 cup or 8 tablespoons) unsalted butter, softened to room temperature
2 cups confectioners' sugar
1/2 cup good caramel topping (I used Le Caramel)
1 teaspoon pure vanilla extract

Place all ingredients in a mixing bowl or stand mixer and beat, start on low so that you don't have sugar flying everywhere then turn up the speed and beat well until light and fluffy.  Pipe or scoop a large dollop of frosting on each cupcake.  Keep cupcakes refrigerated in an airtight container.  They are great cold as well as at room temperature.


Photobucket

Tuesday, August 31, 2010

TWD: Espresso Chocolate Shortbread with Chocolate Caramel Cream Filling

Photobucket


Remember that Caramel Cream made with Chocolate from Le Caramel I told you about on Sunday?

Well, after I made my Espresso Chocolate Shortbread cookies for this week's Tuesdays with Dorie (chosen by Donna of Life’s Too Short Not to Eat Dessert First) I just couldn't get the idea of increasing the amount of chocolate involved with my cookies.  Oh, was it good!  I just spooned a nice dollop of on the back of a piece of shortbread, sandwiched it with another cookie, and voila! Instant doubled goodness.

Photobucket

The shortbread itself was tender, crumbly and delicious.  I went ahead and made the regular recipe, figuring that it wouldn't be much more caffeine in it than if I ate some tiramisu.  I think I ate only three pieces of shortbread, and I'm not kidding, I could feel that caffeine kick!  I guess since I have completely (other than my chocolate intake) cut caffeine from my diet I am a total caffeine light weight now.  Fortunately, the day I made these I really needed the kick anyway so I didn't feel too bad about it.

Photobucket

It could have had something to do with what I used in place of espresso powder (which I can never find or figure out exactly what it is supposed to be).  As far as I can tell it is just a super fine ground strong coffee.  If that is actually correct, then my substitute of two Via packets (Italian Roast) from Starbucks (available at most grocery store chains now at about $3 for 3 single serving packets - 2 packets equaled just shy of the required 1 tablespoon of espresso powder).  The Via packets are described as a micro ground instant coffee and it really does look like a powder and dissolves instantly.


Photobucket

Visit the TWD Blog for more versions of this week's shortbread cookies!

If you haven't already noticed that bright rainbow button over in the sidebar, please consider this your invitation to check back tomorrow (Wednesday, September 1st) for the announcement of the book for September's Edible Imagination and to see our review of Alice in Wonderland and what we made.  I hope you'll join in the fun!

Sunday, August 29, 2010

The Way Caramel Should Taste

Photobucket

I was recently caught by all the possibilities presented by the amazing caramel products made by Le Caramel.  Le Caramel is a very small company in California, but their recipes come directly from Normandy.  I have always had a major love for chocolate, but what some may not have realized is that I have an almost equal love for caramel.  Not all caramels are created equal though and most are so cloyingly sweet that they miss the point entirely.  Much as I love caramel, it isn't something I even try to make often because it isn't as good as what I would hope.

Enter Le Caramel.

Photobucket

The Caramel Cream made with Salted Butter from Le Caramel really lives up to their claim that it is The Way Caramel Should Taste.  It is perfection on a spoon.  The flavor is deep and complicated and hits all the right notes.  The possibilities on how to use it are endless!  As Christen from Le Caramel encouraged me though, just start out with a spoon and dig in!

Photobucket
As if that weren't enough of a worthy goal, Le Caramel has taken the art of perfect caramel even further. They make CARAMEL SYRUP (can anyone else say creme brulee french toast - or just stir it in your coffee) and a wonderful CARAMEL TOPPING (cut an apple, dip, repeat, nuff said) as well as candies.

BUT...

Photobucket


...Without a doubt (and no surprise I'm sure) my absolute favorite is their new CARAMEL CREAM MADE WITH CHOCOLATE.  It is the Caramel Cream made with Salted Butter and the addition of good bittersweet chocolate.

Does anyone else hear angels singing?

I'm not kidding, when I got my package I was absolutely GIDDY.  Giddy people.  I kid you not.  It felt like Christmas morning.  I got that spoon and just dug in.  

How to describe how transcendent this stuff is?  Let's put it this way.  If someone put a spoonful of this in my mouth every morning for the rest of my life, I'm pretty sure I would be the happiest and most well adjusted Mom on the planet.  

Photobucket

PhotobucketPhotobucket
In fact, I have almost demolished my jar because I've been making myself Salted Caramel Hot Chocolate every morning.  It couldn't be simpler, faster or better.  I was a big fan of the Starbuck's version - but it can't even begin to compare.  Especially now that kids are back in school and their is a bit of a chill starting in the early morning air, I know what is going to get me through the winter now!

The ingredients used are simple straightforward and natural.  You know I love doing everything from scratch, but I'm not at all opposed to getting my hands on something crafted by someone who really knows what they are doing and take such care with their products.

Buy your Le Caramel now! You'll be so happy you did!

Salted Caramel Hot Chocolate
1 cup hot milk
pinch of fleur de sel or fine sea salt
Whisk together and enjoy! It doesn't need anything else, but you could top it with some whipped cream, cocoa, cinnamon, or chocolate curls - just if you need that fancy touch.

Photobucket

Tuesday, May 4, 2010

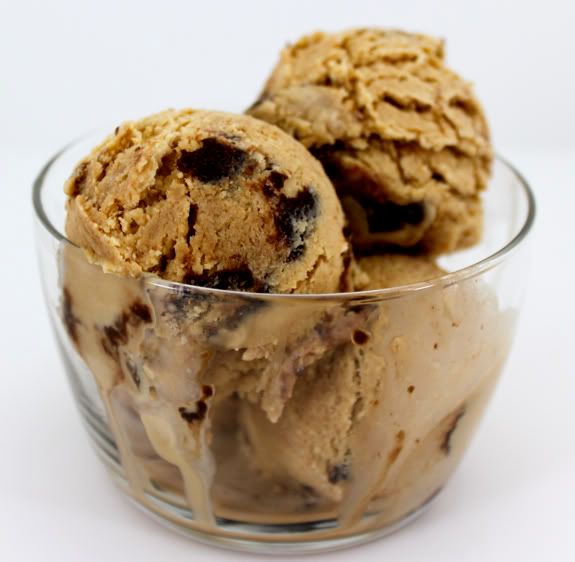
TWD: Burnt Sugar Fudge Ripple Ice Cream

Photobucket

Well, I'm late to the party, but I come bearing hand-made ice cream and even embellished it with a thick ripple of fudge. Did I mention I had to go the hand-made route? No, not just homemade HAND-made.

Yes, I'm proud of myself for following through on it, against all odds (odds being lack of groceries, 11 week old complicated baby, and the fact that I'm having surgery tomorrow - yeah, I'm feeling pretty crazy at the moment.... what better reason for ice cream then, right?! - more on all the above soon, I promise, I have details to share and just haven't gotten in gear to do it yet).

I obviously still haven't gotten around to replacing my ice cream maker that broke last year, but I didn't want to miss this week's Tuesdays with Dorie pick from my darling friend and fellow Utahn Becky over at Project Domestication. Becky is a complete doll and I didn't want to let her down this week. So, I hope you will all forgive my being late to the party.

Photobucket

So, Becky, this one is for you my dear.

I actually finally made it to the grocery store for milk and cream, which I was of course out of, late on Monday afternoon. I then went home and didn't get to start making the custard until around 8:30pm. I then just stuck the custard in the fridge to cool until this morning. I then put it in the freezer, whisked it about 45 minutes later, stuck it back in the freezer, then ignored it for another 45 minutes, whisked it again, repeated that process one more time.

Then it was thick enough for me to bust out my KA with beater blade. I froze my KA bowl, then dumped the thoroughly chilled and mostly frozen custard into the bowl with the blade to act as my churn. I then beat the custard on one of the highest settings for about 30 seconds to whip some air and texture into the mixture. Then I dumped the well churned stuff into a shallow baking dish and drizzled some slightly warmed chocolate ganache (which had a little corn syrup in it to keep it supple and more chewy than hard) so that when I scooped it out it would get that rippled effect. I didn't do as good of a job on that as I wanted, but that was mostly just my lack of technique. It came pretty darn close.

I covered the whole mixture with a piece of plastic wrap right on top of the ice cream and let it freeze and harden for a couple more hours before scooping, and voila, Burnt Sugar Fudge Ripple.

Photobucket

The flavor of the ice cream alone is complex and heavenly. As you can see I really let my sugar caramelize to a golden amber color which really enhanced that deep caramel flavor. The recipe is a keeper, even if it was a little more labor intensive here, I'm glad that I was able to get myself to do it, even without a specialty machine and more time.

Make sure to check out the LYL post for more ice creamy goodness from the TWD group.

Saturday, March 7, 2009

Millionaire Shortbread - NaBloPoMo Day 7

Photobucket


When I finally got my copy of Baked I couldn't wait to decide what to make first. So many incredible sounding and looking recipes, so little time. Since time was something I didn't have a lot of, but just had to make something right then, I decided to go for the Millionaire Shortbread. Now, I'm not saying this recipe was instant gratification, because you do have a couple hours of chilling, but it was worth it. After reading the review over at Serious Eats, they sounded fun, not too difficult, and interesting.

Mainly I was intrigued by the idea of being able to make Dulce de Leche in your microwave. DDL in under 30 minutes instead of several hours sounded pretty awesome to me. I ended up overcooking mine a bit, but overall these cookies were still really incredible. They are described as gourmet Twix candy bars and I'd have to say that is probably a pretty accurate description - except these are so much better!

Photobucket


Millionaire's Shortbread
- makes 24 bars
(- Adapted from Baked: New Frontiers in Baking by Matt Lewis and Renato Poliafito)

Shortbread:
1/2 cup sugar
1 1/4 cups (2 1/2 sticks) unsalted butter, softened
2 /12 cups all-purpose flour
1 large egg yolk, slightly beaten

Caramel filling:
28 ounces sweetened condensed milk (two 14-ounce cans)

Chocolate glaze:
6 ounces dark chocolate (60% cacao), coarsely chopped
1 teaspoon light corn syrup
1/2 cup (1 stick) unsalted butter, softened, cut into cubes

For the shortbread:
1. Preheat the oven to 350°F. butter the bottom and sides of aa 9-by-13-inch baking pan.
2. In the bowl of an electric mixer fitted with the paddle attachment, beat the sugar and butter together until blended.
3. Add 2 cups of the flour and beat until well combined. Add the egg yolk and beat for a few seconds, or until just combined.
4. Turn the dough out onto a lightly floured work surface. Dust the top of the dough and your hands with a little flour. Use your hands to gently work the dough into a 6-by-6-inch square. You will have to turn the dough and sprinkle the top with flour as you go. Sprinkle the remaining 1/2 cup flour on the surface of the dough. Fold the dough over and knead until incorporated, then flatten the dough into a rectangle. Transfer the rectangle to the prepared pan and press it into the pan.
5. Prick the dough all over with a fork and bake in the center of the oven for 20 to 22 minutes, until golden brown. Transfer to a wire rack and let cool completely.

For the caramel filling:
1. Put the sweetened condensed milk in a large microwave-safe bowl. Cook on 50 percent power (medium) for 4 minutes, stirring briskly halfway through, until smooth.
2. Cook on 30 percent power (medium-low) for 12 to 18 minutes, until very thick and caramel colored, stirring briskly every 2 minutes, until smooth.
3. Pour the caramel filling over the cooled shortbread and place the pan in the refrigerator until cool, about two hours.

For the chocolate glaze:
1. In a large nonreactive metal bowl, combine the chocolate, corn syrup, and butter. Set the bowl over a saucepan of simmering water and cook, stirring with a rubber spatula, until the mixture is completely smooth. Remove the bowl from the pan and stir for 30 seconds to cool slightly. Pour the mixture over the chilled caramel layer and use an offset spatula to spread it into an even layer.
2. Put in the refrigerator for 1 hour, or until the glaze hardens.
3. Remove the pan from the refrigerator 30 minutes before serving so as not to crack the chocolate glaze. Cut into squares and serve.
4. The bars can be stored in the refrigerator, tightly covered, for up to 4 days.

Tuesday, February 24, 2009

TWD: Caramel Crunch Bars - Two Ways

Photobucket

For Tuesdays with Dorie this week Whitney of What's Left on the Table? chose the Caramel Crunch Bars.  I have had this one bookmarked since I got the book, but just never got around to making it.   Before I get into all that though, I just wanted to wish everyone a Happy Mardi Gras today!  I will be making a New Orleans inspired dinner tonight, complete (hopefully) with a homemade King Cake (barring any disasters throughout the day that is).  At least if I don't get to make the King Cake, our friends can still munch on some of these delicious bars.

I know now that I will make this many more times.  It was easy and delicious.  It lends itself to lots of interpretation as you can see above.  The cookie base is buttery, with a dark, caramel-like flavor from the brown sugar.  I used good milk chocolate for my finely chopped chocolate in the cookie base and for the chocolate / toffee bit version above I used bittersweet chocolate and some milk chocolate on top (since the only toffee bits I could find were actually more like just broken up Heath candy bars instead of just the toffee).

Photobucket

In the future, I will probably just make some toffee with nuts myself since I think that is way I would have really, really loved this.  Also, though the original recipe calls for espresso powder in the cookie base, since I don't have any of that and never do, rather than leave it out, I decided to grind up about a teaspoon of cocoa nibs in a spice grinder and substitute that.  I scored some of the new cocoa nibs that local Utah Chocolatier, Art Pollard, is making over at Amano Artisan Chocolate. I love their chocolates and the fact that they are right here in our little State, so it was an extra special treat to use them.  They have several different varieties, but for my first go around I decided to use the Ocumare.

Photobucket

For my ice cream filled variation on the caramel crunch bars I topped the cookie base with white chocolate and then sprinkled it with some of the cocoa nibs.  After the cookies were all set I sandwiched two cookies each with some Strawberry Sour Cream Ice Cream I made (I will be posting that recipe soon - promise!  It comes from The Perfect Scoop by David Lebovitz). The ice cream was simple and so fun to make.  It was dreamy and refreshing to eat too and I know I will be making it again in the future.

Photobucket

Be sure to check out the Tuesdays with Dorie blogroll to see everyone else's creations this week.  I am sure there are insane amounts of chocolate-y goodness running around out there to enjoy.  I am just grateful that I will still have a couple of these to nibble on while viewing.

Saturday, November 29, 2008

Daring Bakers in November - Caramel Cake


Photobucket


The Daring Bakers' Challenge for November was to recreate Shuna Fish Lydon's (of Eggbeater) signature caramel cake. I was really excited because I have been looking for a good recipe for a caramel frosting and cake. While I enjoyed making this (even the dangers of making the caramel syrup) I knew that, even though I do love my sugar, that this was going to be borderline too sweet for me. The cake was dense, moist and delicious and the frosting was creamy, buttery and had a wonderful caramel / vanilla taste to it. For the vanilla in my frosting I ended up using vanilla bean paste. Both were fantastic, but I think I would like the frosting on a dark chocolate cake or something to offset the sweetness instead.

Photobucket


Thanks go out to our hosts this month Dolores of Chronicles in Culinary Curiosity, Jenny of Foray into Food and Alex of Blondie and Brownie, as well as Shuna of Eggbeater for the recipe and support of the groups efforts with graciously allowing us to use her recipe and taking questions, and Natalie from Gluten-a-Go-Go for helping with all the alternative baking questions.

Check out the Daring Bakers blogroll to see all the amazing caramelized sugary goodness this month!

Photobucket


CARAMEL CAKE WITH CARAMELIZED BUTTER FROSTING

10 Tablespoons unsalted butter at room temperature
1 1/4 Cups granulated sugar
1/2 teaspoon kosher salt
1/3 Cup Caramel Syrup (see recipe below)
2 each eggs, at room temperature
splash vanilla extract
2 Cups all-purpose flour
1/2 teaspoon baking powder
1 cup milk, at room temperature

Preheat oven to 350F

Butter one tall (2 – 2.5 inch deep) 9-inch cake pan.

In the bowl of a stand mixer fitted with a paddle attachment, cream butter until smooth. Add sugar and salt & cream until light and fluffy.

Slowly pour room temperature caramel syrup into bowl. Scrape down bowl and increase speed. Add eggs/vanilla extract a little at a time, mixing well after each addition. Scrape down bowl again, beat mixture until light and uniform.

Sift flour and baking powder. Turn mixer to lowest speed, and add one third of the dry ingredients. When incorporated, add half of the milk, a little at a time. Add another third of the dry ingredients, then the other half of the milk and finish with the dry ingredients. {This is called the dry, wet, dry, wet, dry method in cake making. It is often employed when there is a high proportion of liquid in the batter.}

Take off mixer and by hand, use a spatula to do a few last folds, making sure batter is uniform. Turn batter into prepared cake pan.Place cake pan on cookie sheet or 1/2 sheet pan. Set first timer for 30 minutes, rotate pan and set timer for another 15-20 minutes. Your own oven will set the pace. Bake until sides pull away from the pan and skewer inserted in middle comes out clean. Cool cake completely before icing it. Cake will keep for three days outside of the refrigerator.

CARAMEL SYRUP

2 cups sugar
1/2 cup water
1 cup water (for "stopping" the caramelization process)

In a small stainless steel saucepan, with tall sides, mix water and sugar until mixture feels like wet sand. Brush down any stray sugar crystals with wet pastry brush. Turn on heat to highest flame. Cook until smoking slightly: dark amber.

When color is achieved, very carefully pour in one cup of water. Caramel will jump and sputter about! It is very dangerous, so have long sleeves on and be prepared to step back.Whisk over medium heat until it has reduced slightly and feels sticky between two fingers. {Obviously wait for it to cool on a spoon before touching it.}Note: For safety reasons, have ready a bowl of ice water to plunge your hands into if any caramel should land on your skin.

CARAMELIZED BUTTER FROSTING

12 tablespoons unsalted butter
1 pound confectioner’s sugar, sifted
4-6 tablespoons heavy cream
2 teaspoons vanilla extract
2-4 tablespoons caramel syrup
Kosher or sea salt to taste

Cook butter until brown. Pour through a fine meshed sieve into a heatproof bowl, set aside to cool.

Pour cooled brown butter into mixer bowl.

In a stand mixer fitted with a paddle or whisk attachment, add confectioner's sugar a little at a time. When mixture looks too chunky to take any more, add a bit of cream and or caramel syrup. Repeat until mixture looks smooth and all confectioner's sugar has been incorporated. Add salt to taste.

Note: Caramelized butter frosting will keep in fridge for up to a month.To smooth out from cold, microwave a bit, then mix with paddle attachment until smooth and light

(recipes above courtesy of Shuna Fish Lydon)


Photobucket

Monday, March 17, 2008

Dulce de Leche Fever

Photobucket

So, this post is really all about what others have been up to. I have been making some really good food from my friend Melanie’s blog, My Kitchen Café. I didn’t get to post about this chicken recipe, but I can tell you that it was delicious. I have also made her French Bread Rolls twice now and they are sooo good! I have also been wanting to make some Dulce de Leche for quite a while. I just hadn’t gotten around to it. Even after I found the recipe used here (on David Lebowitz's site) I still didn't get around to it. Then, I read this post over at Smitten Kitchen, and I knew I was going to have to remedy the lack of Dulce de Leche in our house. You see, sometimes (ok, fine, OFTEN) I become fixated on a technique or recipe and I can't stop thinking about it until I do it. So, thanks to other people's blogs, this fixation is fixed.


Photobucket

Now that I have tried David Lebowitz method I don’t know why anyone would go without having it on hand. Why do I mention both Melanie’s French Bread Rolls and David’s Dulce de Leche? Well, because David mentioned that he liked to just spread the milky caramel onto some French bread. I really wanted to try this, and while I fully intend to make Julia Child's French Bread recipe again, I just didn't have time since it was 6 pm on Saturday night when this all started. Luckily for me, there is more Dulce de Leche in the refrigerator.


Photobucket

I highly recommend trying these recipes out. The rolls are worthy of gracing any table, especially for the holidays, and are so beautifully easy to make. The Dulce de Leche is nothing short of divine and I can’t wait to find other ways to use it. I have a few ideas, so stay tuned. In the meantime, you should visit both Melanie's site and David's site for these recipes and to see all the other lovely posts they have.

Tuesday, March 4, 2008

Pancake Love - Aebelskivers & Buttermilk Caramel Sauce

Photobucket

A few years ago some good friends of ours introduced us to these little round wonders. As an alternative to regular pancakes these are light, puffy and fun to make. They really aren't any more difficult to make either. Besides the opportunity to get creative with just about any kind of filling you can dream up makes a nice way to have a little fun or dress up breakfast for someone you love.

A little history about the Aebelskiver can be found here, and here as well as another recipe here that is sweeter than the version I have below. Once you add the buttermilk caramel syrup we always serve with ours though you definately don't need a lot of sugar in the batter.

Photobucket

Aebelskivers

2 cups flour
1 teaspoon baking soda
1/2 teaspoon salt
3 eggs, separated
2 cups buttermilk
oil for the pan

Heat the aebelskiver pan over medium-high heat.

Photobucket

Place together the flour, baking soda and salt in one bowl and whisk together to combine. In another bowl whisk together the buttermilk and egg yolks.

Photobucket

Whisk the egg whites to soft peaks.

Photobucket

Pour the buttermilk over the flour mixture and stir just enough to combine.

Photobucket

Fold the egg whites into the mixture gently.

Photobucket

Place about 1/2 teaspoon oil into each cup of the pan and heat.

Photobucket

Test a little bit of batter in the oil. It should start bubbling immediately if the oil is hot enough. Scoop about 1/8 cup of batter into each cup.

Photobucket

Allow the batter to brown and using a fork or a couple of skewers to roll the ball over to brown the other side. Remove from oil onto a plate with some paper towels.

Photobucket

Serve hot with the syrup.

Photobucket


Buttermilk Caramel Sauce

1 cup sugar
1/2 cup buttermilk
1/2 cup butter
1 teaspoon light corn syrup
1/2 teaspoon baking soda
1 teaspoon vanilla


Place all ingredients, except the vanilla, into a medium saucepan over medium heat.

Photobucket

Stir together and bring to boil. Allow to boil 5 minutes.

Photobucket

Stir in the vanilla, off the heat. Serve warm.

Photobucket

For the filled pancakes:

Photobucket

My favorite variation is chocolate or strawberry jam. After pouring the batter into the pan, place a small amount of chocolate or your favorite jam in the center, try to push it down enough so that it is in the center of the ball. Cover the filling with a little bit of batter to cover it.

Photobucket

Blog Widget by LinkWithin