PheMomenon has moved!

You should be automatically redirected in 5 seconds.

If not, please visit http://www.phemomenon.com and update your bookmarks and RSS feed.

Showing posts with label cupcakes. Show all posts

Monday, October 25, 2010

Self-Frosting Pumpkin Nutella Muffins


Sometimes, in the middle of the night, when I'm only half awake, I get these ideas for things that I want to bake.  Often, by morning, I can't remember what it was.  Sometimes it comes to me again, but other times it is imprinted in my brain to the point of obsession.

I openly blame Maria and Katie for my latest episode.

I've had pumpkin on the brain.  And Nutella.  And ways to use both.  That is Maria's fault with her Pumpkin Nutella Bread.

Then, add on the fact that Katie seems to be eerily reading my mind lately and making it so I don't have to figure out how to make a Pumpkin White Hot Chocolate to sub for that infamous Pumpkin Spice Latte that I won't be drinking (no coffee for this girl) and, well, then you can see easily why I have pumpkin on my mind.


I had thought I took care of at least the Nutella issue the other day with these little cakes (Visitandine) I made for Dorie's birthday party, but apparently not.

So, these muffins were born.  The self-frosting technique isn't a new one.  In fact, thanks to Nic at Baking Bites (who I believe was the first to post Donna Hay's Self-Frosting Cupcake recipe about five years ago) this idea took the food blogosphere by storm.  I felt like it deserved a definite revisit.


This recipe came about from some serious tweaking to my favorite Banana Muffin recipe (which, incidentally works with the Nutella on top as well if you aren't a pumpkin fan).  I love this recipe dearly and end up making them about once a week whenever our bananas have outlived their eating out of hand shelf life.  And, yes.  I usually buy enough bananas to make sure that happens!

Self-Frosting Pumpkin Nutella Muffins

1 - 15 oz can pure pumpkin puree (not pie filling)
1/2 cup vegetable oil
2 large eggs
1 tablespoon pure vanilla
1/4 cup light brown sugar, packed
1/4 cup sugar
2 cups all-purpose flour
1 1/2 teaspoons ground cinnamon
1/2 teaspoon ground ginger
1/4 teaspoon freshly grated nutmeg
1 teaspoon baking powder
1/2 teaspoon baking soda
1/2 teaspoon salt
2 teaspoons natural (not Dutch) cocoa powder

12 heaping teaspoons Nutella for topping

Preheat oven to 375 degrees F.  Line or spray a 12-cup muffin pan, set aside.

In a large bowl, whisk together the flour, cinnamon, ginger, nutmeg, sugar, baking powder, baking soda, salt and cocoa powder.  Set aside.

In a small bowl, whisk together the pumpkin puree, oil, eggs, vanilla and brown sugar.  Pour the wet ingredients over the dry ingredients and whisk to combine.

Scoop the batter into the prepared muffin cups evenly (will be about 3/4 full).  Scoop a heaping teaspoon of Nutella onto the top of each muffin.  Use a toothpick or skewer to swirl the Nutella slightly around the top of the batter.

Bake the cupcakes for 25 to 30 minutes or until a skewer comes out clean.

Serve warm or at room temperature.  Store in an airtight container.

Sunday, September 5, 2010

Edible Imagination: Alice in Wonderland - Wacky Cupcakes + September's Book!

Photobucket


Sorry for the delay in when I thought I would get this posted! Cole and Kayla have been sick this week as well as about a million and one other things that all seemed to converge on us at once.  We finished the Alice in Wonderland book several days ago for our first round of the Edible Imagination, but Aidan couldn't decide what he wanted to make inspired by the story.  By the time he did, the kids were sick and thus the delay.

Before I get to much more into our review though, if you joined in the fun with Alice in Wonderland, please be sure to leave a comment with a link to your review post in the comments of this post - I can't wait to see what you came up with!

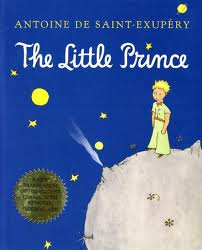
Also, if you would like to join in with us for September, this month we have decided to read The Little Prince - I really hope you'll join in the fun! We will make something and post it toward the end of September/beginning of October so there is still plenty of time to read along.


Back to Alice...

Our discussions about what to make that the book inspired us with went from the simple to the complicated and creative, but with how the rest of this week shook out we decided to keep it simple.

There were plenty of ideas to choose from though that we had a lot of fun thinking of ways to go.  Tea cakes, tarts, and of course we could have gone the tea party route, but for some reason my totally boyish boy wasn't so in to that idea.  :)

We did consider tarts for the Queen of Hearts, but the boys wanted to make cake.  Cupcakes to be exact.
We decided, that since there was so much nonsense and wackiness in Alice in Wonderland that we would try making Wacky Cake (see an explanation of Wacky Cake below, by the recipe).  Originally we wanted to make a small rectangle cake with poured fondant and put a little note on it that said, "Eat Me" in honor of the book.  To be honest, I just couldn't get my act together enough to ever get the cake made and deal with trying to make the poured fondant.

Rather than keep waiting, we decided to just make the Wacky Cake into Wacky Cupcakes that could be served at a tea party and that are about the simplest, easiest and most fun cake that a kid could make almost entirely by themselves.

We frosted the cupcakes with a simple Caramel Cream Cheese Buttercream which ended up being insanely delicious, due in no small part I'm sure to the use of my Caramel Topping from Le Caramel.  I've never been enough of a fan of frosting to say I could just eat a frosting shot, but let me tell you, this frosting could change my mind!

As for our thoughts on the book, here is the run down from the boys and myself.

THE REVIEW

What Aidan (7YO) had to say:
Favorite Part: I liked that fake turtle and the dance. That was funny. (Referring to the Mock Turtle and the Griffin and the Lobster Quadrille toward the end).
Favorite Character: The Mad Hatter (said with an maniacal laugh - I really ought to video these reviews, it is quite funny)
Overall Opinion: It was weird. Good weird. I liked it. 

What Cole (almost 3YO) had to say - sort of:
Favorite Part:  All he focused on the entire book was when I made piggy snorting and squealing noises when Alice had the pig baby she took from the Duchess's house.  As soon as we would start reading every night Cole would just climb all over me and say, "Piggy says SNORT SNORT"  - I really should record this because it wasn't actually him saying 'snort' so much as him trying to snort over and over.  It is ridiculously cute and funny.

What Holly (aka Mommy) had to say:
Favorite Part:  I think I actually liked the trial at the end the best.  It kind of tied together the entire bits of nonsense through the book for me.
Favorite Character: Alice herself. She was actually an interesting and clever girl in a crazy situation with a lot of imagination.
Overall Opinion:  Overall, I liked the whole book.  I was pleasantly surprised that I liked it at all.  I never liked the Disney movie - I always thought it was weird and creepy, and not in a good way.  I never enjoyed it for the nonsense it was because I could never get past all the craziness.  I don't know if I'm just able to enjoy the nonsense more for what it is now or if I'm just old enough to see the nonsense in the Queen of Heart's constant threats. I always felt like the story was too crazy for me.  

Photobucket


The boys mixed the cupcake batter almost entirely by themselves.  I collected the ingredients and helped with some of the measuring while we talked about it.  They used a scoop to measure and scoop the batter in the cupcake liners.  They were also able to put all the ingredients for the frosting into the mixing bowl with very little help.  We just scooped the frosting into a big ziptop plastic bag with a plain round tip and squeezed it straight onto the cupcakes.  The boys helped with the scooping and I helped guide with the squeezing.  We didn't really feel like getting crazy with the decorating, but you could add more to gussy these cupcakes up pretty easily.

Here is what the Food Timeline has to say about the origins of Wacky Cake.


Wacky cake is an interesting study in culinary chemistry. What sets modern Wacky Cake apart from other chocolate cakes? Vinegar and method. WWI-era Dump Cakes likely provided inspiration. They do not, however, include vinegar. Depression-era Crazy cakes feature cocoa, baking soda & baking powder. No vinegar. In sum, recipes with these names vary greatly according to place and period. The connecting culinary threads are innovation, efficiency, and deliciousness.
It is interesting to note that two popular 20th century American food history books (Jean Anderson's American Century Cookbook and Sylvia Lovegren's Fashionable Food) place this recipe in the 1970s. Culinary evidence confirms this recipe existed in the 1940s. Wacky cake is but one example of the tradition of "make do" cakes that were popular during times of short supply. Contrary to popular opinion, eggless, butterless cakes were not invented at that time, they were revived from WWI days (which were revived from pioneer days). Dump Cake is another descendant of Wacky Cake in method.


Wacky Cupcakes

Adapted from recipe by Nancy Shay and Cook’s Country

1 1/2  cups all-purpose flour
3/4     cup sugar
1/4     cup natural cocoa powder
3/4     teaspoon baking soda
1/2     teaspoon table salt
5     tablespoons vegetable oil
1     tablespoon distilled white vinegar
1     teaspoon vanilla extract
1     cup water

Center the rack in your oven and preheat to 350 degrees F. Line one muffin tin with cupcake liners or grease the pan or use paper souffle cups, also lightly sprayed.

In a medium bowl, whisk together the flour, sugar, cocoa, baking soda, and salt.  

Push 1 large crater and 2 smaller craters into the dry ingredients to make holes to pour in the wet ingredients - the kids loved this part.  

Add the oil to the largest crater, then the vinegar and vanilla separately to the smaller craters. Pour the water into the bowl, and using a spoon or spatula (or whisk gently) mix the ingredients until just a few streaks of flour remain and it is mostly smooth. 

Fill the cupcakes just 2/3 full. Bake the cupcakes 16 to 18 minutes until they are set and a toothpick comes out mostly clean.  The recipe makes about 12 cupcakes.

Caramel Cream Cheese Frosting
Recipe from PheMOMenon

8 oz cream cheese, softened slightly
1 stick (1/2 cup or 8 tablespoons) unsalted butter, softened to room temperature
2 cups confectioners' sugar
1/2 cup good caramel topping (I used Le Caramel)
1 teaspoon pure vanilla extract

Place all ingredients in a mixing bowl or stand mixer and beat, start on low so that you don't have sugar flying everywhere then turn up the speed and beat well until light and fluffy.  Pipe or scoop a large dollop of frosting on each cupcake.  Keep cupcakes refrigerated in an airtight container.  They are great cold as well as at room temperature.


Photobucket

Tuesday, February 2, 2010

TWD: Milk Chocolate Cupcakes


Although this week's Tuesdays with Dorie recipe is technically for Milk Chocolate Mini Bundt Cakes (as chosen by Kristin at I'm Right About Everything) I didn't have the right pan and really can't purchase another pan right now (I'm pretty sure my husband would consider some sort of mayhem at this point if I try to bring anything else into our kitchen).

I instead just tried to make the batter into cupcakes, which worked fine with just a little bit of sinking in the middle of the cakes. I also chose to just dust them with a little powdered sugar and keep things simple for serving.

The only other change I made to the original recipe was to follow Dorie's directions in the Playing Around section for using buttermilk in the batter. The flavor of these cakes was really quite light and delicate without too much of an overwhelmingly chocolatey flavor at all. In fact, I was reminded most of the flavor of most red velvet cakes I've had which don't have too much of a pronounced flavor either - somewhere in between chocolate and vanilla. They were tender and we enjoyed them, but they weren't really a favorite of ours. I imagine with the addition of the nut swirl and the chocolate glaze they have more flavor too them.

Be sure to check in with the rest of the TWD Bakers to see what this recipe looks like without all the fiddling!

Tuesday, January 5, 2010

TWD: 2nd Anniversary - Cocoa Buttermilk Cupcakes & Happy 2nd Blogiversary to Me!


Today marks the Second Anniversary post of Tuesdays with Dorie! I can't believe how far we've come! Thank you to Laurie for creating the group and to Dorie for her support and expertise - I know I'm not alone when I say that this group has been life changing and so much fun!

I also find it hard to believe that Monday (January 4th) marked my 2nd Blogiversary here at PheMOMenon! It has been a fun and wild ride, that is for sure! With this current pregnancy and trying to play catch up from the holidays, I have to admit I am still a bit behind, but I do have some fun ideas and things in mind for the coming year. I can't say it enough, so thank you, thank you, thank you, thank you to all my friends and readers for coming here in the first place and giving me a 'home' to express myself and enjoy all your amazing like-minded company - you all ROCK my world!

I've said it many, many times over the course of my TWD membership (almost the full two-years, but not quite) and I really do believe that Baking From My Home To Yours is hands down THE BEST baking book out there. If you like to bake even a little, you absolutely shouldn't be without this book! (And I really can't wait until this coming Fall when Dorie's new book Around the French Table comes out!!!!)

For the anniversary recipe, Laurie has kindly hosted and you can find the original recipes there. The group voted on a few choices, but the winners of the vote were for the Cocoa Buttermilk Birthday Cake and the Tarte Tatin. I chose to make a half batch of the Cocoa Buttermilk cake and turn them into cupcakes, which gave me a bakers' dozen.

Rather than make the malted chocolate frosting though, I opted to just do a thick whipped cream flavored liberally with cocoa powder, a little vanilla and plenty of confectioners' sugar - a concoction which happens to be one of my favorite simple frostings and fillings for chocolate cake. Incidentally, I found that I needed to bake my cupcakes almost as long as I would have needed to bake the cake layers. The cake itself had a nice chocolatey flavor. While not my favorite chocolate cake recipe, it was still delicious and easy.

Happy Anniversary fellow TWD Bakers!


Cocoa Whipped Frosting
Recipe by PheMom (adapted from a family friend)

1 1/2 cups cold heavy whipping cream
4 Tablespoons unsweetened cocoa powder
1 cup confectioners' sugar
1/2 teaspoon pure vanilla extract

Combine all ingredients in a medium bowl and beat thoroughly until smooth and very thick and spreadable - texture will start to become almost buttery. Spread onto cupcakes or use as layer cake filling. Yields about 3 cups frosting. Keep chilled until serving.

Sunday, October 25, 2009

SMS: Devil's Food Cake (Cupcakes) with Peanut Butter Frosting


Happy October to all! This is one of our favorite months around our house - Fall is in full swing, Cole has just had his birthday (turned 2) and as far as Aidan is concerned the entire month should be all about Halloween. The fact that is was Cole's birthday is the reason I chose the Devil's Food Cake with Peanut Butter Frosting for my recipe choice for Sweet Melissa Sundays!

I made a scaled down version of the recipe to come up with 12 cupcakes - mainly just because since we were doing Cole's birthday celebration with just the four of us, there was really no reason to have a full sized big cake. I hadn't really read the recipe all the way through when I made the selection and hadn't realized first, what a big cake it would make, and second, the incredible amount of butter called for to make the peanut butter frosting (which was really much more of a buttercream frosting with a light peanut butter flavor). I know that some SMS Bakers scaled down the amount of butter significantly and increased the peanut butter flavor - personally, I felt I should try to stay as close to the original as possible, for the sake of trying it first, but in the future I will definitely increase the amount of peanut butter since the flavor was very subtle and I would have liked it even more featured just a bit more prominently.


All that said, the birthday boy, his big brother, and his papa and myself, were all very happy with these cupcakes and really enjoyed them. Perhaps my favorite thing about them was the fact that they were even better the next (and the next) day - which is how long it took us to work through our dozen cupcakes. I hate to admit that most of that dozen was still eaten by me!

While I have managed to make a couple of the recipes for Sweet Melissa Sundays since this crazy thing called pregnancy started back in June, I swear, managing to post anything has been a bit ridiculous around here. I'm not entirely sure why, and I'm going to attempt to do better since I am getting more and more (and more behind)! Present count is that I have at least 16 items ready to write up and post, pictures and all - but can't seem to get my act together. So, my point is, I wanted to send out an extra huge thank you to the other SMS Bakers for baking with me this week and for continuing to stop by during my craziness and to all my loyal readers for visiting when I do get my rear in gear, so to speak.

I have included the original recipe below, but if anyone is interested, I did keep track of the conversions I actually used to take the recipe down to a dozen cupcakes (the math was a bit crazy) and can share that recipe as well.


Devil’s Food Cake with Peanut Butter Frosting

from The Sweet Melissa Baking Book

Makes one 9” cake

For the Cake:
6 oz best-quality unsweetened chocolate, coarsely shopped
2/3 cup vegetable or canola oil
2 2/3 cup sugar
1 2/3 cup all-purpose flour
1/3 cup best-quality unsweetened cocoa powder
1 tsp baking soda
¾ tsp kosher salt
2/3 cup sour cream
3 large eggs
1 1/3 cups hot strong brewed coffee (I just used hot water)

For the Peanut Butter Frosting:

1 pound confectioner’s sugar, sifted
1 ½ pounds unsalted butter, softened
2 tsp pure vanilla extract
3 Tbsp whole milk
½ cup smooth peanut butter, at room temperature

Position a rack in the center of your oven. Preheat the oven to 350. Butter and flour two 9×2-inch round cake pans, Line each pan with a 9-inch round of parchment paper.

To Make the Cake
1. In the top of a double boiler set over simmering, not boiling, water, melt the chocolate, stirring occasionally. When the chocolate is completely melted, whicsk in the vegetableoil until smooth. Remove from the heat, but keep warm over the hot water.

2. In the bowl, of an electric mixer fitted with the paddle attachment, combine the sugar, flour, cocoa powder, baking soda, and salt, and mix well.

3. In a separate bowl, whisk together the sour cream and eggs until smooth.

4. Add the egg mixture to the flour mixture, and mix until combined. Be sure to scrape down the sides of the bowl. Add the melted chocolate mixture and mix until combined. add the hot coffee (or water) in a stream, and mix until combined. (Again, scrape down the sides and bottom of the bowl.) The batter will be loose.

5. Divide the batter evenly between the prepared cake pans. Bake for 35 to 40 minutes, or until a wooden skewer inserted into the center comes out clean. Remove to a wire rack to cool in the pans for 25 minutes before turning out the layers onto the rack. Cool completely before finishing.

The baked layers may be stored tightly wrapped in plastic wrap at room temperature for 2 days. For longer storage, wrap tightly in plastic wrap and refrigerate for up to 5 days, or freeze wrapped in plastic wrap and them aluminum foil for up to 2 weeks. Do not unwrap before thawing.

To Make the Frosting
1. In the bowl of an electric mixer fitted with the paddle attachment, combine the confectioner’s sugar, butter, vanilla, and milk, and beat until light and fluffy, 2 to 3 minutes.

2. Add the peanut butter and mix until combined. Use the frosting immediately, if possible. It may be stored in an airtight container at room temperature overnight, or in the refrigerator for up to 4 days. Let the frosting come to room temperature and briefly rebeat it in the mixer before using.

Thursday, June 25, 2009

Tweet Up Party and Sweet Tooth Fairy CUPCAKES!

Sweet Tooth Fairy Cupcake Flavors Shown:
Double Chocolate Fudge, Chocolate Peanut Butter, Black & White, Key Lime,
Chocolate Vanilla, Toasted Coconut, Red Velvet, Orange, Strawberry Shortcake

This past Tuesday night I was lucky enough to have a really great friend who was willing to watch the boys for me while I trekked on down to Orem for a preview of the catering we will be having at the upcoming Moms Who Make It Conference - being held July 16 at Noah's in South Jordan - more about the catering soon!

Just after the catering taste testing at Utah Celebrations Catering, we headed down to the Sweet Tooth Fairy in Provo. It is this adorable, comfy and yet chic bakeshop where they make cookies, cake bites, brownies, wedding cakes, and of course, cupcakes! In fact, they were even featured on Rachael Ray. All the gorgeous creations you see above were goodies that were provided for all the moms who attended this fun mom's night out. Lucky, lucky us!


This little get together was, of course, to help promote the conference and tell more Moms all about it. We ate cupcakes, we talked, we shared stories, we laughed, we sympathized, we tweeted, and most importantly we all heard more about the inspiration behind the upcoming conference - which is basically how to be empowered and inspired to take the hard things that come our way in life, and not let them define who we are.

Among those in attendance were @jylMomIF, @emihill, @evonnesell, @ajpassey,
@petit_elefant, @inevergrewup, @keepingupwmom, @sweetlifeinthe, @momswhomakeit, and of course the genius behind the event, Quinn @createdbymom as well as her product manager, Crystal. Needless to say, with this group of incredible gals, it was a blast and I was so glad I made it!

This conference really isn't to be missed, and since the organizers were savvy enough to break it up into portions, for those of you that can't make it to the entire day, you can still at least join in for a part of it (though, if at all possible, you should take the day for yourself - your family will be better for it).


It's Nie Nie's Birthday!
Get Your VaNIElla Squared cupcakes!
This Saturday, June 27


The cupcakes were heavenly and so is Megan, owner of the Sweet Tooth Fairy. In fact, if you live in Utah anywhere even remotely near Provo - then you really should go to their shop this Saturday and buy yourself some cupcakes - especially the VaNIElla ones. (Actually, they ship, so order some cupcakes!)

That name isn't a typo either. This Saturday is the one and only Nie Nie's birthday and to celebrate the Sweet Tooth Fairy is donating ALL PROCEEDS from sales of their renamed vanilla cupcakes - Nie Nie's favorite - to her family and the Arizona Burn Center. If you haven't ever read the NieNie dialogues, then you really should. When I grow up, I want to be as inspiring and wonderful as NieNie.


Obviously, this cupcake was mine - you'll have to get your own!

Stay tuned for details on another Tweet Up Party
to be held in Salt Lake County on Tuesday, June 30th!

Wednesday, March 25, 2009

Carrot Cake Cupcakes


Until very recently I had never really liked carrot cake.  I'm not a big fan of cakes that are 'loaded' to the brim with stuff and most carrot cakes are just way too busy for me with all the carrots, nuts, pineapple, coconut, etc. in there. 

Then there are these cupcakes.  Simple, not overloaded and, in a word, heavenly.  If there is a simpler recipe, I don't know what it would be.  These are cupcakes that are mixed in one bowl really, and by hand.  The most high-tech thing that has to be done is to shred a couple of carrots.  In fact, other than some spice, the carrots, and the usual suspects, there aren't any other embellishments in this recipe.  And it doesn't need it.  


Don't get me wrong, you could certainly toss some toasted nuts in, or add some other stuff to it if you want, but you don't have to.  Which is really nice.   The frosting is the perfect embellishment with the cream cheese, some orange zest and vanilla bean paste - I just dearly love the orange / vanilla combo.  I also added just a little bit of heavy cream to my frosting to get a more flowing frosting that was somewhere between a thick frosting and an extra thick glaze.  These cupcakes are great with a few broken pieces of lightly toasted walnuts or pecans on top too.

The first time I made these cupcakes was for my husband's birthday.  He is rather hard to please in the dessert department, and especially with cake.  I did know that he liked carrot cake though.  I literally threw these together while dinner was cooking.  They were mixed, baked, cooled, frosted and eaten within about 45 minutes.  That, in my opinion, is my kind of dessert. 


Carrot Cake Cupcakes
Adapted from Martha Stewart

1 1/2 cups all-purpose flour
1 teaspoon baking powder
1/2 teaspoon baking soda
3/4 teaspoon salt
1/2 teaspoon ground cinnamon
1/4 teaspoon ground ginger
1/4 teaspoon freshly grated nutmeg
3/4 cup (1 1/2 sticks) unsalted butter, melted
1 cup firmly packed dark brown sugar
1 large egg
2 Tablespoons sour cream
1 teaspoon pure vanilla extract
1 1/2 cups grated carrots (about 4 medium carrots)

Frosting:
1 8-oz. package cream cheese, room temperature
1/4 cup (1/2 stick) unsalted butter, room temperature
1 cup powdered confectioners' sugar
2 teaspoons vanilla bean paste (or 1 1/2 teaspoons pure vanilla extract)
Finely grated zest of one orange
1 - 2 Tablespoons heavy cream (optional)

Preheat oven to 375 degrees F.  Line a 12-cup standard muffin tin with paper liners.

In a large bowl whisk together all the dry ingredients and set aside.

In another large bowl whisk together the remaining ingredients, except for the carrots. Combine well, then stir in the grated carrots.  Gradually add the dry ingredients to the butter mixture and stir until well combined.  

Divide between the 12 lined cups (they will be about 3/4 full).  Bake for 25 to 30 minutes, rotating the pan halfway through, and bake until a toothpick inserted in the center comes out clean.  Remove from the pan to a wire rack to cool completely before frosting.  

To make the frosting, use an electric mixer to beat the ingredients together.  For a slightly thinner, glaze-like frosting, add 1 to 2 tablespoons of cream and stir into the mixture to get the consistency you want (as shown) - without the cream the frosting will just be thicker.  Top each cupcake with about 2 tablespoons of frosting and serve.

Optional:  These cupcakes are great topped with some lightly toasted pecans or walnuts.

Tuesday, January 20, 2009

TWD: Berry Surprise Cupcakes

Photobucket

The Sugar:  These little cakes were fun to make and very pretty and tasty, which is always a plus.  They made me think of summer, and that is always a nice memory in the middle of winter.

The Snark:  Notice, I didn't say these little cakes were easy to make.  The two pictured above were the only survivors because I had some really fallen cupcakes that didn't work out at all.  Good thing they were tasty because that will get me to try again.

The Spice:  I was so careful about not over-mixing that I ended up under-mixing my batter, up until the last two cupcakes.  So, while at least I had survivors to take pictures of, I had a lot of failure to contend with as well.  That was my fault though.

Photobucket

I have some great neighbors.  I really do.  One in particular, my neighbor across the street, is so fun and easy to talk to - and vent to - about life, raising our kids, marriage, etc.  I bring this up because it is something that I haven't had in a really long time.  Oh, we've had neighbors, but not that I could really commiserate with about life in general.  I have some friends, that I'm happy to say are still friends, even though we haven't actually been neighbors for going on seven years now.  I value those kinds of relationships that go deeper than just the surface, and, if you are lucky, surprise you along the way.  The best surprises, I think, are sweet ones.  Not only in baking, like these lovely little cupcake versions of this week's recipe, the Berry Surprise Cake, chosen by Mary Ann of Meet Me in the Kitchen, but in relationships.   Speaking of relationships, one of my favorites, is all my fellow Tuesdays with Dorie Gals & Guys.  Be sure to check out the blogroll for all the other amazing variations this week.

The best relationships are a lot like these delicious cupcakes, which, incidentally, I did share with my wonderful neighbor and she loved them.  These cupcakes may be light and airy and uncomplicated on the surface, but they are sturdy and can hold in all the goodness that is inside and keep you going and keep you surprised by that goodness being shared and touching our lives.  Sweet little red berries as that added extra little boost that we sometimes all need.

Photobucket

This may seem silly, but in this case, you could almost say that you could learn a lot about friendship from a cupcake.  I didn't mean to write about this when I started this post, but the fact is that while I was finishing putting these together tonight, I was having a great heart to heart with my neighbor.  It was really nice reaffirm again that, basically, I'm not the only one that is in a situation like mine, and that someone out there understands where I'm coming from.  That is very comforting, especially if you go through life for a long time, surrounded by people and feeling very alone.

I think that is why, that even though the past couple of years have been some of the most difficult times in my life, they have also been the sweetest.  I spent a lot of time alone with my babies, which was both joyful and very lonely, but I have two beautiful, mostly healthy boys who keep me going (and going and going) and are the sweetest reward life has to offer.  When our first boy was born, people used to ask me how I felt about being a mother.  I didn't mean to sound flippant and I hope that people understood that I was completely serious when I would laugh and say that it is by far the best thing I have ever done.  I'm not saying it is for everyone, but even when I feel like my head is going to explode or I'm going to pass out from sheer exhaustion, it is still the very best experience I've ever had.

I don't think I focus on that enough.  I have a tendency to want life to be good, but hone in on the bad too much.  This is something I am working on.  That is something I would say is a good resolution to have.  It is a daily, if not hourly, event and something I have to constantly remind myself of.  Especially when faced with hard times as we are all experiencing.

I wanted to take this opportunity to thank all of you who come here and visit my little blog and leave me comments that are always helpful, funny, cute, creative and supportive.  When I started this blog, I really hoped that I would be able to find my way into this community and get the support and basic human contact I so desperately needed.  I really just don't have enough words to express my gratitude for not only having good neighbors near my house, but having incredible neighbors in this blogging community.  I really couldn't do all this without you.

A huge part of this for me has been Tuesdays with Dorie.  Tuesday is now my favorite day of the week.  I know that even if I fail, I will still get to share the experience and the passion for baking and creating with simple ingredients that we all share.  I know I am gushing, but I just had to share how I'm feeling with you all.  So, thank you, a million times over, for being here and sharing this experience with me.

Tuesday, October 28, 2008

TWD: Chocolate-Chocolate Cupcakes

Photobucket

Clara of I Heart Food4Thought has chosen the Chocolate-Chocolate Cupcakes for this week's Tuesdays with Dorie pick. Clara, I Heart YOU!! No surprise that I've had my eye on this recipe for a while. I mean, seriously. Chocolate. And Chocolate. And Cupcakes. What's not to love? Since it is Halloween this coming Friday, Clara thought it would be fun to decorate our cupcakes for Halloween and I agreed... sort of. So, I was going to try to make some of those little candy pumpkins to go on my cupcakes, but I just ran out of time, had a sick five year old in the house and a migraine to boot. Bottom line, I am just glad I got these made and posted. Anyway, I don't want to whine about the lousy last few days, so let's just focus on the cupcakes shall we? Alrighty then.

Photobucket

Now you may have noticed that my cupcakes don't look like Chocolate-Chocolate since there are Oreos involved. I have been wanting to try making a cookies and cream kind of frosting for a while now. I didn't want to lose the ganache either though, so I decided to fill the cupcakes with the bittersweet ganache Dorie suggests in the sidebar. I then made a cream cheese buttercream with oreo crumbs for the top and an extra oreo treat. This was quite the moist and delicious little combination but...

Photobucket

I actually ate three (yes, I admit, three) of these cupcakes before they had anything done to them at all and they were moist and delicious. I was a bit dubious about how these were going to turn out since there was quite the discussion going on with the P&Q this week on the TWD blog. Lots of dry cupcakes, lots of questioning why. Why? I don't know - but that was the big debate. Mine were fantastic. I decided that where I usually fiddle around with recipes, this time I wouldn't, just so I could see what happened. Here is what I did though, to try to help figure it all out and see if it helps anyone:

- I did the 'scoop and sweep' method Dorie outlines in the back of the book. I then weighed the flour to find out how much it actually was in case worked and the cupcakes were moist. It was a scant 4oz. I used unbleached all-purpose flour.

- I heard/read somewhere once that when making cakes it is always a good idea to let all of your ingredients be at room temperature, so I let them all be pretty close to room temperature. Whether this helped or not I couldn't say for sure, but they were perfect for me, so you be the judge.

- I let the oven preheat and get all the way up to temperature. I set the timer for my cupcakes at 15 minutes. I checked my cupcakes - oven light only at that point - and they still needed time (no surprise) but not too much. I always check a little early because my gas oven runs hot. I didn't bake them more than 20 minutes, which is when a toothpick came out clean for me (clean being, not gooey, but a couple of little crumbs stuck to them).

I think that was pretty much it. They were perfect, moist, chocolately and had a nice and tender crumb. I actually thought it was the best chocolate cake recipe I've had in a while. I really liked the use of both the cocoa and the melted chocolate. It definitely isn't the prettiest picture, but here is a shot of a halved cupcake so you can see the interior crumb. I hope this is helpful to anyone who didn't have such great results.

Photobucket

Cookies & Cream Frosting
5 oz cream cheese, softened
4 Tablespoons unsalted butter, softened
3 cups powdered sugar
1 teaspoon vanilla
3 Tablespoons heavy cream
5 Oreo cookies, processed to crumbs

Beat the cream cheese and butter together until smooth and creamy. Add the powdered sugar, vanilla and cream and beat on low to incorporate. Once mixed together, turn speed to high and beat approximately 3 minutes until light and fluffy. Add the cookie crumbs on low and just mix in lightly. Pipe as desired and sprinkle with additional cookie crumbs if desired.

Make sure to check out the TWD blogroll to see lots and lots of fun chocolatey cupcakes this week! If you want to join TWD this is your last chance since the group for Baking From My Home To Yours will be ending on Halloween! Don't miss out on the fun and get your book now!

Photobucket

Would You Like A Little Cupcake?
(Adapted from poem by Mary Howitt titled Walk Into My Parlor)

"Would you like a little cupcake?"said the spider to the little boy;
"Tis the prettiest little cupcake - it could be better than a toy."
"This cupcake has your favorite cookie in the frosting piped so high,
and inside you will even find a curious, chocolatey surprise."
"Oh no!" said the little boy," to ask me is in vain;
For when you were not looking with the cupcake I already ran away."
Happy Halloween!

Sunday, September 21, 2008

Kindergarten Cupcakes

Photobucket

So, I have been trying to be very proactive about volunteering at Aidan's school. It is a charter school that is "service learning" oriented so all families are required to volunteer at least 30 hours through the school year. School is only one month in and I am already almost half way there, so it isn't going to be a problem getting our time.

One of the things I did to volunteer was to help with the food at the fall fundraiser "fiesta." Basically, my help entailed helping make some Carne Asada for tacos (more on that soon - promise) and helping make quesadillas at the function (which were insanely popular - we couldn't slow down all night!).

The mini cupcakes you see here were from going in to Aidan's kindergarten class last week to talk about "Community Helpers" - in this case, being a baker. Now, technically, I have done very little along these lines so far and am just getting started (a couple of cakes so far). Anyway, they needed someone to take the time and I had 5 minutes to talk to the kids so it was a win-win situation. I decided, as a mom of one of the crazy, wound-up 5 year olds in the class, that since we were going to let the kiddos have cupcakes as a treat that day that I wanted them to be better (aka, slightly healthier and less of a sugar rush) than regular cupcakes.

I think these little darlings did a great job. They were actually really great without the frosting and warm from the oven as mini-muffins too. We will definitely be making these again since Aidan and I couldn't get enough of them! The cupcakes themselves are patterned after the ones I made a while ago and the frosting was inspired by Peabody's amazing looking cupcakes.

So, here I give you my very first cupcakes for Aidan's kindergarten! I sent home copies of the recipe to all the parents in the hopes that since these are so easy to make they would take the time to start teaching (if they aren't already) their kids to bake.

All the kids in the class were super excited about the topic so I'm sure they would all love to do it! There was an awful lot of kids that thought making pancakes was the epitome of baking though (which actually made me feel good that it sounds like I'm not the only mom who ends up feeding their family pancakes a few times a week). Anyway, you really should give these a try - as I said, they don't need the frosting, but well, why not?

Since these aren't your average, everyday, buttercreamed cupcakes I am sending these over to Fanny at Foodbeam for this month's Sugar High Friday. If cupcakes are dying, I think this rendition is a good step in the right direction! Don't believe me - just look below to see what Aidan thought of them!

Peanut Butter Banana Chocolate Chip Cupcakes

1/2 cup all-purpose flour
1/2 cup whole wheat flour
1 tablespoon wheat germ
1 1/2 teaspoons double-acting baking powder
1/2 cup firmly packed dark brown sugar
1/4 cup creamy peanut butter
3 tablespoons unsalted butter, softened
1 large ripe banana
1 large egg
1/2 teaspoon vanilla
1/2 cup milk
3/4 cups semisweet mini-chocolate chips (reduce amount to 1/2 cup if using regular chocolate chips)

In a bowl whisk together the flours, the baking powder and wheat germ. In another bowl with an electric mixer cream together the brown sugar, the peanut butter, and the butter. Add the banana and beat well, then add and beat in the egg and the vanilla.Beat in one-third of the flour mixture, then half of the milk, followed by half the remaining flour, then the remaining milk, ending with the remainder of the flour mixture. Mix each addition in gently and only until incorporated. Last, stir in the chocolate chips.Divide the batter among 12 paper-lined 1/2-cup muffin tins and bake the cupcakes in the middle of a preheated 350 F oven for 20 to 25 minutes, or until a tester comes out clean. Turn the cupcakes out onto a rack and let them cool completely.

Chocolate Ovaltine Whipped Cream Frosting

1 cup heavy whipping cream
1 cup powdered sugar
4 Tablespoons Ovaltine

In a large bowl, whip the cream until it forms soft peaks. Add sugar and Ovaltine. Beat until stiff. Frost cooled cupcakes with whipped cream frosting. Top with a Whopper (malted milk balls).


Photobucket

Thursday, August 28, 2008

Peanut Butter Chocolate Chip Cupcakes with Chocolate Icing

Photobucket

Have I mentioned lately how much I love chocolate? I don't think I have. I also don't know when the last time I mentioned that I love peanut butter was either. Aidan is also very specific when requesting treats - like in the case of these cupcakes. He actually is not a big fan of cupcakes and is much more of a cookie boy. However, when I described these to him and told him how fast and easy they would be to make, he decided they could be okay to try.

He likes to measure and pour (and especially sneak bits of chocolate) with me when we make his treat choice about once a week. The part that really cracks me up though is that he likes to pretend we have our own cooking show and repeats everything I saw in his "TV" voice for the audience. He is also the director at the same time. It is really quite hilarious and if I ever remember to catch him at it on video without him knowing I will share for a good laugh.


In the meantime, I leave you with these seriously yummy Peanut Butter Chocolate Chip Cupcakes with Chocolate Icing. They were Aidan's choice to make this last weekend after his first couple of days of kindergarten (which so far is going pretty well). They are best described as a peanut butter chocolate chip cookie - in cupcake form. They were really, really good even warm without the frosting - but with the whipped chocolate ganache icing on top - well, they become pretty fantastic and very addictive. The best part is the they are very easy and fast to make which makes them perfect for making with someone who has a short attention span. We love (almost) instant gratification.


They were perfect for a day out, and so here is a picture of me and my boys on Aidan's first day of kindergarten. We went for a really nice hike around a beautiful lake high up in the mountains after school (which I hope we can make a tradition).


Peanut Butter Chocolate Chip Cupcakes with Chocolate Icing
Recipe courtesy of Gourmet Magazine

1 cup all-purpose flour
1 1/2 teaspoons double-acting baking powder
1/2 cup firmly packed dark brown sugar
1/4 cup chunky peanut butter (I used creamy)
3 tablespoons unsalted butter, softened
1 large egg
1/2 teaspoon vanilla
1/2 cup milk
1 1/4 cups semisweet chocolate chips (I used bittersweet)
1/4 cup heavy cream

In a bowl whisk together the flour, the baking powder and a pinch of salt.

In another bowl with an electric mixer cream together the brown sugar, the peanut butter, and the butter and beat in the egg and the vanilla.

Beat in the flour mixture alternately with the milk, beating well after each addition, and stir in 1/2 cup of the chocolate chips.

Divide the batter among 12 paper-lined 1/2-cup muffin tins and bake the cupcakes in the middle of a preheated 350 F oven for 20 to 25 minutes, or until a tester comes out clean.

Turn the cupcakes out onto a rack and let them cool completely.

In another bowl combine the remaining 3/4 cup chocolate chips and the cream, scalded, let the chips soften, and whisk the mixture until it is smooth. Let the icing cool completely, whisk it until it is fluffy, and spread it on the cupcakes.


Photobucket

Wednesday, August 20, 2008

CH: Chocolate Chipotle Cupcakes with Cherry Cocoa Buttercream

Photobucket


At first this cupcake was going to be a chocolate cupcake with a chipotle cherry ganache center, and while that sounded good... it also seemed fussy to me. I wanted something simple, but still fun and different.

Then, I couldn't decide on whether I wanted a buttercream frosting or a ganache frosting. The only thing I did know exactly was how I was going to incorporate the jalapeno into my cupcakes.

First off, as I am sure most of you know, a smoked jalapeno pepper is called a chipotle pepper. That is what I immediately knew I was going to use here. A while back I made some really terrific chocolate cupcakes with peanut butter truffles in them. For the cake in that recipe it called for hot coffee, since coffee boosts the flavor of chocolate. Well, I don't drink coffee, and had used just hot water (which was fine), but I had long been thinking about what else (besides coffee) I could use to boost the chocolate flavor.

That is where the chipotle came in. I saw absolutely no reason not to puree some chipotles into the water, strain it so that none of the texture got in there and all of the sweet, smokey heat and flavor did.

So, that brings us to these Chocolate Chipotle Cupcakes. I used only one chipotle pepper because I wanted both the flavor and heat to just be subtle and complimentary, but if you wanted to go big you could add more. For the frosting, to help balance out any heat, I decided that a nice light and simple buttercream was the way to go. So, I used my favorite simple buttercream recipe and modified it to give that two toned swirly effect I love so much.

The final creation is my entry for this month's one and only original single ingredient focused cupcake event in the food blogosphere - CUPCAKE HERO HeroHeroHero this month hosted by Rachel of Tangerine Tart and Teri of the 90/10 rule. This month's secret ingredient, in any form, was the jalapeno, so in my case, yup, you got it, the chipotle. Big thanks to Laurie for creating this event and to Rachel and Teri for a fun ingredient!

Photobucket

So, for the brave, here is my recipe for Chocolate Chipotle Cupcakes with Cherry Cocoa Buttercream! Incidentally, these pretties actually ended up at a friend's wedding shower and everyone loved them - we just didn't mention the secret ingredient! ;)

Chocolate Chipotle Cupcakes
(Adapted from 1942 Devil's Food Cake, Perfect Cakes, by Nick Malgieri)

3 ounces unsweetened chocolate
1 1/3 cups all-purpose flour
3/4 teaspoon baking soda
1/2 teaspoon salt
6 Tablespoons unsalted butter, cut into 6 pieces
3/4 cup boiling water
1 whole chipotle pepper (from can with adobo sauce)
1 1/2 cups sugar
6 tablespoons buttermilk
2 large eggs

Preheat oven to 350 degrees.

Melt the chocolate in a large heatproof bowl set over hot, but not simmering, water. Let cool.

Stir together the flour, baking soda, and salt in a bowl, mixing well.

Puree together the boiling water and chipotle pepper until liquid, strain into a clean bowl and set aside. (Try not to breath in the fumes because it has quite a kick).

Add the butter to the chocolate, then pour in the boiling water/chipotle mixture and stir well to mix. Whisk in the sugar and buttermilk. Stir in the flour mixture. Whisk in the eggs.

Pour the batter into the cupcake liners about half full (it is a relatively thin batter).

Bake for about 25 minutes, or until well risen and firm to the touch and a toothpick inserted into the middle comes out clean. Remove from the oven and allow to cool completely before frosting.

(Makes about 24 cupcakes, depending on how full you fill them - I ended up with 22)

Cherry Cocoa Buttercream
3 cups confectioners' sugar
1 cup butter
1 teaspoon vanilla extract
1 to 2 tablespoons whipping cream

1/2 cup cherry preserves, pureed til smooth
1/4 cup good quality unsweetened cocoa powder

In a standing mixer fitted with a whisk, mix together sugar and butter. Mix on low speed until well blended and then increase speed to medium and beat for another 3 minutes.

Add vanilla and 1 Tablespoon of the cream and continue to beat on medium speed for 1 minute more. Add the cherry preserves and whip 1 minute more. Add more powdered sugar or cream to get desired consistency (should be fairly thick).

Place 2/3 of the mixed frosting into a pastry back fitted with the desired tip, keeping the frosting to one side of the bag and leaving a gap down to the tip for the cocoa frosting. To the remaining 1/3 of frosting add the cocoa powder and enough cream to again get the desired consistency. Add to the other side of the bag and pipe as much as desired onto the tops of each cupcake.

Photobucket

Blog Widget by LinkWithin