So sorry all! I have a master plan to get my Danish Braid and other pastries made, but this first month of being out of the house after our 8 month seclusion from Cole's premature birth has been CRAZY! In other words, I have had a hard time staying in the house. We have just been going and going!
I don't plan on missing out on making this recipe though, so watch for it in the next day or two.
Sorry for the delay! Make sure to check out what the other Daring Bakers made this month!
UPDATE: Sigh. Life sometimes really is crazy!! I am still going to make this braid - but you probably won't see it til later this week. So sorry!
Sunday, June 29, 2008
Daring Bakers... Danish Braid - Running Late
Posted by
PheMom
at
12:01 AM
4
comments
![]()
![]()
Wednesday, June 25, 2008
Cookie Carnival: Snickerdoodles
 my favorite. So, if you like your cookies more on the crisp than tender side, then this is a good recipe for you. I'll keep looking for one that is a bit softer and chewier. As I said, they really taste good - but the texture just isn't quite how I like them.
The snickerdoodles this month were the winning vote for the Cookie Carnival - that monthly celebration of cookie goodness created by darlin' Kate over at The Clean Plate Club. Thanks again Kate for another fun round!
Oh, and you'll also notice that I got a little bit silly and decided to just mix in some M&M's to half of the dough, just for fun. Easy to do and a yummy cookie besides!
(Source: Martha Stewart)
Ingredients
Makes 4 dozen
2 3/4 cups all-purpose flour
2 teaspoons cream of tartar
1 teaspoon baking soda
1/4 teaspoon salt
8 tablespoons (1 stick) unsalted butter
1/2 cup pure vegetable shortening
1 3/4 cups sugar, plus more if needed
2 tablespoons ground cinnamon, plus more if needed
2 large eggs
Directions
Preheat the oven to 400 degrees, with one rack in top third and one rack in bottom third of oven. Line baking sheets with Silpat baking mats or parchment paper; set aside.
Sift together flour, cream of tartar, baking soda, and salt; set aside. In the bowl of an electric mixer fitted with a paddle attachment, combine butter, shortening, and 1 1/2 cups sugar. Beat on medium speed until light and fluffy, about 2 minutes. Scrape down sides of bowl. Add eggs, and beat to combine. Add dry ingredients, and beat to combine.
In a small bowl, combine remaining 1/4 cup sugar and the ground cinnamon. Use a small (1 1/4-ounce) ice-cream scoop to form balls of the dough, and roll in cinnamon sugar. Place about 2 inches apart on the prepared baking sheets. Bake until the cookies are set in center and begin to crack (they will not brown), about 10 minutes, rotating the baking sheets after 5 minutes. Transfer the sheets to a wire rack to cool about 5 minutes before transferring the cookies to the rack. Store in an airtight container up to 1 week.
Posted by
PheMom
at
4:35 PM
12
comments
![]()
![]()
Labels: candy, cinnamon, cookies, food blogging event
Tuesday, June 24, 2008
TWD: Mixed Berry Cobbler... Goes Peach
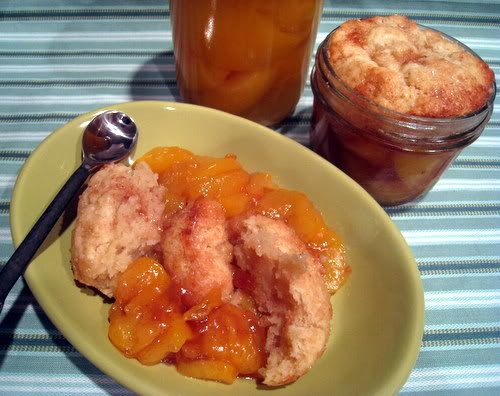
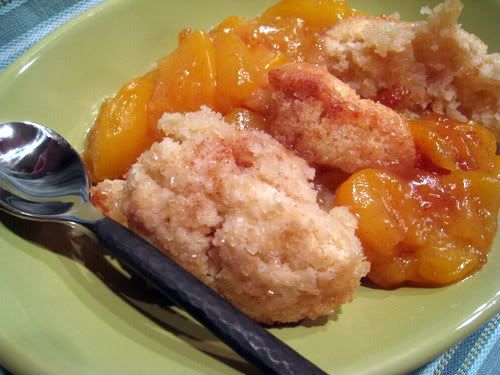
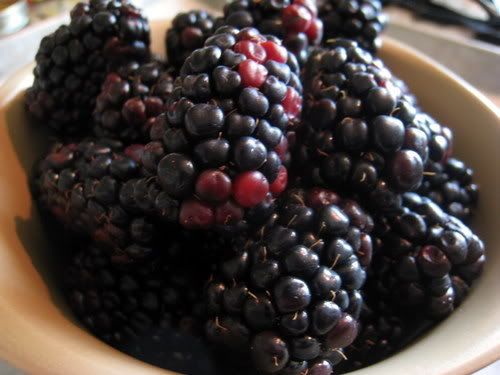
I have been planning on how I was going to make this cobbler all week. I really wanted to get my hands on some blackberries, blueberries and raspberries and try this recipe without fiddling for once, but, alas (yes, I just said "alas" - I'm a dork, what can you do?) I couldn't scrape together extra grocery money at any point to buy all those berries. You see, while berries are in season here for one small pint it is still $4 each so added altogether would be a killer. I didn't want to miss out this week though, and since I really prefer peach cobbler over any other baked or cooked fruit, well - today, you have peach cobbler from me.
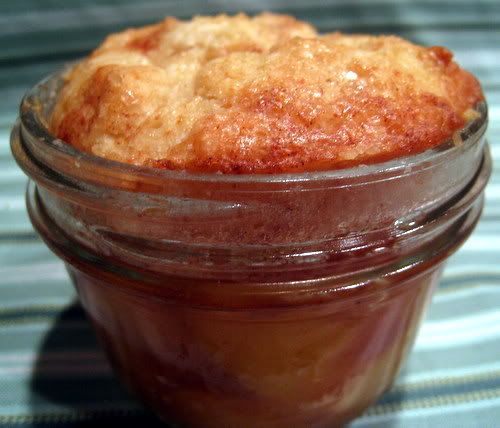
So, I used Dorie's biscuit top recipe, with the addition of a bit of extra sugar in the dough and some raw sugar on top (when is more sugar ever really bad after all?). I also decided to bake them in the emptied peach bottles because I really, really hate doing the dishes. I used the jar ring lids to cut out the top so they were the perfect size and I just cut a small vent circle out of the center.
Now, though we aren't posting Dorie's recipes anymore I usually try to search and see if the week's recipe can be found online already and - even more fun this week - this one is online - but even better it has a recorded interview with Dorie! How cool is that! Anyway, Dorie even mentions that you could make this with peaches in the interview so that made me feel a little better about being berry-less.
My thoughts on the great crust debate? I really liked the crust and thought it was absolutely delicious. If I was making it with a sweet berry filling I'm not sure if I would add more sugar or not (other than the raw sugar on top). The crust baked up very nicely and was a snap to make. The proof? I didn't get around to starting to make my cobbler until about 9 pm tonight and it was all done in just about an hour (start, make, bake, cool a bit and eat).
Don't forget to see how the rest of the TWDers did on this one - it should be interesting with the great debate that was going on this week!
So, here is my peach "filling" recipe, which is adapted from my favorite peach cobbler recipe. If you have fresh peaches, just adapt that recipe a bit to add whatever spice you like.
Peach Cobbler Filling
2 pints bottled peaches, drained and cut into small chunks (approximately equal to 6 peaches)
1/3 cup sugar
2 Tablespoons corn starch
1 to 2 teaspoons ground cinnamon (to taste)
pinch of kosher salt
1 teaspoon pure vanilla extract
Combine all the ingredients in a non-reactive bowl and stir gently. Put into buttered dish and top with the crust. (The mini's baked each at 375 degrees F for about 20 minutes - til golden).
Posted by
PheMom
at
12:01 AM
32
comments
![]()
![]()
Labels: cobbler, peaches, Tuesdays with Dorie
Monday, June 23, 2008
Blake Bakes
Posted by
PheMom
at
10:46 AM
0
comments
![]()
![]()
Labels: Blake Bakes
Saturday, June 21, 2008
Chocolate Chunk Muffins
When I first moved to Utah I worked in an office tower that was built onto one of the downtown shopping malls. Every morning when I would park, I would have to make my way through the mall to get to work. Even though I am not a great shopper (weird. I know.) it wasn't actually annoying in the mornings because it was early enough that there was no one there really. Most of the shops weren't open yet and the mall was basically empty. The only places open that early were some of the food places, which were open probably to swindle the money out of office drones just like me with their $4 double mocha lattes with a triple shot of espresso and a shot of english toffee syrup. Hmmmm.... I digress.
Anyway, I also had to walk past the Mrs. Fields shop which actually not only had cookies ready that early and tempting me, but they made the most heavenly chocolate chip muffins. Not chocolate muffins with chocolate chips (which I also love) but more like getting a chocolate chip cookie - but in the form of a muffin - and therefor totally eligible as legitimate breakfast fodder. Right? (OK, so it is probably still pushing it, but I was young and will therefore blame it on a better metabolism and just not knowing any better... right).
I still remember those muffins, but haven't ever found a recipe that fit the bill. It wouldn't be hard to create one I realize, but I just never seemed to get around to it. Anyway, that brings us up to speed with today.
I signed up for the latest round of Taste & Create, the fun "monthly" event created by Nicole at For the Love of Food where food bloggers are matched up with a partner and get to choose one recipe from their partner's blog to make and write about with a little review of the other's blog.
I have participated twice before and really enjoy this event and the whole idea behind it, so I'm glad to be able to participate again this time around.
My partner for the event this time was Ruth of Ruth's Kitchen Experiments. Ruth, lucky girl, lives over in Ireland and I have to admit, I am completely jealous! I have never been there, but I just know in my heart that Ireland and I would get along famously.
Ruth is a busy girl with a darling husband and cute dog who makes lots of great dinner and baking "experiments" (which yes, I realize you don't get a lot of here from me... and you aren't this time either, but I will try - I swear, we don't live on cookies alone - after all there are cupcakes and brownies too - muahahaha)! (Yes, I know, I am rambling and a bit all over the place here, but it is 2am while I write this and frankly, I'm hoping to just go for coherent at this point).
So, it would seem that Ruth's husband preferred having chocolate in his muffins instead of raspberry and though I love raspberry - when I read this recipe I immediately thought of those muffins from the mall and knew I had to go this route.
I modified the recipe a bit since Ruth had adapted the recipe to accomodate making a half batch. And, because you know me and I can't leave well enough alone, I also fiddled with the ingredients a bit.
I doubled the quantitites, but I also used regular sugar (accidentally because I didn't read well enough til it was too late and will use brown sugar next time), I added some vanilla extract and butter. I also opted to use the "muffin method" theory for the mixing and then I added some raw sugar on top to create a sugary crusty crunch (just like the muffins from the mall used to have... mmm mm gooood!)
The muffins worked out great and I will definately be making these again. Without further ado, or any more rambling, on to the recipe.
Chocolate Chunk Muffins
- Makes 12 muffins -
2 cups all-purpose flour
4 Tablespoons packed light brown sugar
1 Tablespoons baking powder
1 cup milk
1 large egg
1 teaspoon pure vanilla extract
4 Tablespoons butter, melted and cooled to room temperature
6 oz bittersweet (or semisweet) chocolate, choped into chunks
Raw sugar for sprinkling on top
Preheat oven to 375o F. Line a muffin pan with paper or foil liners, or grease with vegetable oil spray.
In a medium bowl, stir together the flour, sugar and baking powder.
In another medium bowl, whisk together the milk, egg and vanilla til well combined. Stir in the cooled, melted butter and combine well. Add the flour mixture into the bowl with the milk mixture and fold in til just combined and wet. Fold in the chocolate chunks and do not overmix.
Fill muffin cups 2/3 full and sprinkle with some raw sugar (probably only about 1/4 teaspoon each). Bake for 20-25 minutes in the preheated oven, until tops are golden brown and muffins spring back to the touch.
Posted by
PheMom
at
2:20 AM
8
comments
![]()
![]()
Labels: breakfast, Chocolate, food blogging event, muffins
Tuesday, June 17, 2008
Chocolate Bouchons and a Raspberry Chocolate Short
Stepanie's party this time? Mmmmm.... CHOCOLATE!! How do I love it - so many ways. This time, party style.
I made Thomas Keller's Chocolate Bouchons. PERFECTION. HEAVEN. Make them!! Need I say more? (OK, I will say that I didn't have the suggested chocolate and made them anyway - they were still awesome. So, don't let it deter you - just get the best semisweet chocolate you can get your hands on and go to town!)
The drink? Chocolate Short. Easy, lazy. Cold chocolate milk + scoop of really good ice cream (raspberry here, vanilla is fantastic, chocolate is great too). Not terribly creative, but it is my favorite chocolate drink (cold anyway). Yummm!!!
Gotta run!
Chocolate Bouchons Recipe
Recipe from Bouchon
Bouchon Bakery uses 2-ounce fleximolds and serves smaller bouchons. 3-ounce (2-inch to 2-1/2-inch diameter) timbale molds or silicon muffin molds can be used for larger cakes.
Recipe Makes 12 servings of the smaller bouchons or 16 brownies using muffin molds.
Ingredients:
Butter and flour for the timbale molds
3 1/2 ounces (3/4 cup) all purpose flour
1 cup unsweetened cocoa powder
1 teaspoon kosher salt
3 large eggs
1 1/2 cups plus 3 tablespoons granulated sugar
1/2 teaspoon pure vanilla extract
24 tablespoons (12 ounces - 3 sticks) unsalted butter, melted and slightly warm
6 ounces semisweet chocolate, such as Valrhona Equatoriale (55%) chopped into pieces the size of chocolate chips (size of chips is important for piping - I ended up using Lindt 70% and these were still insanely good)
Confectioners’ sugar
Preheat the oven to 350 degrees F. Butter and flour molds or muffin cups. Set aside.
Sift the flour, cocoa powder, and salt into a bowl; set aside.
In the bowl of a mixer fitted with the paddle attachment, or in another large bowl if using a handheld mixer, mix together the eggs and sugar on medium speed for about 3 minutes, or until very pale in color. Mix in the vanilla.
On low speed, add about 1/3 of the dry ingredients, then 1/3 of the butter, and continue alternating with the remaining flour and butter. Add the chocolate and mix to combine. (The batter can be refrigerated for up to a day.)
Put the timbale molds on a baking sheet if you are using those. Place the batter in a pastry bag without a tip, or with a large plain tip, and fill each mold about 2/3 full. Place in the oven and bake for 20 to 25 minutes (30 to 32 minutes for the muffin pans).
When the tops look shiny and set (like a brownie), test one cake with a wooden skewer or toothpick. It should come out clean but not dry (there may be some melted chocolate from the chopped chocolate).
Transfer the bouchons to a cooling rack. After a couple of minutes, invert the timbale molds and let the bouchons cool upside down in the molds; then lift off the molds. (The bouchons are best eaten the day they are baked.)
To serve: Invert the bouchons and dust them with confectioners’ sugar. Serve with ice cream if desired.
Posted by
PheMom
at
11:55 PM
6
comments
![]()
![]()
Labels: Chocolate, food blogging event
TWD: Cream Puff Ring

I decided to just go with what I had on hand - white chocolate and blackberries. The combination was beautiful and light. For the white chocolate I used the White Chocolate Whipped Cream recipe at the back of The Book. I decided to keep things light with just a bit of melted white chocolate on top as well.
Posted by
PheMom
at
12:01 AM
44
comments
![]()
![]()
Labels: blackberries, Tuesdays with Dorie, white chocolate
Sunday, June 15, 2008
Pepperjack Cornmeal Bread and Easy Chili
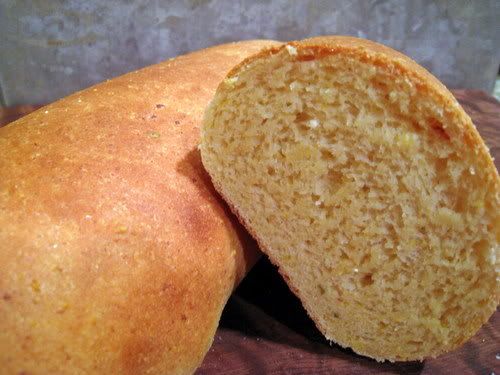
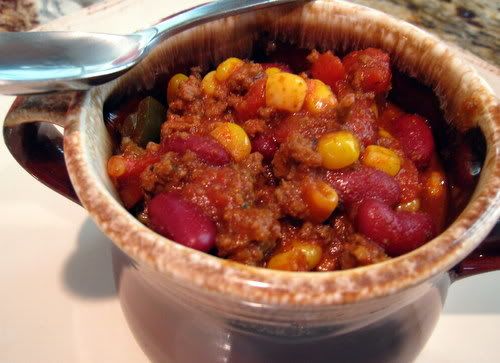
Fresh bread and chili will always remind me of my Dad. So I thought I would share these simple recipes with you today. This bread is easy to make, turns out beautifully and is completely delicious. It is also my favorite accompaniment to chili. While it has cornmeal in it and you can taste it and get some of that texture, it is also a yeast bread, so you really get the best of both worlds.
One of my favorite memories growing up was when I was at a week-long summer camp for church and my Dad was there with us. My Dad is a fan of the simple foods in life (he would say not all the gourmet "fancy" stuff). Anyway, he really excels at Dutch Oven style cooking and baking.
For one of our camp activities we were supposed to go on a 5-mile loop overnight hike. Not too big of a deal right? So, there are a few details about my childhood that should help give you a better picture of what I'm about to tell you.
First off, I grew up in Wyoming (as in home of Yellowstone and more animals than people). I love Wyoming, don't get me wrong, but I know a lot of folks who's camping experiences were more of the cabins and running water variety. That was unheard of for us. I guess we were more "hardcore" or something because we were thrilled that we at least had an outhouse and a river to play in.
Anyway, back to the hike. The lady who was supposed to lead our hike basically was asked to do so a couple of weeks before the camping trip and she didn't really have much time to plan and didn't really have a lot of experience either.
So, we got started on the hike and though we were headed in the correct "general" direction, we were pretty much off course from her "planned" hike from the get-go. Our overnight (being, leave in the late morning, hike through woods and over hills to a lake, camp the night, come back in the morning) turned into a 12-mile hike - 7 miles to the wrong lake (so no truck waiting with fresh water for us) and 5 miles back the next day, via a different route, as figured out on the maps by some of us campers. Needless to say, by the time we made it back we were thirsty, hot, exhausted and about to fall down (actually one girl did).
Well, when we finally made it back, we trudged into camp, now wet to boot since it had just started to rain on us about a half mile from the end. So we were all figuring we were going to have to go hungry and fall down in our tents. Instead, when we made it back to camp we found that my dad had been busy. There was fresh hot bread in the Dutch Ovens, butter, honey, and hot cocoa. He had also rigged tarps over all the tables and sitting areas so that we didn't have to spend the time in the stuffy tents. It has been many, many years since that day, but I remember that hot fresh bread and how comforting it was to be back in camp, safe and warm. I don't actually remember if we had anything to eat with that bread or not, but I will never forget how good that bread was! I think that the outdoors really sharpened our hunger, but it was great!
So, I'm dedicating this post to my dad. He is also the one who helped get me interested in cooking. Though our cooking styles are now very different, and he often thinks I am too careful or fussy, I know that he is proud of me. Thanks Dad! I love you!
Easy Chili
(Adapted from Best of Cooking Light)
3/4 pound ground beef or turkey
1 teaspoon canola oil
2 cups water
1 1/2 cups frozen whole-kernel corn
1 cup of your favorite salsa
2 Tablespoons chili powder
1 Tablespoon sugar
2 1/2 teaspoons ground cumin
1 1/2 teaspoons dried oregano
1/4 teaspoon salt
1 (16-ounce) can dark red kidney beans, drained and rinsed
1 (16-ounce) can chili beans, undrained
1 (14.5-ounce) can no-salt-added diced tomatoes, undrained
Cook the ground beef or turkey in a large Dutch oven or pot that has been oiled with the canola oil. Cook over medium heat until beef or turkey is browned and cooked through, stirring occasionally.
Stir in the water and remaining ingredients; bring the mixture to a boil. Reduce heat; simmer over low heat 25 minutes, stirring occasionally.
- Makes approximately 6 servings (about 1 cup each) -
Pepperjack Cornmeal Bread
(Adapted from Cooking Club of America - Celebrate!)
3/4 cup lukewarm water (105 - 110 F)
2 Tablespoons sugar
1 (1/4 oz) package dry yeast
2 Tablespoons vegetable oil
1 large egg
3 cups bread flour
1 cup shredded pepperjack (jalapeno jack) cheese
1/4 cup yellow cornmeal
2 teaspoons salt
In a medium bowl, stir together water, sugar and yeast. Let sit 5 minutes. Stir in oil and egg.
In a large bowl, stir together 2 1/2 cups of the flour, cheese, cornmeal and salt. Stir in yeast mixture until forms a soft dough.
Sprinkle remaining 1/2 cup flour on work surface; turn dough out onto the surface and knead about 10 minutes or until smooth and elastic, working in the flour on the counter only as necessary to prevent sticking.
Place the dough ball in a clean, lightly oiled bowl and cover with a piece of plastic wrap. Let rise about 1 to 1 1/2 hours or until doubled in bulk. Punch down the dough and turn out onto a lightly floured surface.
Lightly oil (or use parchment or silicone mat) a baking sheet and dust with enough extra cornmeal to cover. Pat the dough into a 8x14-inch rectangle. Roll up tightly starting at the long side of the dough. Pinch the bottom and sides to seal. Place on baking sheet and let rise about 45 minutes or until doubled in bulk.
Heat oven to 400 degrees F. Bake the loaf 20 to 25 minutes or until loaf is well browned and the bottom sounds hollow when tapped. Cool on a wire rack.
- Makes 1 loaf -
Posted by
PheMom
at
12:01 AM
8
comments
![]()
![]()
Friday, June 13, 2008
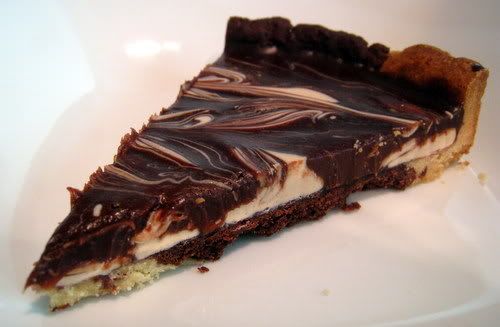
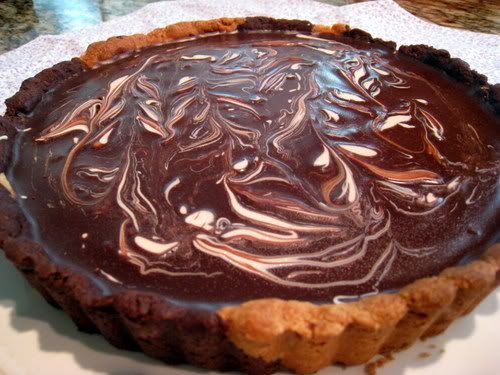
Chocolate Peanut Butter Tart
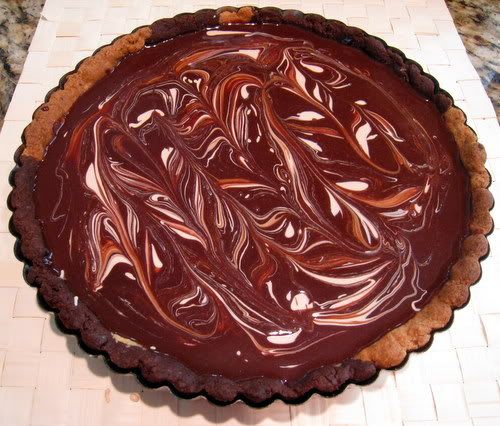
A while back I made some Chocolate Peanut Butter Truffle Cupcakes for Sugar High Friday, and ever since I made those I've craved them too. The thing about these cupcakes is that, while the cake is fabulous and the ganache frosting was perfect - it is the peanut butter truffle that I keep dreaming about. It was just a simple concoction of melted white chocolate and peanut butter, but it was so good I knew that its time had arrived once again.
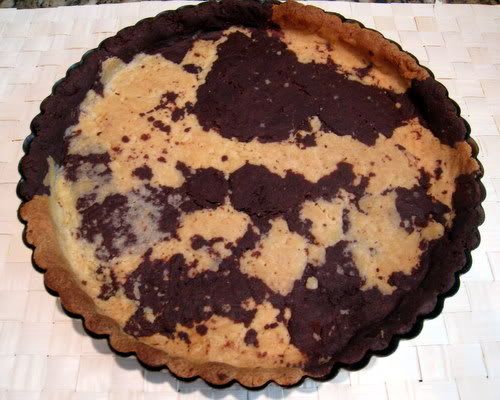
So, my friends, that is how we have arrived at this Chocolate Peanut Butter Tart (yes, with the problematic "dalmatian" crust - just shut your eyes and don't peek while you eat if this is too dizzying - you know who you are LOL ; )
(Portions adapted from Baking: From My Home to Yours)
For the Sweet Tart Dough:
3/4 cups all-purpose flour
1/4 cup confectioners’ sugar
1/8 teaspoon salt
5 tablespoons) very cold (or frozen) unsalted butter, cut into small pieces
1/2 of one large egg yolk, beaten (you will use the other half in the other crust)
Put the flour, confectioners’ sugar and salt in a food processor and pulse a couple of times to combine. Scatter the pieces of butter over the dry ingredients and pulse until the butter is coarsely cut in – you should have some pieces the size of oatmeal flakes and some the size of peas.
Stir the yolk, just to break it up, and add it a little at a time til you've added about half the yolk, pulsing after each addition. When the egg is in, process in long pulses – about 10 seconds each – until the dough , which will look granular soon after the egg is added, forms clumps and curds. Just before you reach this stage, the sound of the machine working the dough will change – heads up. Turn the dough out onto a work surface and, very lightly and sparingly, knead the dough just to incorporate any dry ingredients that might have escaped mixing. Wrap in a small piece of plastic and set aside while you prepare the chocolate dough.
For the Chocolate Dough:
1/2 cup + 1 Tablespoon all-purpose flour
1/8 cup unsweetened cocoa powder
1/8 cup confectioners' sugar
1/8 teaspoon salt
5 Tablespoons unsalted butter, very cold or frozen, cut into small pieces
1/2 of one large egg yolk, beaten (remainder from the other dough)
Put the flour, cocoa, confectioners’ sugar and salt in a food processor and pulse a couple of times to combine. Scatter the pieces of butter over the dry ingredients and pulse until the butter is coarsely cut in – you should have some pieces the size of oatmeal flakes and some the size of peas.
Stir the yolk, just to break it up, and add it a little at a time til you've added about half the yolk, pulsing after each addition. When the egg is in, process in long pulses – about 10 seconds each – until the dough , which will look granular soon after the egg is added, forms clumps and curds. Just before you reach this stage, the sound of the machine working the dough will change – heads up. Turn the dough out onto a work surface and, very lightly and sparingly, knead the dough just to incorporate any dry ingredients that might have escaped mixing.
TO PRESS THE DOUGH INTO THE PAN:
Butter a 9-inch fluted tart pan with a removable bottom. Press the doughs evenly over the bottom and up the sides of the pan in whatever random pattern you choose, using all but one little piece of each dough, which you should save in the refrigerator to patch any cracks after the crust is baked. Don’t be too heavy-handed – press the crust in so that the edges of the pieces cling to one another, but not so hard that the crust loses its crumbly texture. Freeze the crust for at least 30 minutes, preferably longer, before baking.
TO FULLY BAKE THE CRUST:
Center a rack in the oven and preheat the oven to 375 degrees F. Butter the shiny side of a piece of aluminum foil and fit the foil, buttered side down, tightly against the crust. (Since you froze the crust, you can bake it without weights.) Put the tart pan on a baking sheet and bake the crust for 25 minutes. Carefully remove the foil. If the crust has puffed, press it down gently with the back of a spoon. Bake for another 8 minutes or so, or until it is firm and golden brown – just make sure to keep a close eye on the crust’s progress – it can go from golden to way too dark in a flash.) Transfer the tart pan to a rack and cool the crust to room temperature before filling.
TO PATCH, IF NECESSARY:
If there are any cracks in the baked crust, patch them with some of the reserved raw dough as soon as you remove the foil. Slice off a thin piece of the dough, place it over the crack, moisten the edges and very gently smooth the edges into the baked crust. Bake for another 2 minutes or so, just to take the rawness off the patch.
Chocolate Peanut Butter Ganache Filling
For the Filling:
4 ounces bittersweet chocolate, finely chopped
1/2 cup plus 1 tablespoon heavy cream
2 tablespoons unsalted butter, cut into 2 pieces, at room temperature
1/3 cup creamy peanut butter
Bring the cream to a boil, then pour half of it over the chocolate and let it sit for 30 seconds.
Working with the whisk or spatula, very gently stir the chocolate and cream together in small circles, starting at the center of the bowl and working your way out in concentric circles. Pour in the remainder of the cream and blend it into the chocolate, using the same circular motion. When the ganache is smooth and shiny, stir in the butter piece by piece. Don’t stir the ganache any more than you must to blend the ingredients – the less you work it, the darker, smoother and shinier it will be. Set aside to cool a bit while you prepare the peanut butter truffle mixture.
In a heat-proof bowl, over a pan of simmering water, place the white chocolate and peanut butter, stir together until just melted and smooth. It will be much thicker than the dark chocolate ganache.
Pour the dark chocolate ganache into the crust and, holding the pan with both hands, gently turn the pan from side to side to even the ganache. Allow to cool and rest on the counter for 2 minutes before adding the peanut butter mixture.
Using a small spoon, gently drop small dollops of the peanut butter truffle mixture in dots all over the ganache layer. Use a thin knife to gently cut through the dollops to create a marbled and swirled effect. Do not stir too much or you will just stir it into the dark chocolate which is more liquid.
Refrigerate the tart for 30 minutes to set the ganache, then remove the tart from the fridge and keep it at room temperature until serving time. (Note – don’t cut right into it because the ganache won’t be set yet - let it set up for a couple of hours).
Makes 8 servings.
Posted by
PheMom
at
9:00 PM
17
comments
![]()
![]()
Labels: Chocolate, peanut butter, Tarts, Tuesdays with Dorie
Thursday, June 12, 2008
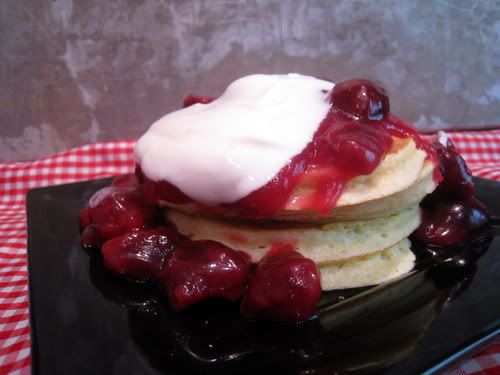
Ricotta Pancakes with Brown Sugar Cherry Sauce
One tip I can share with you is that this "lightly whipped cream" of mine, is actually my lazy version of whipping cream. You see, I hate dirtying up an extra bowl, just to whip some cream just for me - especially when *sigh* I still don't have a hand mixer (just whisk and stand mixer - weird, I know). I also don't have one of those cool whipping gadgets (and as much of a gadget junkie as I am, just can't justify it...anyway, I digress - I was just so distracted by the pretty red color of the gadget - which actually brings us back to the pretty red cherries!).
So, what's a girl to do? Here you go, it's not terribly earth shattering, but you never know right?
Cream Topping - Shaken, Not Whipped
1/3 cup heavy whipping cream
1 Tablespoon confectioners' sugar (or a bit less, depending on how sweet you like the cream to be)
1/4 teaspoon extract (I used almond here, but I usually use vanilla)
Combine all three ingredients in an empty, clean jelly jar or Mason jar. Put on the lid and shake vigorously until thick. (It only takes about a minute - incidentally, if you keep shaking, eventually you'll have butter - as a random aside, this is how Pioneers made their butter when they were walking across the Country to Utah. It is a fun thing to do with kids some time and the butter is great and creamy. Just omit the sugar and flavoring and shake the cream. You could add a small pinch of salt if you wish.)
Ricotta Pancakes with Brown Sugar Cherry Sauce
(Source: Bon Appetit June 2008 via Epicurious)
Sauce:
1/2 cup (or more) water, divided
2 teaspoons cornstarch
1 tablespoon unsalted butter
2 cups halved pitted fresh Bing cherries or other dark sweet cherries (about 14 ounces unpitted cherries)
2 tablespoons (packed) golden brown sugar
1 tablespoon fresh lemon juice
Pancakes:
3/4 cup unbleached all purpose flour
2 tablespoons sugar
1/2 teaspoon baking powder
1/4 teaspoon salt
1 1/3 cups whole-milk ricotta cheese
4 large egg yolks
1/2 cup whole milk
3 large egg whites
Vegetable oil (for brushing)
For sauce:
Whisk 1/4 cup water and cornstarch in small bowl. Melt butter in medium nonstick skillet over medium heat. Add cherries, 1/4 cup water, and brown sugar; stir until sugar dissolves. Increase heat to medium-high; add cornstarch mixture and stir until mixture boils and thickens, adding water by tablespoonfuls if sauce is very thick, about 1 minute. Remove from heat; stir in lemon juice.
For pancakes:
Whisk flour, sugar, baking powder, and salt in small bowl. Using electric mixer, beat ricotta cheese and egg yolks in large bowl at medium-high speed until light and fluffy, about 1 minute. Reduce mixer speed to low; add flour mixture alternately with milk in 2 additions each, beating just until blended and scraping down sides of bowl as needed.
Using electric mixer fitted with clean beaters, beat egg whites in medium bowl until stiff but not dry. Fold 1/4 of whites into ricotta mixture to lighten, then fold in remaining whites in 3 more additions.
Heat griddle or large nonstick skillet over medium heat; brush griddle lightly with oil. Drop batter by generous 1/4 cupfuls onto griddle; spread each pancake with offset spatula to form 3 1/2-inch round. Cook until bubbles form on tops of pancakes and bottoms are golden, about 3 minutes. Turn pancakes over and cook until golden brown on bottoms, about 2 minutes.
Transfer pancakes to plates. Top with cherry sauce and cream, if desired, and serve.
Tuesday, June 10, 2008
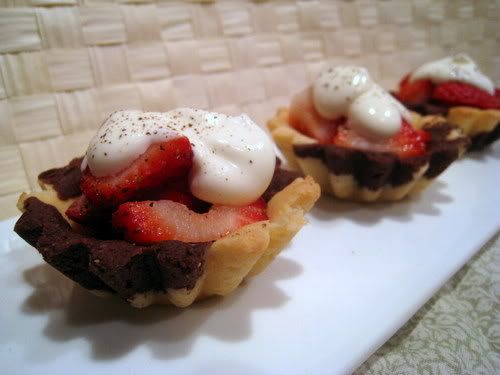
TWD: La Palette's Strawberry Tart

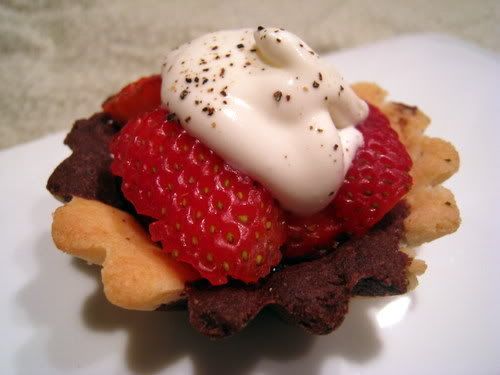
I recently read a post by Peabody that I was just reminded of while preparing to write about this week's Tuesdays with Dorie recipe because she was talking about the little angel and the little devil on her shoulder. I find myself in a somewhat similar predicament with this week's recipe - La Palette's Strawberry Tart, chosen by Marie of A Year From Oak Cottage. Otherwise known as my new favorite way to eat strawberries!
You see, not too long ago I made the Tarte Noir from Baking From My Home To Yours for my first post over at Blake Makes as a Blake Baker (which, incidentally launched yesterday with a fabulous tutorial on making bread by TWD's very own darlin' Lemon Tartlet Leigh) and had already made Dorie's Sweet Tart Crust. Herein lay my dilemma. All I could think about, all week long was the combination of that crust with chocolate. I couldn't get it out of my head.
So, back to the angels and devils. The angel was telling me "Don't mess with a good thing. It is supposed to be simple and rustic. Just relax and let this recipe be what it is." But, then that little devil kept piping in and saying "Oh, it's just a little change - besides, isn't everything better with chocolate."
Since this dough is basically crumbly chunks pressed into the pan it was easy to just randomly press alternating flavors in to create these dual flavored crusts. Which, incidentally, with this creation, I have discovered an emerging pattern of dessert flavor "indecisiveness" happening here - I mean, seriously, between the Dark and White Chocolate Marshmallows, the Black and White Cookies, all the way back to the Dark and White Chocolate with Raspberry Coconut Tarts.
I guess it is some kind of baking disorder I have - can't decide between my flavors - ah, why choose, just have both! As long as the results keep being so good, I don't think I'll be seeking any counseling for it just yet.
Other Tuesdays with Dorie:
Posted by
PheMom
at
1:23 AM
42
comments
![]()
![]()
Labels: Chocolate, strawberries, Tarts, Tuesdays with Dorie
Sunday, June 8, 2008
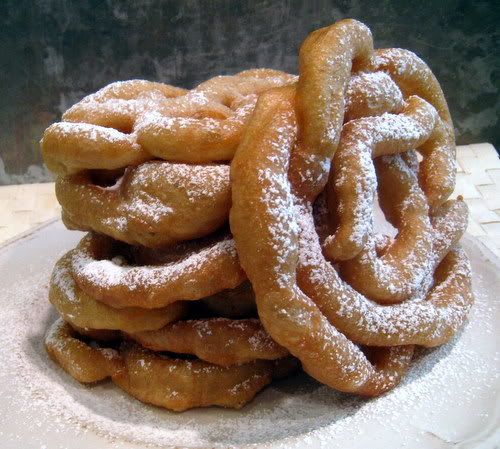
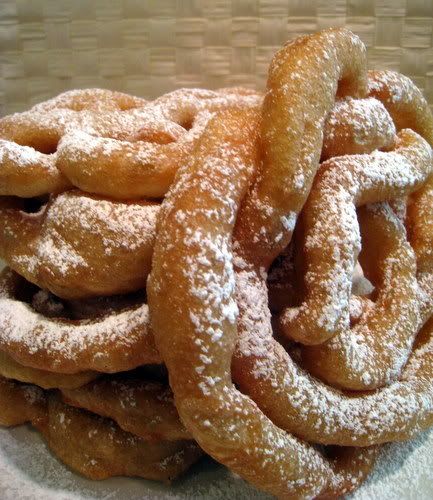
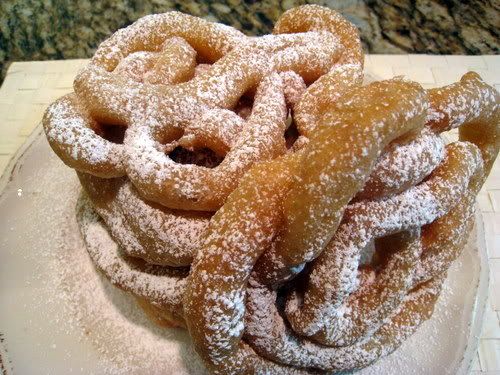
Hay Hay It's Funnel Cake!
1 cup (8 fl oz) water (240 ml)
100 grs (3 ½ oz) unsalted butter
¾ cup (112 ½ grs / 4 oz) plain all-purpose flour
5 eggs
1 teaspoon vanilla
Place the water and butter in a saucepan over high heat and bring to the boil. In a small bowl whisk together the flour, sugar, cinnamon and ginger. Add flour mixture and beat with a wooden spoon until smooth. Cook, stirring over low heat until the mixture leaves the side of the pan. Remove from the heat.
Once all eggs have been added and mixture is smooth, put dough in a piping bag fitted with a number 12 tip. Heat about 1 1/2 inches of oil in a heavy pan. Pipe dough into oil, making a free-form lattice pattern; cook until browned, flipping once. Remove cake from oil, drain on paper towels, and top with powdered sugar. Continue until all of the batter is used.
Posted by
PheMom
at
8:00 PM
25
comments
![]()
![]()
Thursday, June 5, 2008
Gruyere Cheese Stuffed Bread
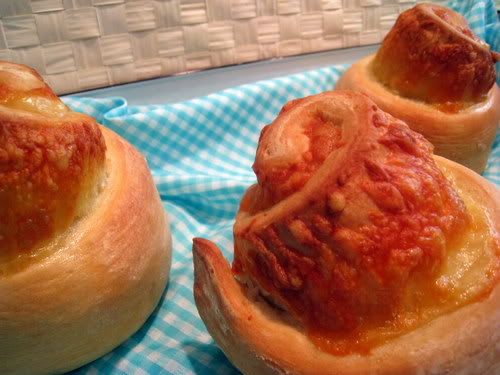
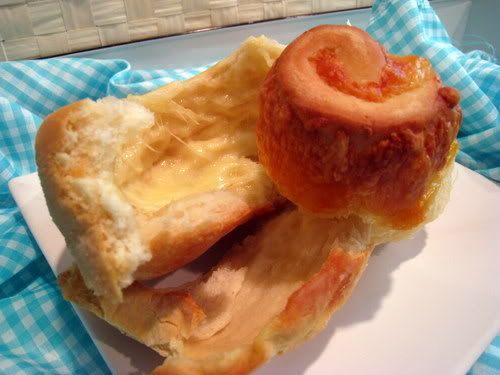
Before I made this bread I had a whole lot of wonderful ideas in mind to write about how much I love visiting Farmers' Markets and how great they are. The problem is that now every time I think about this bread everything else just fades away into oblivion while my eyes and mind start to glaze over and I completely lose my train of thought. It is just that good. Ridiculously good.
So, this post is going to be abnormally short for me with just a lot of pictures. The bread, hot out of the oven is stellar, but even cold it is just so ridiculously good that I will now openly admit that I ate all of this for lunch, without even anything to go with it, and literally decided to hoard it all for myself. I did offer some to Aidan, but he was too focused on trying to get candy from me that he declined. Oh, so sad... more for me!! Now, before you think I am a complete glutton, I did only make half the recipe shown below, and I savored the bread over the span of a few hours - but, I could eat this everyday and be a very happy girl.
Park across the street from Gardners' Market - so beautiful!
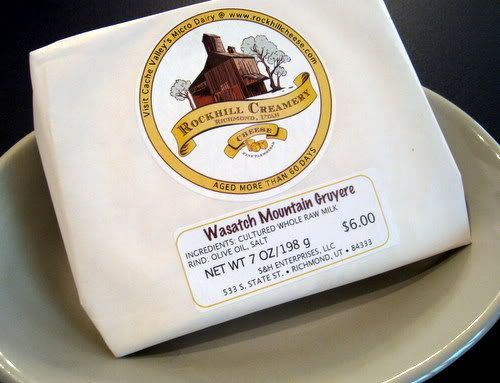
I do think that the quality of the cheese you use makes a difference, and I was very excited that I did get to go to the Gardners' Market while visiting my parents and that I got to get some Rock Hill Creamery gruyere cheese. They are a small, artisan type operation and they even have a blog, with the too cute name Holy Cows. If you are in the Continental U.S. you can even buy their cheese online. It was so worth it.
Now, if you'll excuse me, I need to go get groceries and buy more cheeses to try this bread with.
Gruyère-Stuffed Crusty Loaves
Adapted from the King Arthur Flour website
Step-by-step photos illustrating how to make this bread are available at Bakers’ Banter, the King Arthur blog.
Starter:
1 1/4 cups (5 1/4 ounces) unbleached bread flour (I used all-purpose flour)
1 teaspoon salt
1/2 teaspoon instant yeast
1/2 cup (4 ounces) cool water
To make the starter:
Mix the 1 1/4 cups flour, salt, yeast, and 1/2 cup water in a medium-sized bowl. Mix till well combined. Cover and let rest overnight at room temperature.
Dough:
All of the starter
1 cup + 2 tablespoons (9 ounces) to 1 1/4 cups (10 ounces) lukewarm water*
1 teaspoon salt
3 1/2 cups (14 3/4 ounces) unbleached bread flour (I used all-purpose flour)
1/2 teaspoon instant yeast
* Use the greater amount of water in winter, when conditions are dry; and the lesser amount in summer, when the weather is humid.
Filling:
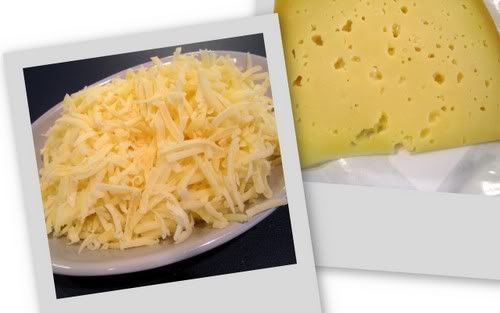
2 1/2 cups (10 ounces) grated Gruyère cheese, or the grated/shredded cheese of your choice
To make the dough:
Combine the risen starter with the water, salt, flour, and yeast. Knead—by hand, mixer, or bread machine set on the dough cycle—to make a smooth dough. Place it in a lightly greased bowl, cover, and let it rise for 1 1/2 to 2 hours, till it’s nearly doubled in bulk.
Gently deflate the dough, and pat and stretch it into a ¾"-thick rectangle, about 9" x 12". Spritz with water, and sprinkle with the grated cheese. Starting with a long side, roll it into a log, pinching the seam to seal. Place the log, seam-side down, on a lightly floured or lightly oiled surface. Cover it and let it rise for 1 to 1 1/2 hours, till it’s puffy though not doubled in bulk.
Towards the end of the rising time, preheat the oven to 425°F. Gently cut the log into four crosswise slices, for mini-breads; or simply cut the dough in half, for two normal-sized loaves.
Place them on one (for two loaves) or two (for four mini-loaves) lightly greased or parchment-lined baking sheets, cut side up. Spread them open a bit, if necessary, to more fully expose the cheese. Spritz with warm water, and immediately place them in the preheated oven. Bake for 20 minutes (for the mini-loaves), or 35 minutes (for the full-sized loaves), or until the cheese is melted and the loaves are a very deep golden brown. Remove them from the oven, and cool on a rack.
Yield:
four mini-loaves or two standard-size loaves.
©2007 The King Arthur Flour Company, Inc. All Rights Reserved.
Posted by
PheMom
at
12:01 AM
23
comments
![]()
![]()
Labels: bread, cheese, Farmers' Market
Tuesday, June 3, 2008
TWD: French Chocolate Brownies
Lovely as they sound - and taste - these brownies are also now known as "the brownies that hate me" and I'm forced to write the following:
Dear French Chocolate Brownies,
What did I do to you? Was it the fact that from the onset I adamantly refused to give rum raisins a chance? I know that you are quite likely more than happy not being fiddled with, and that my constant adjustments are probably quite annoying, but, my apologies to the Raisin Council, I don't like raisins. Ever. At all.
Yes, yes, I understand I could have substituted something else. I don't enjoy dried fruit in my baked goods and if I am going to make a recipe and commit ingredients, I want to want to eat them.
I know that you were probably quite disappointed with the loss of the opportunity to get all rummy and fired up. I'm sad to miss that opportunity as well, but it just couldn't be helped.
Though your end results were very delicious, the stigma of trying to make you and running into
personal failures two times in a row is for me a bit too difficult at this time to continue our relationship. I am sad to say, that until I get up the courage, I will not be coming back to you.
It's not you. It's me.
Sincerely,
Holly
You see, the first time I made these brownies, I wanted to make them in individual muffin cups and save them for picnics and lunches and such. Great idea, right? Well, not with this recipe. As reported by many others, this recipe puffed. A lot. That was fine, but the center ended up being a good inch or two lower than the sides. They were still delicious though, but the texture just wasn't my favorite for a brownie. They were good in their own right, just not what I hoped for.
The second time around I decided to try again to see if I got a different result by making the batch in one square pan, as originally written, minus the raisins. Again, the batter was nice and thick and tasted wonderful. Again, they puffed up nicely, but then they got really high on the sides and really sunk in the middle.
So, why don't you see any pictures of attempt number two. Well, I intended to take a picture, but everyone ate (and loved) them while I was off feeding the baby. I will say that the fact that these were still devoured quite quickly is definitely a testament to the deliciousness of the recipe itself. Especially since the brownies had been wrapped in a towel for transport and subsequently stepped on by Aidan. He may only be four years old, but he has big feet - so, he pretty much flattened and destroyed the entire pan - which again, since they were covered, everyone still ate even though I told them what happened.
Great brownies then? Yes. Do I have some severe malfunction or curse when trying to make this recipe? Apparently so. I am not leaving this recipe due to its lack of goodness - just because I'm afraid if I make it again I will burn down the kitchen or something. Maybe, one day, when I'm not so nervous about it, I'll give it another go. I realize that there is really nothing to be afraid of in this recipe but, for some reason, I just can't seem to get it right. Make sure to check out how all the other TWDer's faired with this recipe!
So, I drowned my sorrows in this Cherry Gelato recipe from the new issue of Gourmet instead. I needed a confidence boost after my brownie fiascos. This was supposed to be all cute and pretty with brownies cut from the second pan, but, well, you already know what happened to those. This gelato was easy to make and tasted extremely awesome. Use really good almond extract because the flavor really does shine through under the cherry flavor. Enjoy!
- makes 16 brownies -
Adapted from Baking From My Home to Yours
Ingredients
1/2 cup all-purpose flour
1/8 teaspoon salt
1/8 teaspoon cinnamon (optional)
1/3 cup raisins, dark or golden
1 1/2 tablespoons water
1 1/2 tablespoons dark rum
6 ounces bittersweet chocolate, finely chopped
1 1/2 sticks (12 tablespoons; 6 ounces) unsalted butter, at room temperature and cut into 12 pieces
3 large eggs, at room temperature
1 cup sugar
Getting ready:
Center a rack in the oven and preheat the oven to 300°F. Line an 8-inch square baking pan with foil, butter the foil, place the pan on a baking sheet, and set aside.
Whisk together the flour, salt and cinnamon, if you're using it.Put the raisins in a small saucepan with the water, bring to a boil over medium heat and cook until the water almost evaporates. Add the rum, let it warm for about 30 seconds, turn off the heat, stand back and ignite the rum. Allow the flames to die down, and set the raisins aside until needed.
Put the chocolate in a heatproof bowl and set the bowl over a saucepan of simmering water. Slowly and gently melt the chocolate, stirring occasionally. Remove the bowl from the saucepan and add the butter, stirring so that it melts. It's important that the chocolate and butter not get very hot. However, if the butter is not melting, you can put the bowl back over the still-hot water for a minute. If you've got a couple of little bits of unmelted butter, leave them—it's better to have a few bits than to overheat the whole. Set the chocolate aside for the moment.
Working with a stand mixer with the whisk attachment, or with a hand mixer in a large bowl, beat the eggs and sugar until they are thick and pale, about 2 minutes. Lower the mixer speed and pour in the chocolate-butter, mixing only until it is incorporated—you'll have a thick, creamy batter. Add the dry ingredients and mix at low speed for about 30 seconds—the dry ingredients won't be completely incorporated and that's fine. Finish folding in the dry ingredients by hand with a rubber spatula, then fold in the raisins along with any liquid remaining in the pan.
Scrape the batter into the pan and bake 50 to 60 minutes, or until the top is dry and crackled and a knife inserted into the center of the cake comes out clean. Transfer the pan to a rack and allow the brownies to cool to warm or room temperature.
Carefully lift the brownies out of the pan, using the foil edges as handles, and transfer to a cutting board. With a long-bladed knife, cut the brownies into 16 squares, each roughly 2 inches on a side, taking care not to cut through the foil.
Serving:
The brownies are good just warm or at room temperature; they're even fine cold. I like these with a little something on top or alongside—good go-alongs are whipped crème fraiche or whipped cream, ice cream or chocolate sauce or even all three!
Storing:
Wrapped well, these can be kept at room temperature for up to 3 days or frozen for up to 2 months.
Cherry Gelato
(Adapted from Gourmet Magazine, June 2008)
For gelato:
1/2 vanilla bean, halved lengthwise
3 1/2 cups whole milk
1/2 cup turbinado sugar such as Sugar in the Raw
2 Tbsp cornstarch
For cherries:
1/2 lb bing cherries (1 1/2 cups; do not substitute frozen), pitted
2 Tbsp turbinado sugar
1 tsp pure almond extract
1 tsp pure vanilla extract
Equipment:
an ice cream maker
Preparation
Make gelato:
Scrape seeds from vanilla bean with tip of a paring knife into a small heavy saucepan. Add milk and a pinch of salt and bring just to a boil, then remove from heat.
Meanwhile, whisk together sugar and cornstarch, then add 1/2 cup hot milk, whisking until smooth. Whisk into milk in saucepan. Bring to a simmer, whisking, then simmer, whisking, 3 minutes (mixture will be thick). Immediately pour through a fine-mesh sieve into a metal bowl set in an ice bath. Cool to room temperature, stirring occasionally, about 10 minutes.
Remove from ice bath and chill, covered, 1 hour.
Prepare cherries:
Pulse cherries, sugar, and extracts in a food processor until finely chopped, then chill, covered, 1 hour.
Make ice cream:
Stir cherries with their juices into gelato mixture and freeze in ice cream maker. Transfer to an airtight container and put in freezer to harden, at least 2 hours.
Pecan Honey Sticky Buns
Madeleines
Florida Pie
Peanut Butter Torte (& Bars) (Winner - Our Secret Ingredient)
Fluted Polenta & Ricotta Cake
Bill's Big Carrot Cake
Marshmallows - Dark & White Chocolate (Winner - Our Secret Ingredient)
Chocolate Gooey Cakes
Pecan Sour Cream Biscuits
Posted by
PheMom
at
12:01 AM
51
comments
![]()
![]()
Labels: cherries, Chocolate, Tuesdays with Dorie


